Approximate time: 4+ hours |
  Level: Beginner
Improving the Lighting in your worlds⚓︎
Welcome to the World Lighting tutorial!
The goal here is to improve the lighting in your worlds and make them more visually appealing. In addition to that, we will also show you how to make them more performant from a lighting point of view to meet the framerate requirements for virtual reality.
We will also be showing performance measurements in our tutorial, for context these were taken on a Ryzen 7 5800x with an RTX 3080.
There are no Prerequisites or Files required for this tutorial.
Preface⚓︎
Assessing our world⚓︎
The first thing we have to do before messing with any lighting is to assess our world and determine what kind of lighting it will need.
For lighting in general we have roughly the following styles to choose from.
- Realtime Lighting: Where scene lighting is calculated for every frame that is rendered. This is best for dynamic worlds that are always changing, but this is also the most expensive render.
- Baked Lighting: Where lighting is precalculated into textures beforehand. This is best for static worlds that don't change, and is also the cheapest to render.
- Mixed Lighting: Is a combination of both Realtime and Baked lighting. Useful for getting the best of both worlds.
The reason this is important, is that different worlds will need different styles of lighting depending on how interactive they are. Very interactive worlds will need a different lighting style than ones are mostly static with little interaction. Each of these lighting styles have their own advantages and drawbacks, so it's important to go with one that best suits our world and will lead to the best performance.
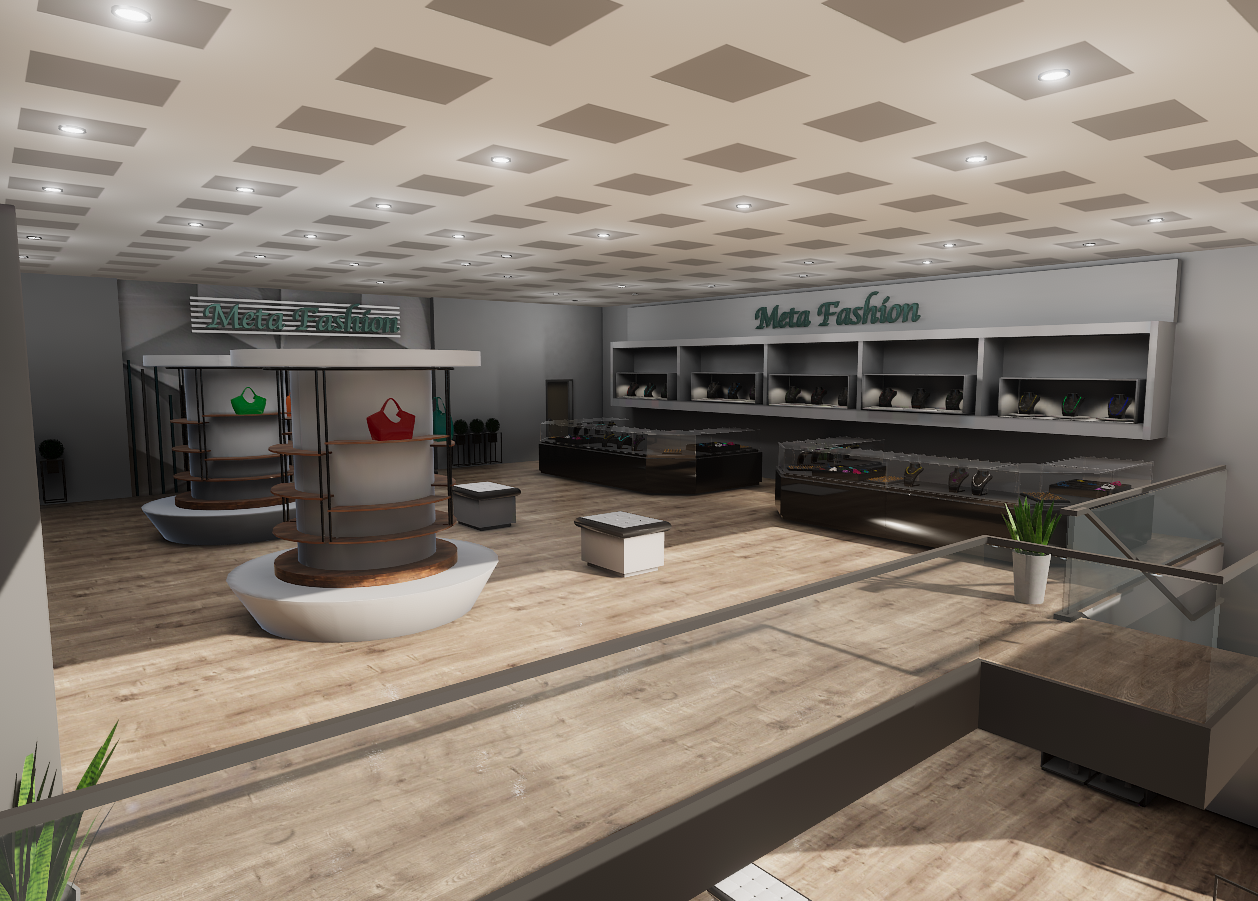
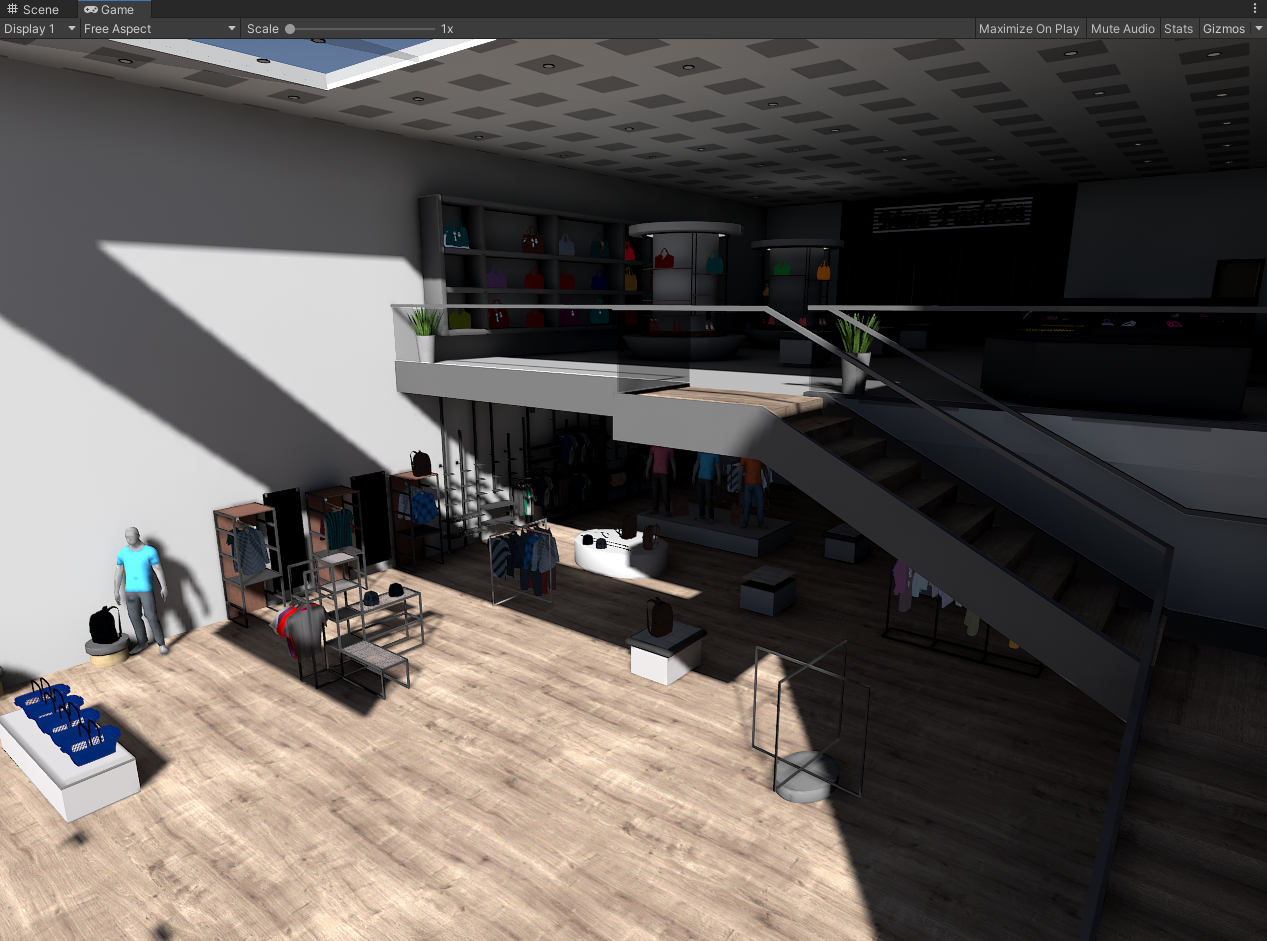
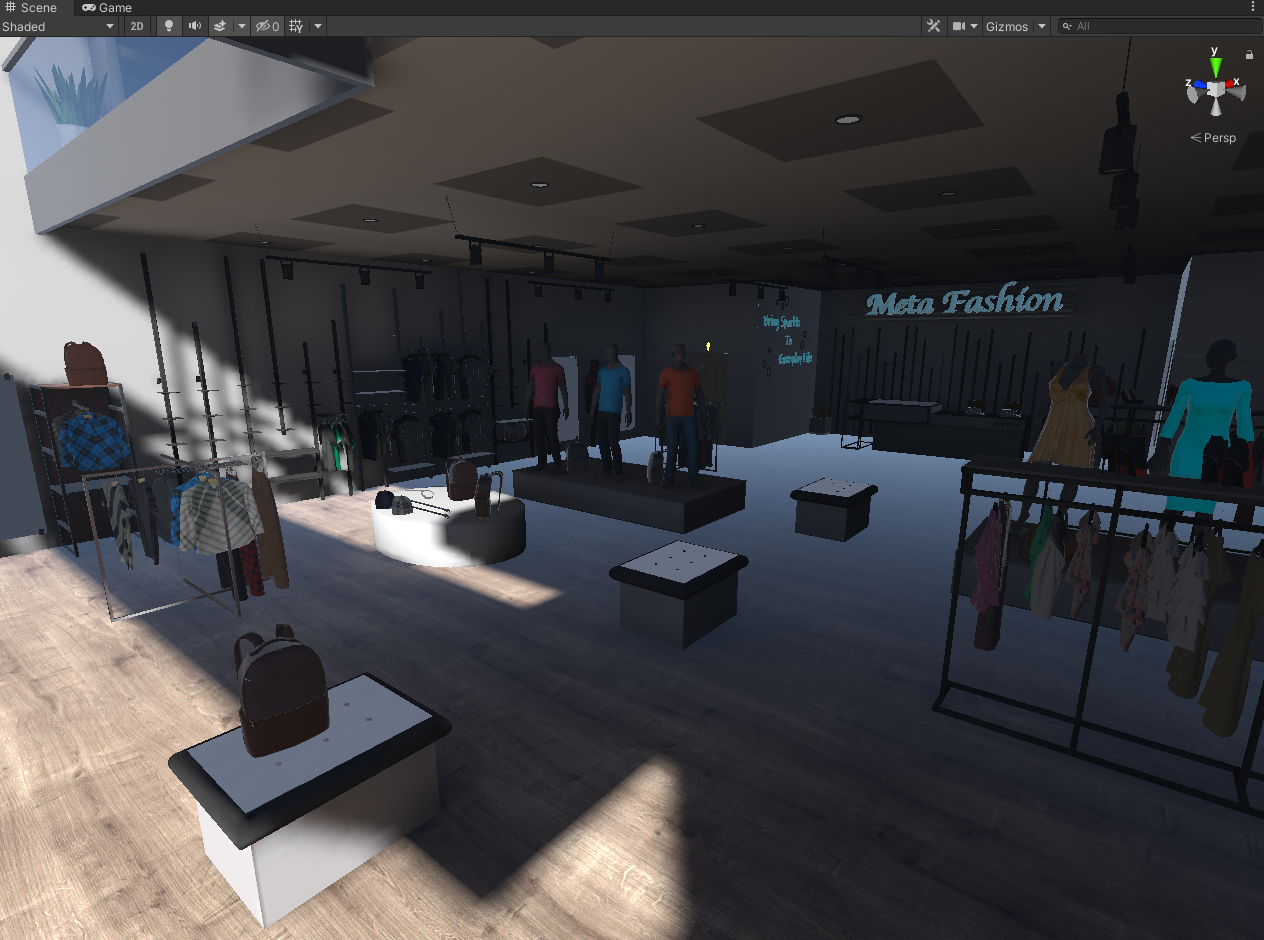
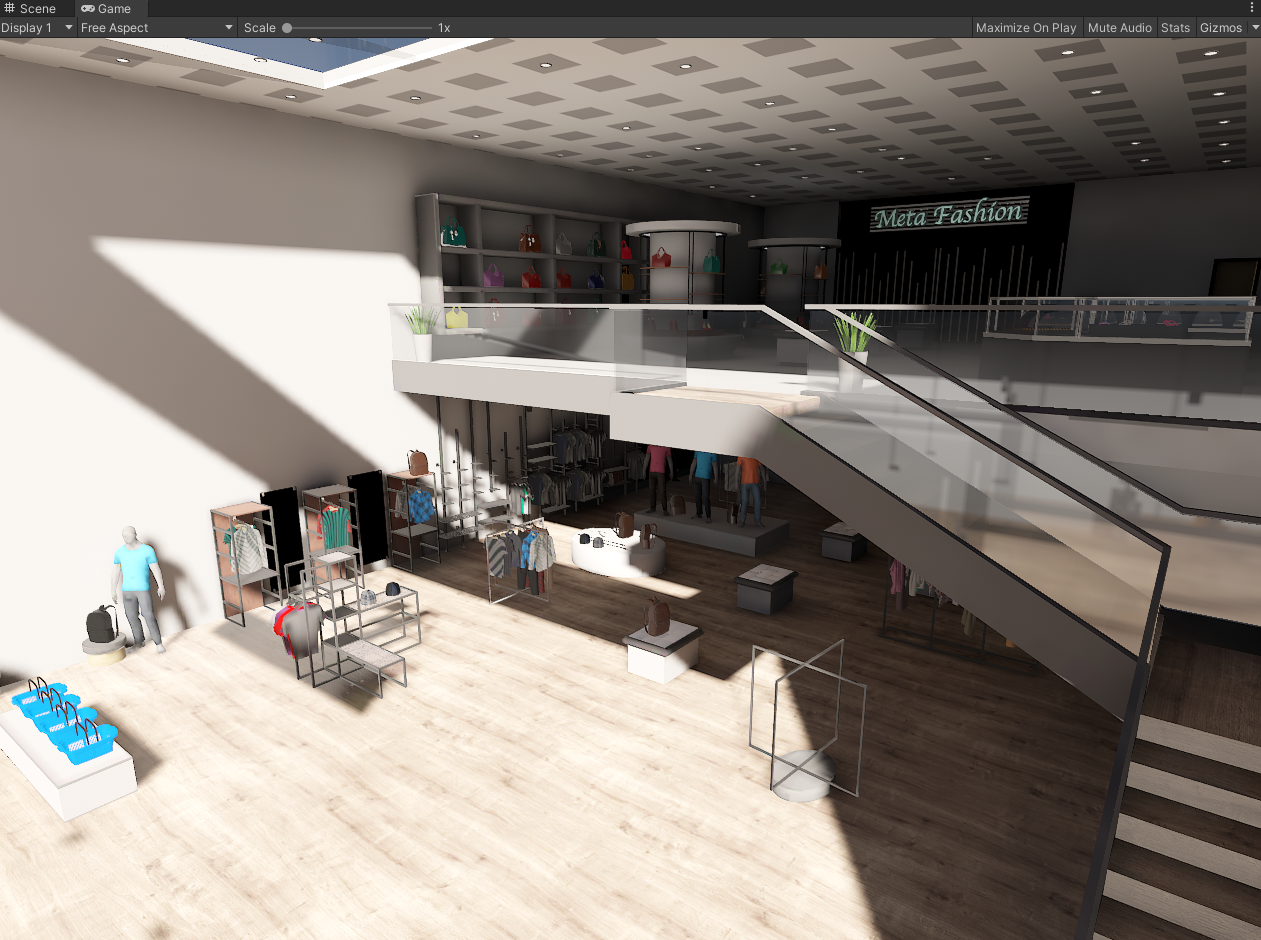
In our instance, we have a shopping world where you go around the shop picking up some items that the player can get. Beyond that there won't be alot of other interactions. There also won't be any day or night cycles, so the lighting of the world will stay consistent the entire time.
With that said, that means that our enviorment will be primarly static. So the style of lighting that we will choose for this world based on our prior description will be Baked Lighting (Where lighting is baked to textures as the enviorment and it's lighting will not change).
So with the lighting style in mind, we will also look around our world to figure out how we can light it artistically.
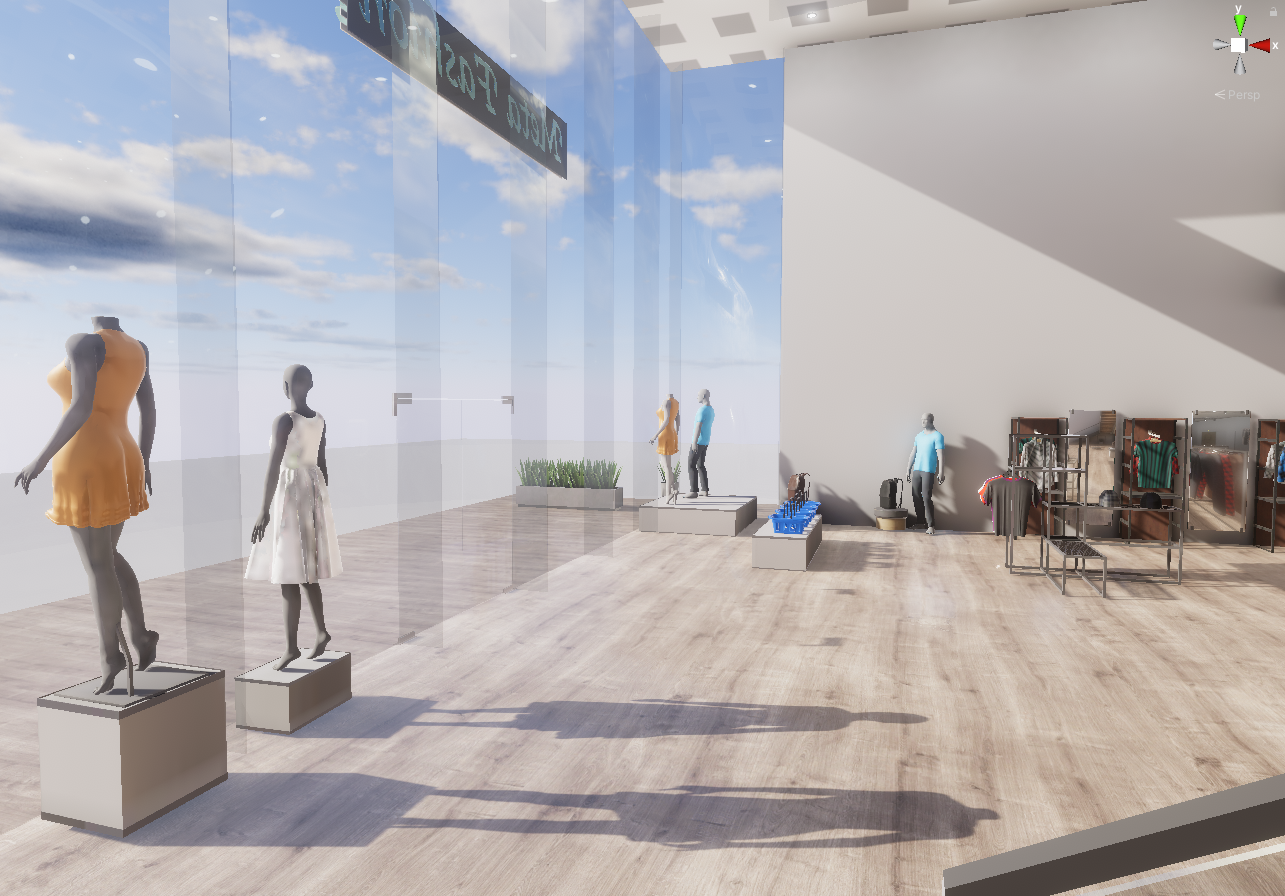
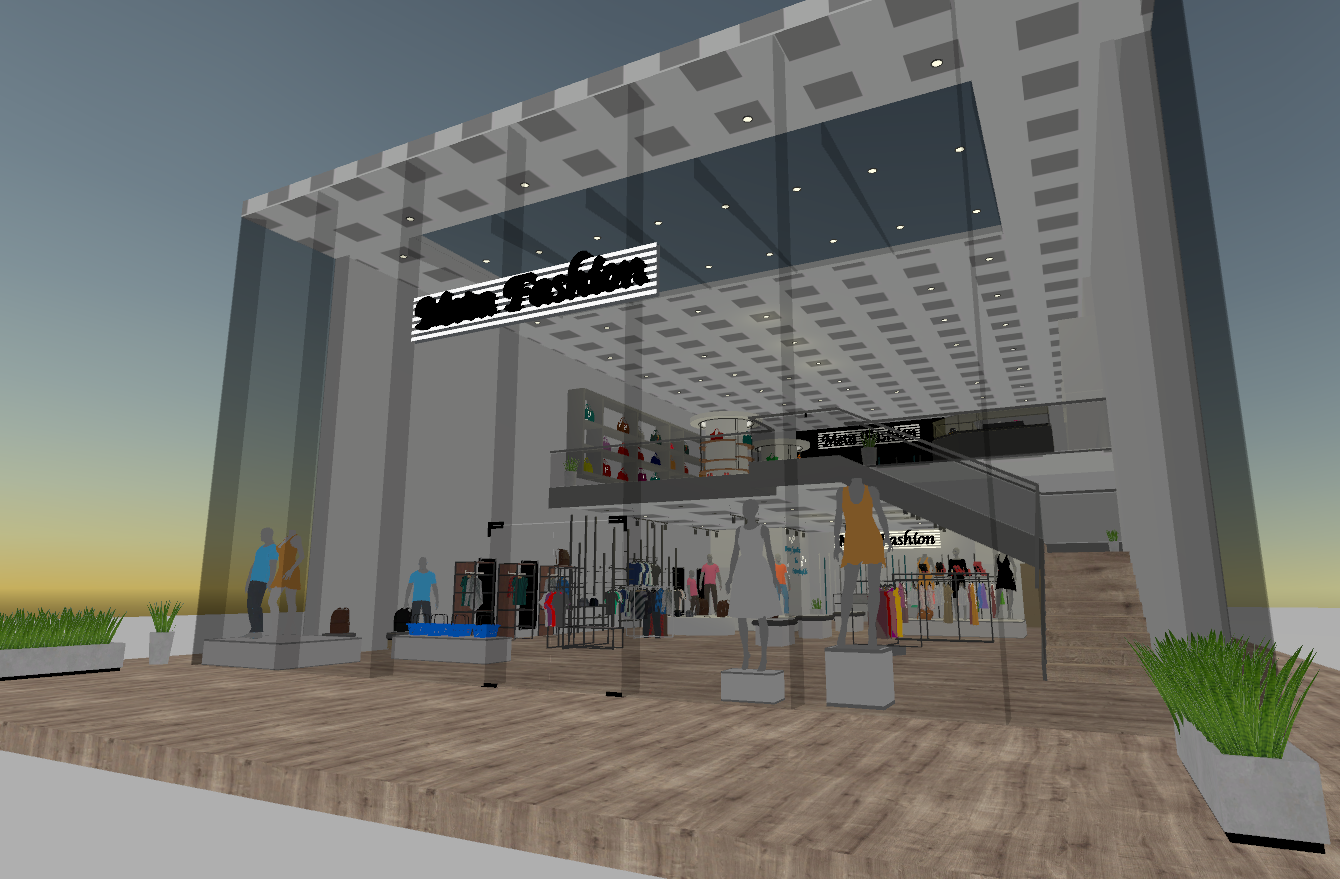
We'll take into consideration the way we have our shop is modeled, where there are large windows in the front of the store that can let in a lot of natural light from the outside. We can use that to our advantage to light the store in broad daylight.
To summarize, these are the main points for our world to keep in mind...
- Completely Static Environment.
- A few small interactable items.
- Large open windows for natural lighting.
Now before we can move on, we will first go over some lighting limitations we may run into before we begin to light the world.
Lighting Limitations⚓︎
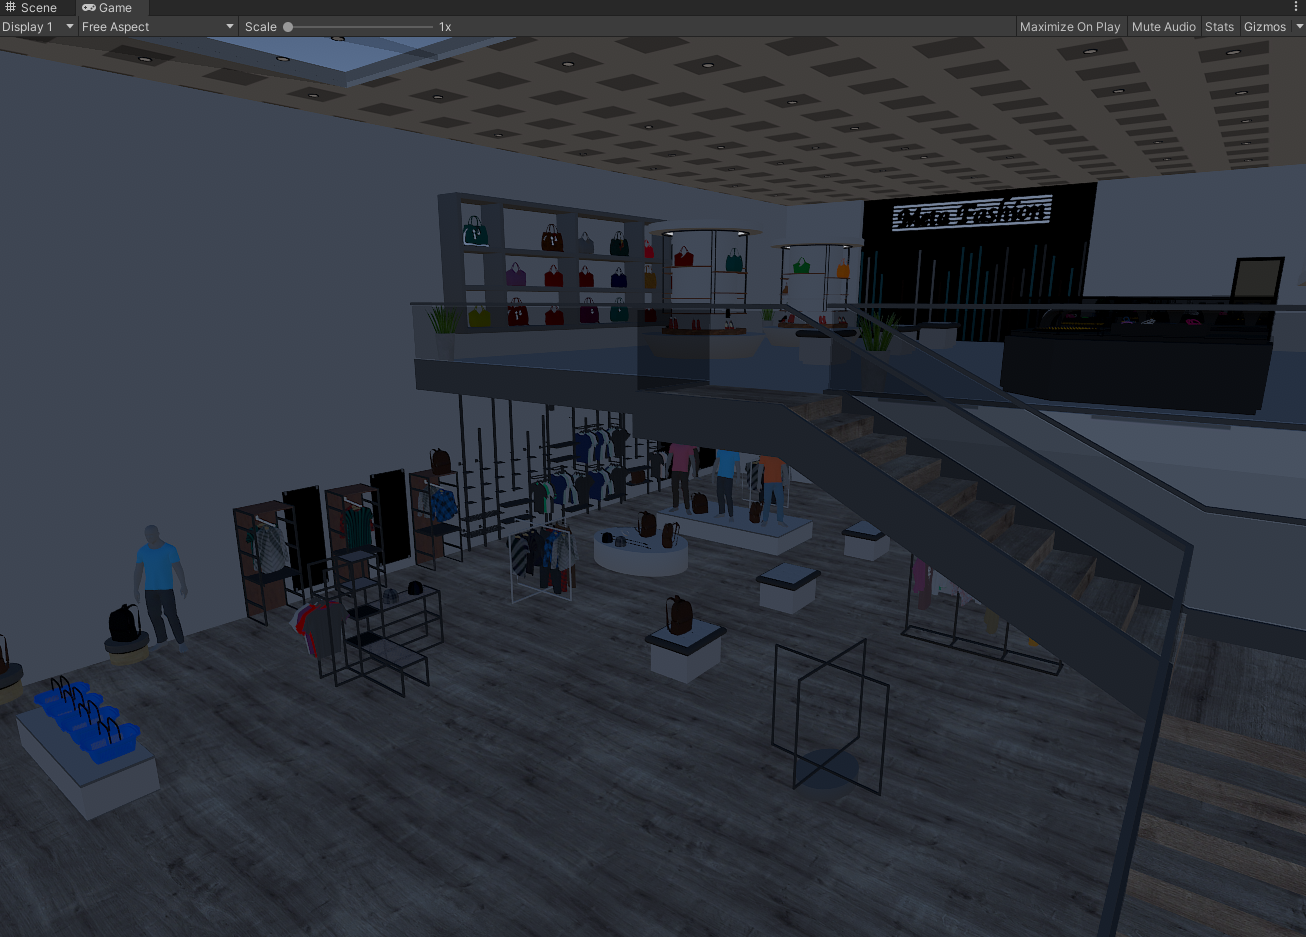
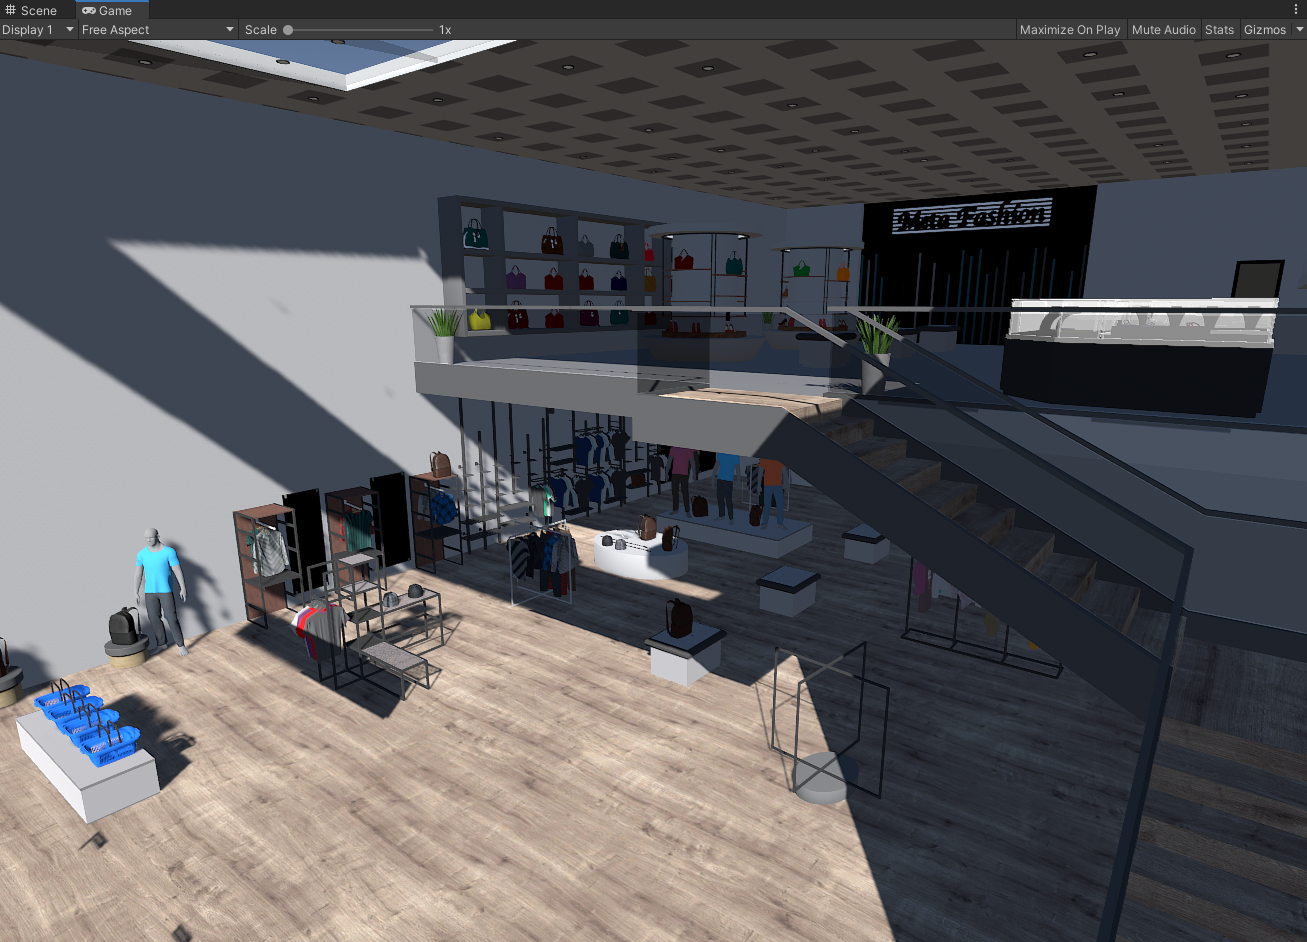
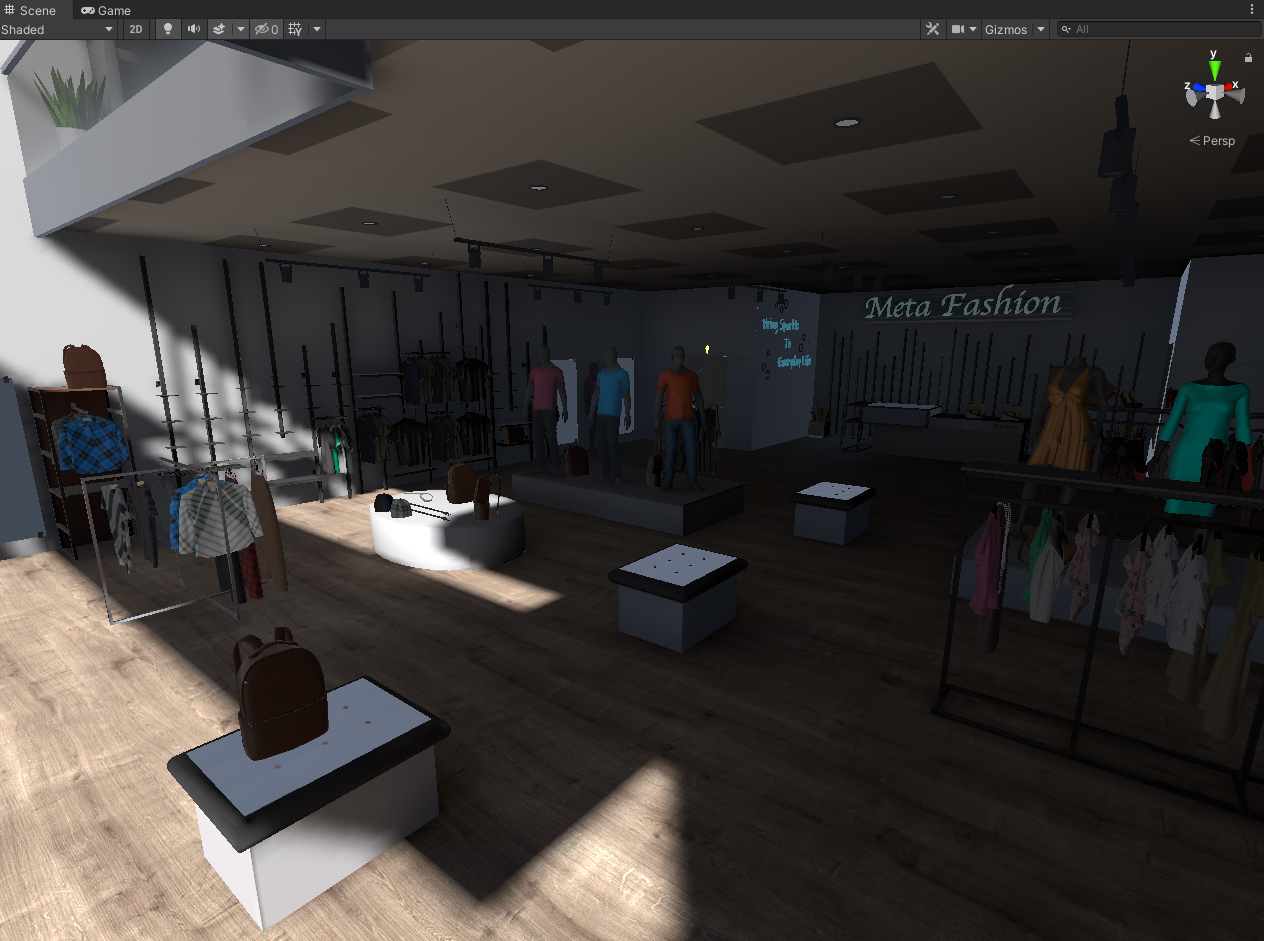
Now our world currently has existing lighting. However, there are a lot of issues with it...
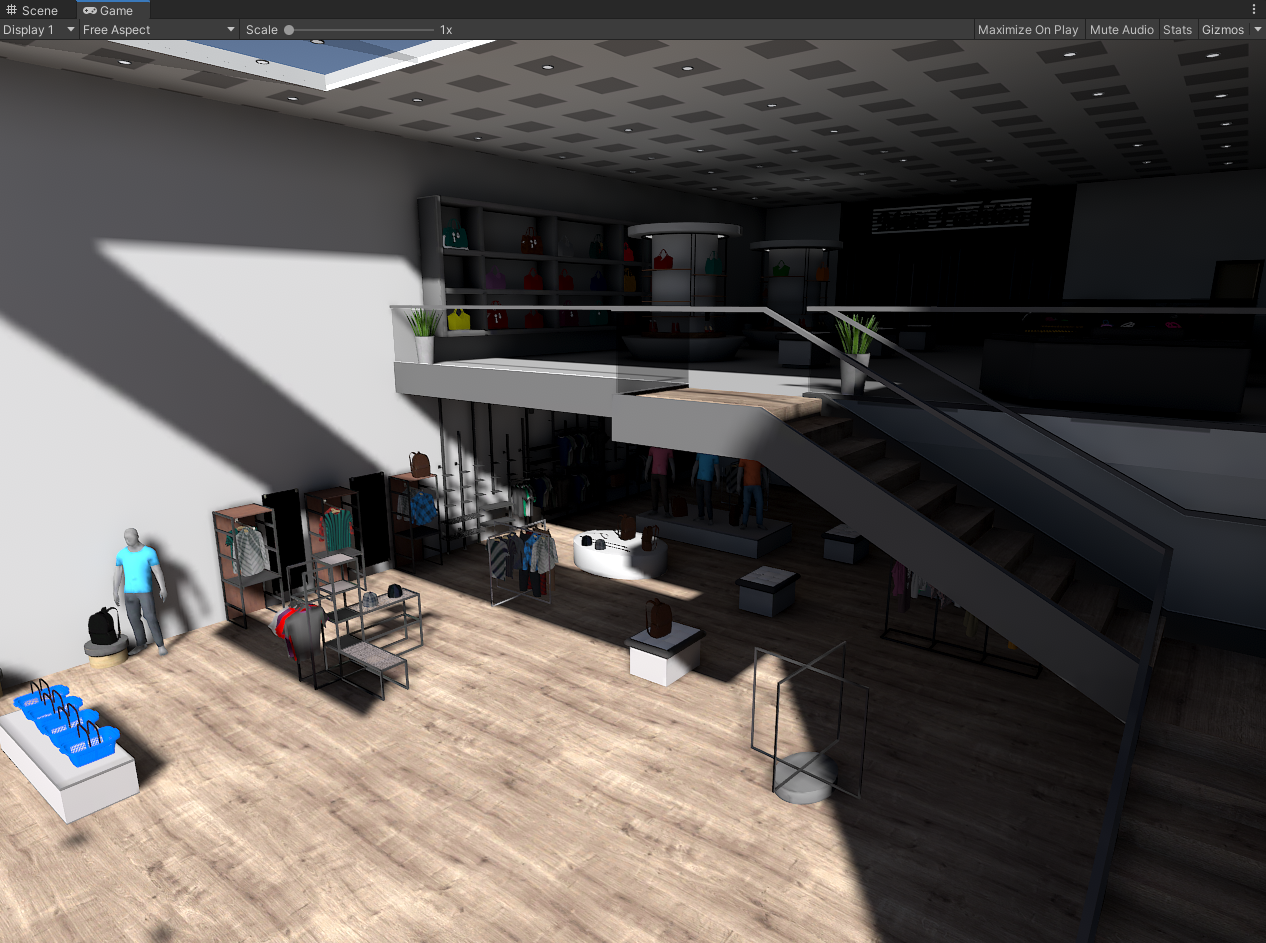
Currently, there are over several shadow casting point lights in the scene. These lights are all in real-time, and in-action is causing a lot of performance slowdown. Since it's also real-time, it means the lights are recalculated for every frame that is rendered.
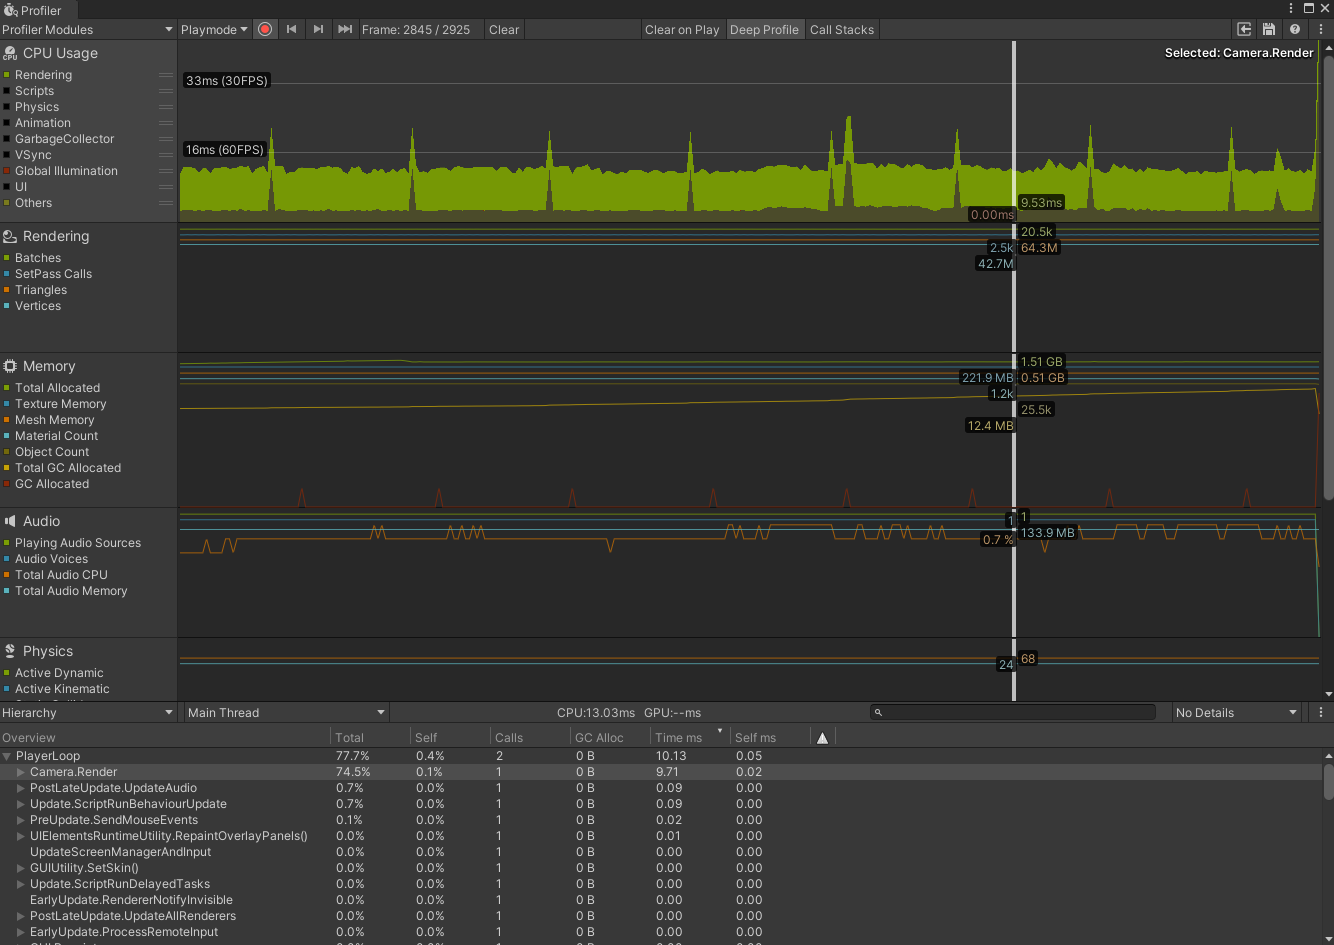
By using the Unity Profiler tool we can see how many milliseconds are spent in the rendering of the scene.
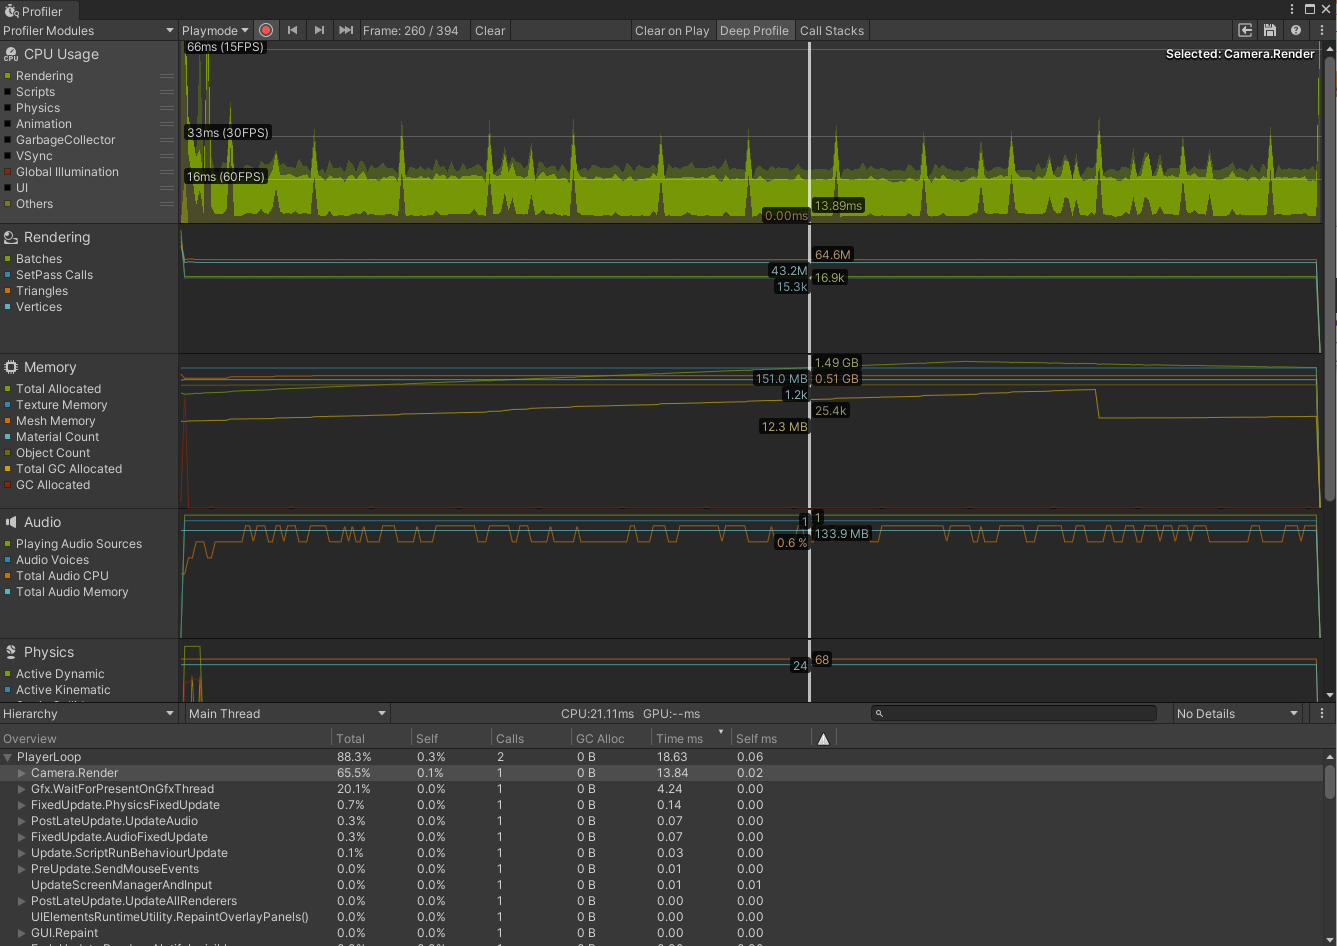
The rendering phase on the CPU is taking roughly 14 ms (Roughly 60 fps). However, the framerate target for virtual reality is 90 fps (10 ms - 11 ms). We are 30 fps under the target.
The reason this is important especially in virtual reality, is that framerates below the target are known to induce negative side effects like motion sickness or disorientation. We want to ensure a very comfortable experience for the user, so the performance has to hit the target for virtual reality.
As a quick test, we can disable all of the lights in the scene and see how the performance of the world improves.
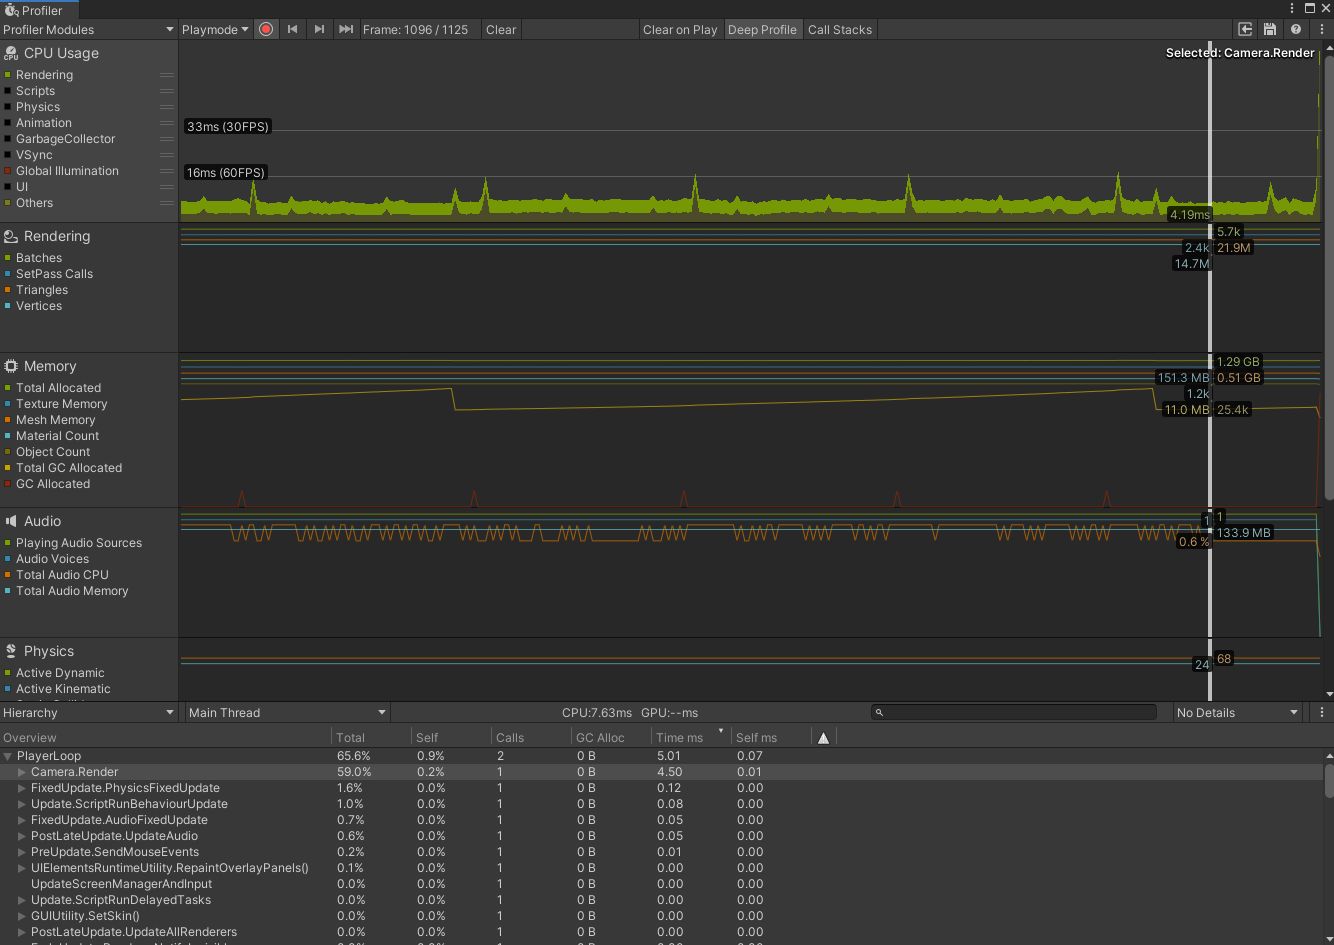
The rendering phase on the CPU now takes only 4 ms (Roughly 250 fps) with no lights in the scene.
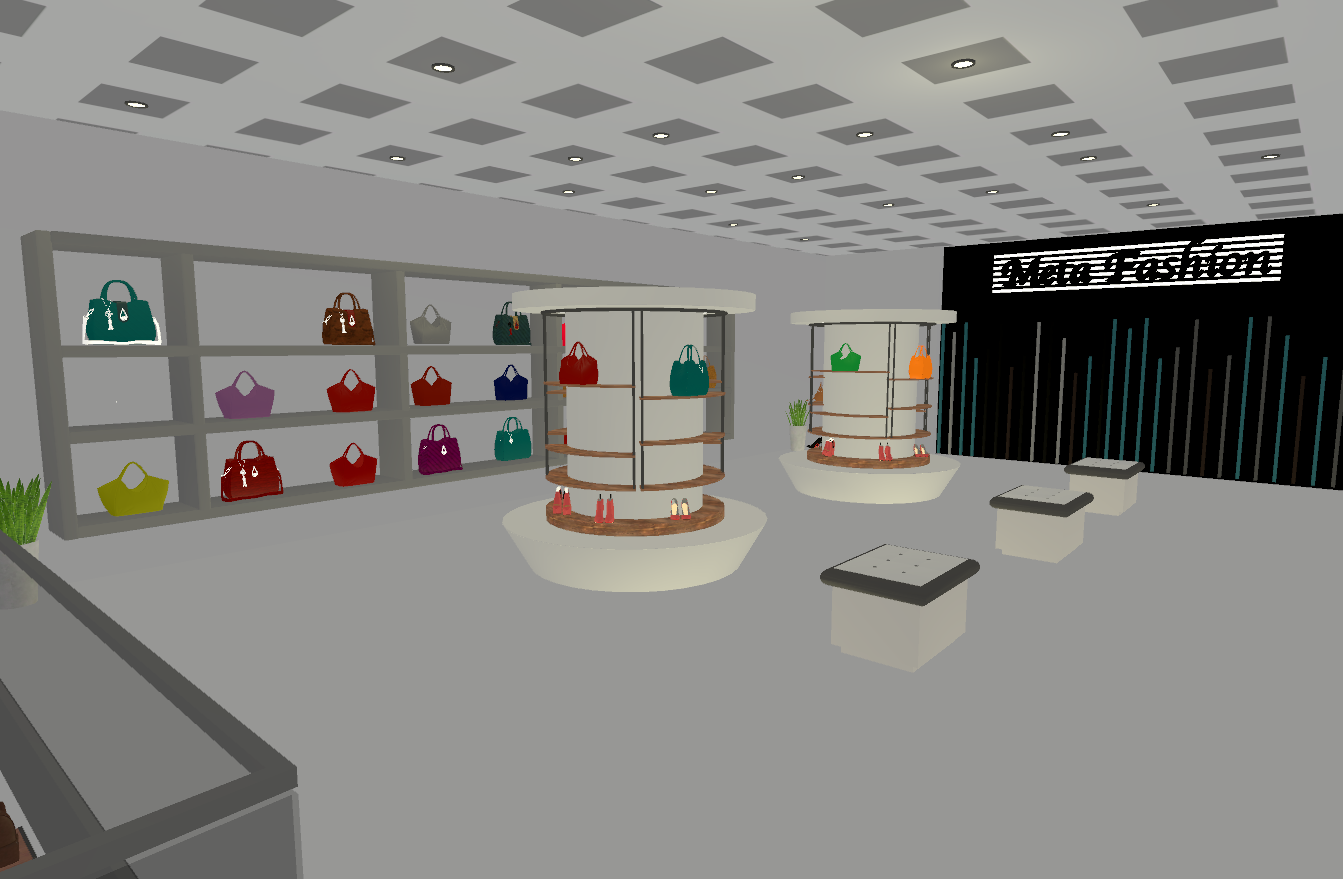
One limitation of Forward Rendering here is important to note. Notice in the image how the seats and column displays are receiving point lighting, but the floor and walls are not. As a result they look disconnected from the environment. When moving around in the scene, lights can pop in and out of existence as Unity tries to decide which lights on the object have per pixel priority.
Forward Rendering has a limitation to where it can only render a certain amount of per-pixel lights per object. In the Massive Loop client this value is set to 4 Lights. When the number of lights interacting with an object goes beyond this limit, they are then rendered with a less precise but faster method.
Per-pixel lighting means that light is shaded per pixel, and each light is shaded in a single pass. When you have 4 Lights shading an object, that means there are 4 Lighting passes for an object. This can grow in complexity when there are many objects in the scene interacting with lights that require multiple passes. This is why when there are a large number of lights and objects in a scene, the performance can decrease dramatically as we saw previously.
If real-time lighting was a design choice for our world, a solution to solve the light popping issue can be to split up the walls and floors into multiple objects so they can receive per-pixel lighting. To save performance as well also we can have zones within our world where we disable lights that the player does not see.
However, in this case, since our environment will primarily be static, and we are choosing to stick with baked lighting there is no need to have any realtime lights because the world and it's lighting won't change.
With the design points of our world set and the lighting limitations acknowledged, we can now start lighting our world...
Lighting Our World⚓︎
1. Setting our Enviormental Lighting⚓︎
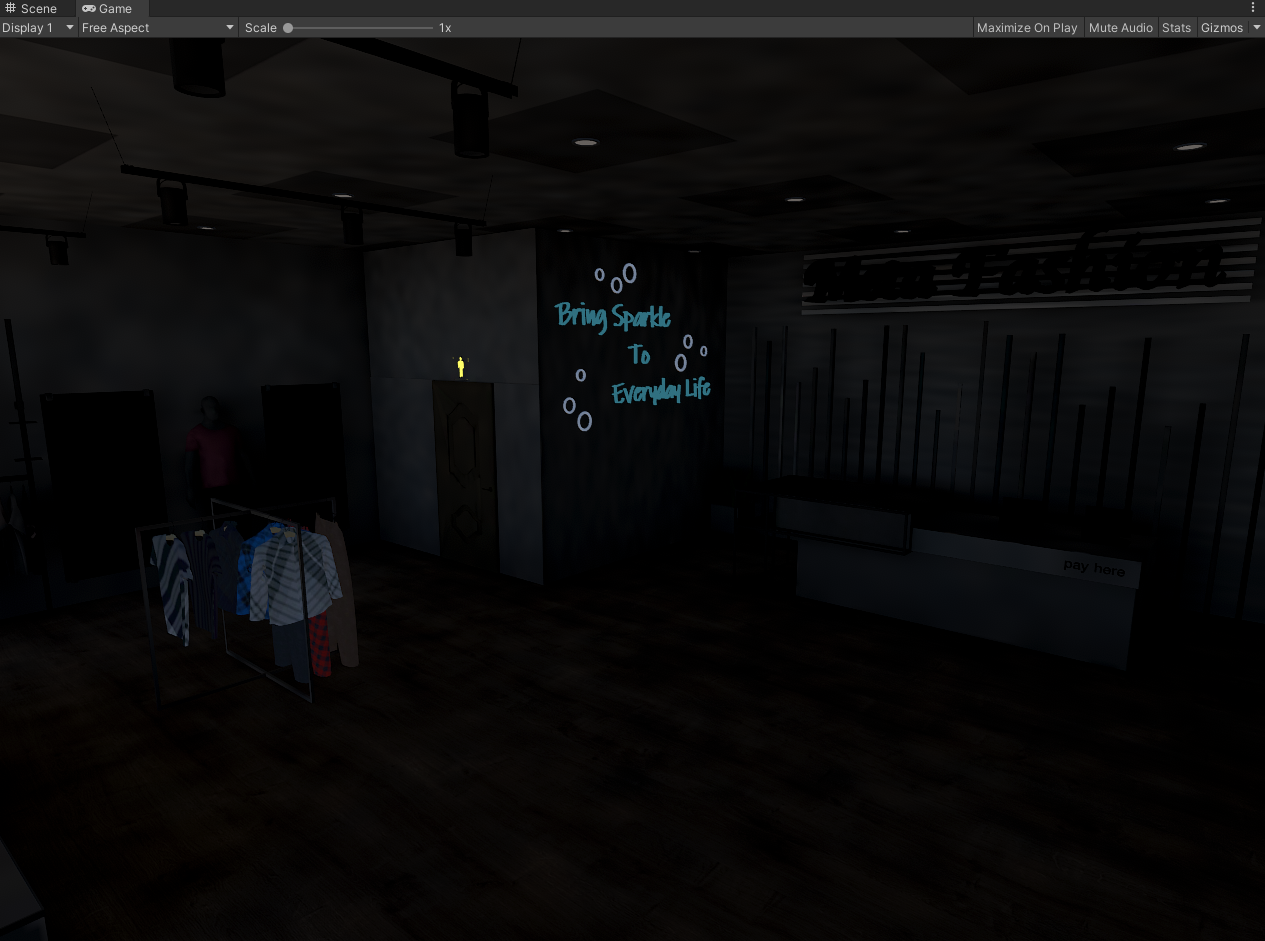
We have removed all lights in our scene, and as shown in the image, the world is only lit with ambient lighting.
Yet, there is an issue with it because the ambient lighting is incredibly flat and bright.
There is no visual depth information in the scene. Meaning we can't distinguish the direction of lights, and objects have constant flat shading making them blend together.
Referencing our inital goals for the world, we want to light the scene in broad daylight and emulate natural lighting. In real-world outdoor lighting the biggest contributions are the sky, and the sun. Since we will add the sun in a bit we will start with the sky.
So to start lets make sure the scene is lit from the sky rather than an arbitrary flat constant color.
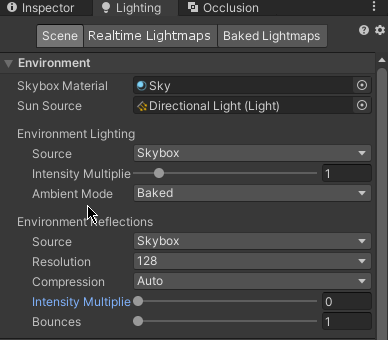
We can fix this by adjusting our environmental lighting settings in the Lighting window.

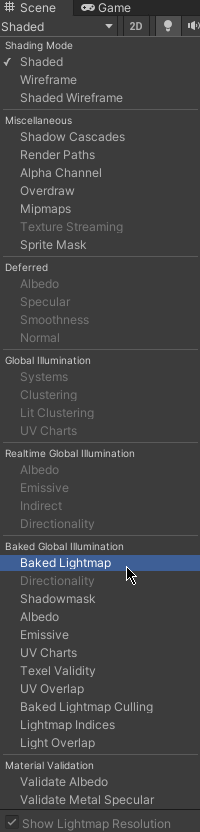
For ambient lighting, Unity provides 3 modes...
- Color - The ambient lighting term of the scene is a single constant color.
- Gradient - The ambient lighting term of the scene is made up of 3 different colors. A ground color (which comes from below), an equator color (which comes from the sides), and a sky color (which comes from above).
- Skybox - The ambient lighting term is dictated by the skybox of the scene.
Currently, the ambient source of the scene is set to Color. To match the design goals of lighting the scene in broad daylight we want to change it to the skybox.
This means now that the ambient term of the scene will be dictated by the Skybox, which is physically correct, and matches our design goal.
For our sky, we are using the default Unity sky shader.
Note
Other shaders can also be used as a Skybox, whether they are completely dynamic or static.
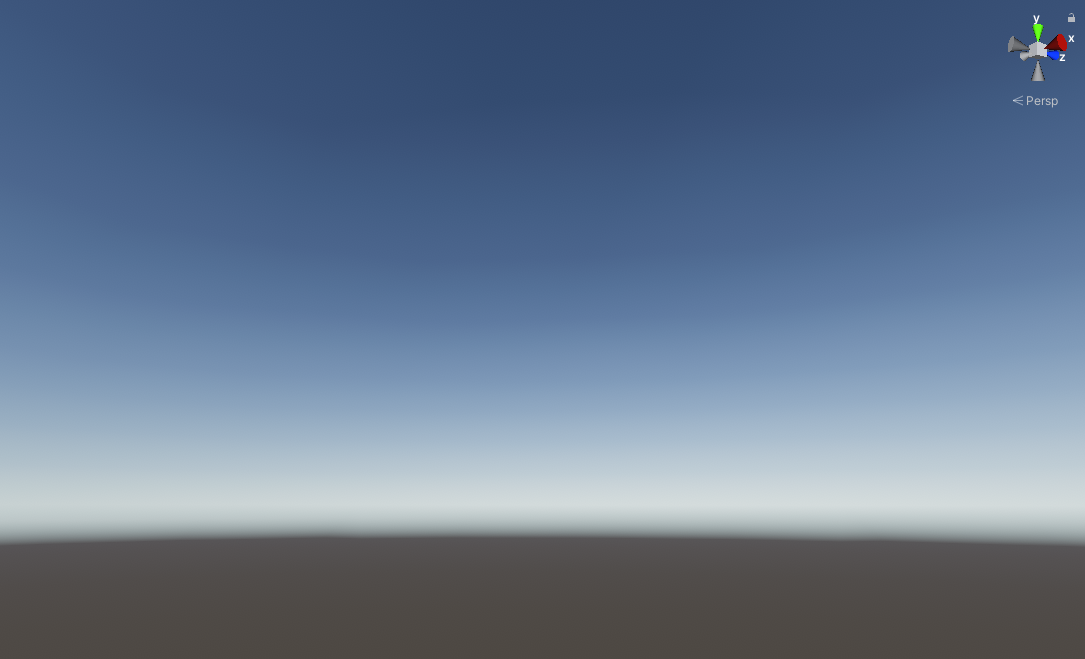
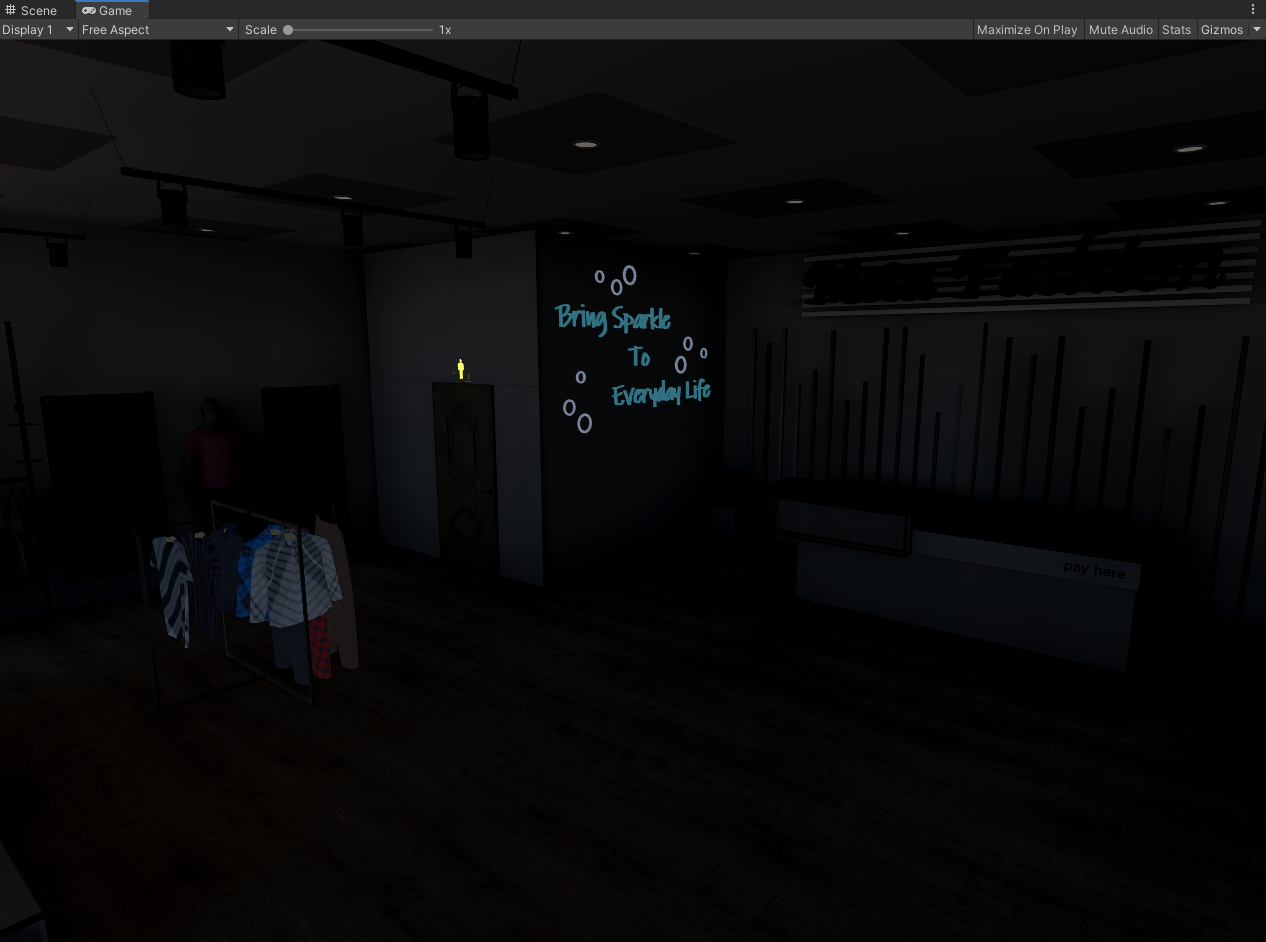
Upon making this change, we can see an immediate improvement to our scene...
The ambient shading of the scene now matches that of the sky.
In addition to that, because the sky is not a constant color, we have variance in how the ambient term of the scene is shaded.
There are different colors and values depending on the angle of objects. Giving us more visual depth cues compared to the Color ambient lighting, where everything blended together.
With our environmental lighting now set correctly, we will move on to adding sunlight.
2. Adding Sunlight⚓︎
Since we want to emulate natural daylight, we are missing sunlight in our scene. For that, we will add a Directional Light to our scene to represent the sun.
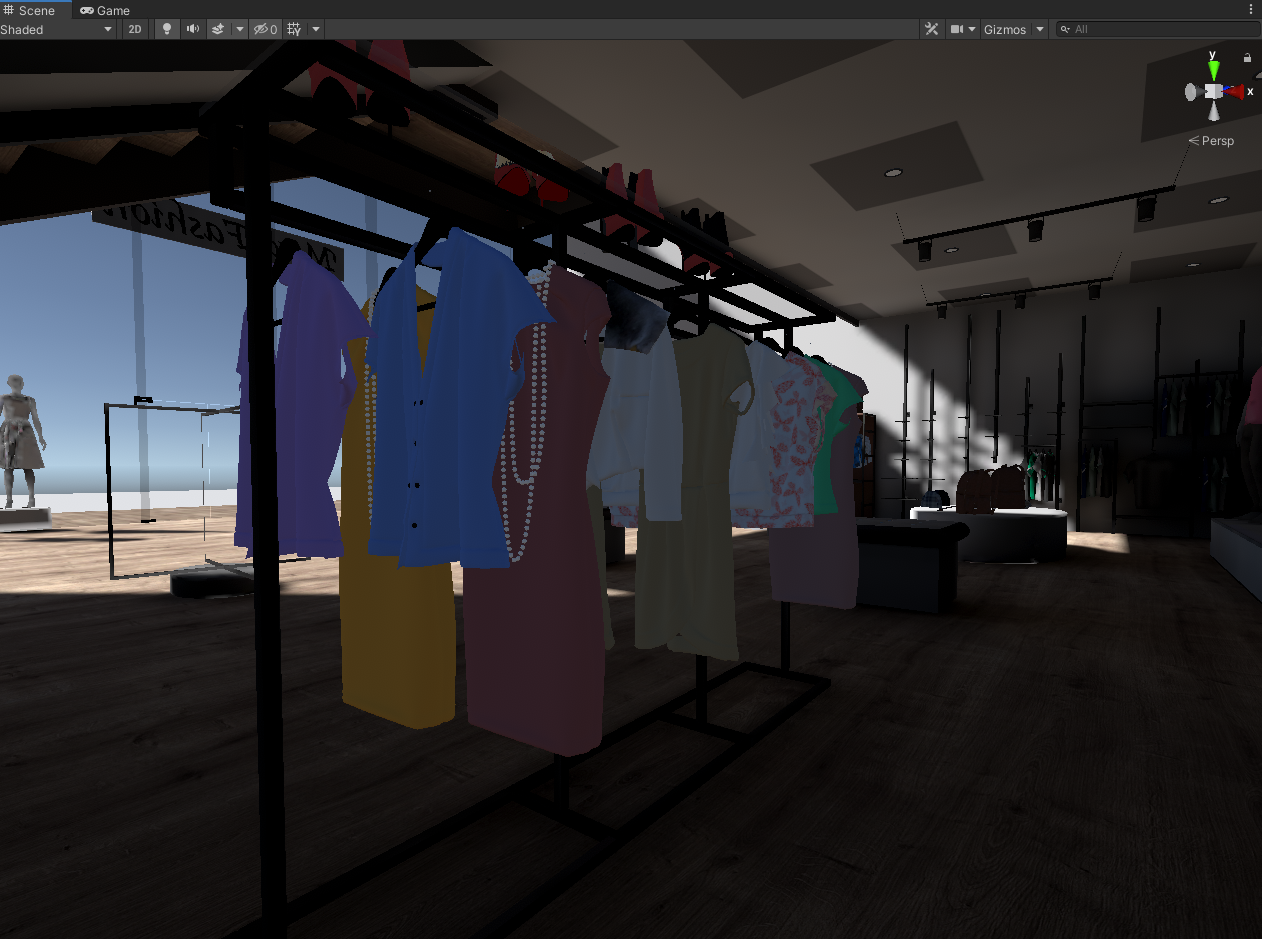
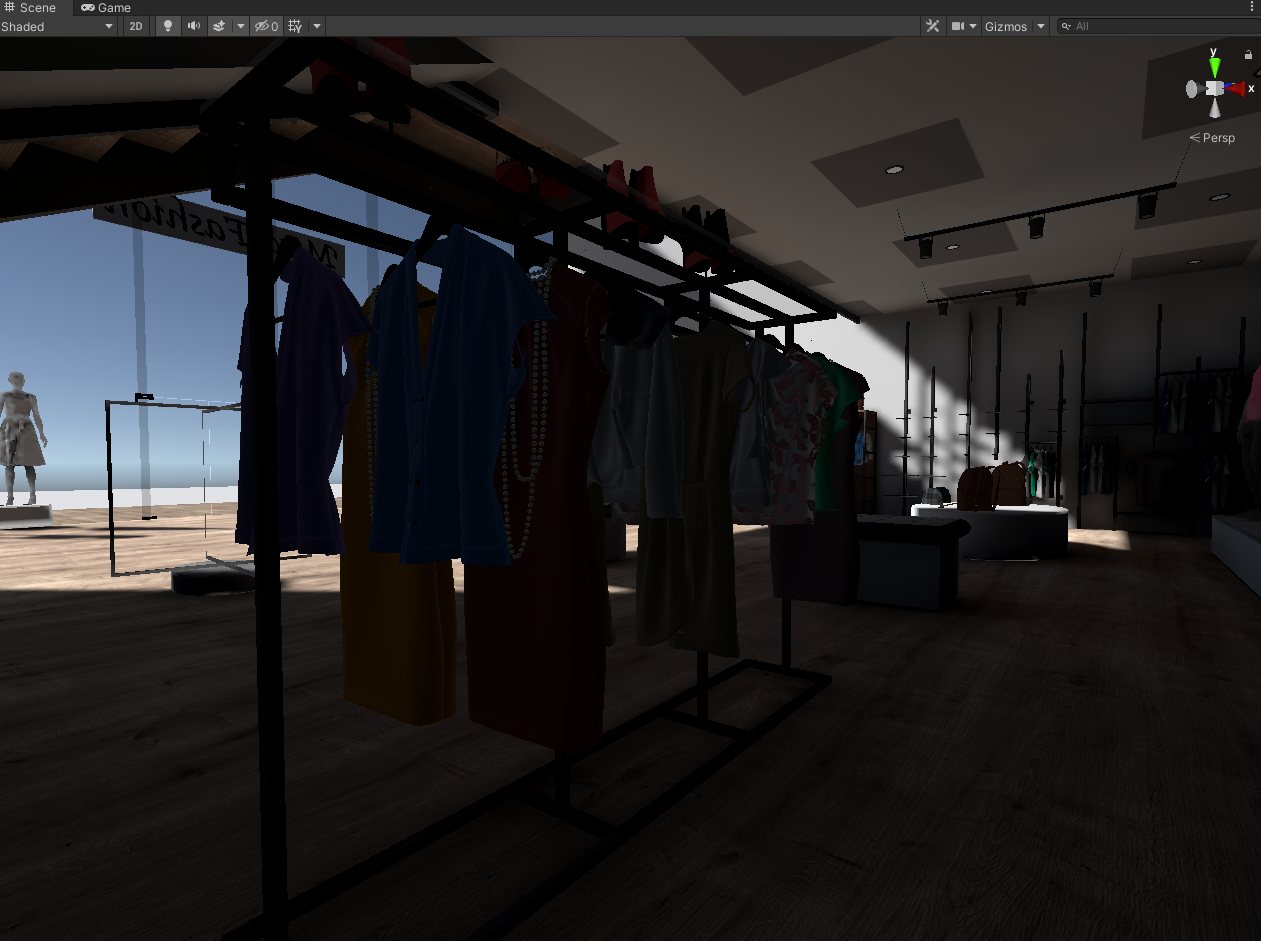
Once it is added, our scene now starts to look better. Yet, there is a glaring issue because the light is bleeding through the interior of the space. This is not correct, and we can easily fix this by enabling real-time shadows on our Directional Light.
Unity for shadows gives the option to have Hard Shadows, or Soft Shadows. Soft Shadows are more visually pleasing than Hard Shadows, but they are more expensive because the shadowmap is sampled more than once for blurring.
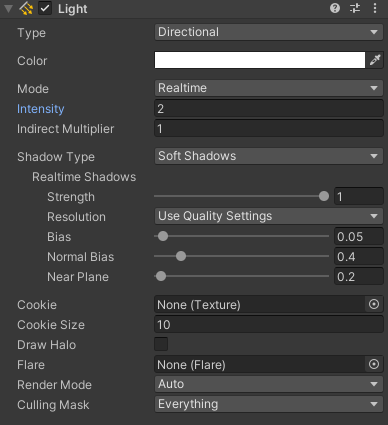
Previewing the results...
Now the scene lighting looks correct and is matching our design goals. From here we will start taking closer steps to make it look more natural and more correct.
Before we do, we will check the performance to make sure we are still below the 90 fps 10 - 11 ms target for virtual reality.
The rendering phase on the CPU is taking roughly 9 - 10 ms (Roughly 90 - 100 fps). We are on average right at the target needed for VR which is good. Though on a different project, this might mean that we don't have much room for extra lights.
We can save some CPU time by reducing the resolution of the directional light shadows, or switching to hard shadows. Although we established that our environment will be primarily static, and the lighting won't change. So with that we can instead utilize lightmapping to save even more CPU time and get better quality lighting.
3. Preparing The Scene For Lightmapping.⚓︎
Lightmapping is the process of precomputing all the lighting within a scene, and store it into texture files. This saves a large amount of rendering time on the CPU and GPU becuase the lighting is computed beforehand.
With the nature of lightmapping also being precomputed, we can get overall better quality lighting compared to real-time lighting by doing way more calculations in the precompuation phase for better accuracy.
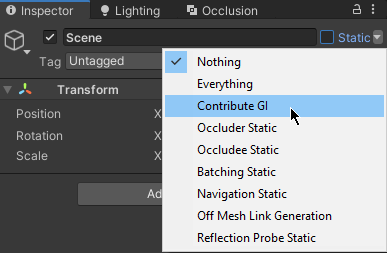
Since we organized our scene to where it's parented to a single Game Object, we can click the Static dropdown and check the Contribute GI Static Flag. Doing this means that we will mark all Game Objects in the scene that have a Mesh Renderer component to be used in the light mapping process.
Note
You can also mark an object with a Mesh Renderer component by enabling Contribute GI in the component settings.
However, there are a few things we need to watch out for and keep in mind to ensure that we have a clean final bake.
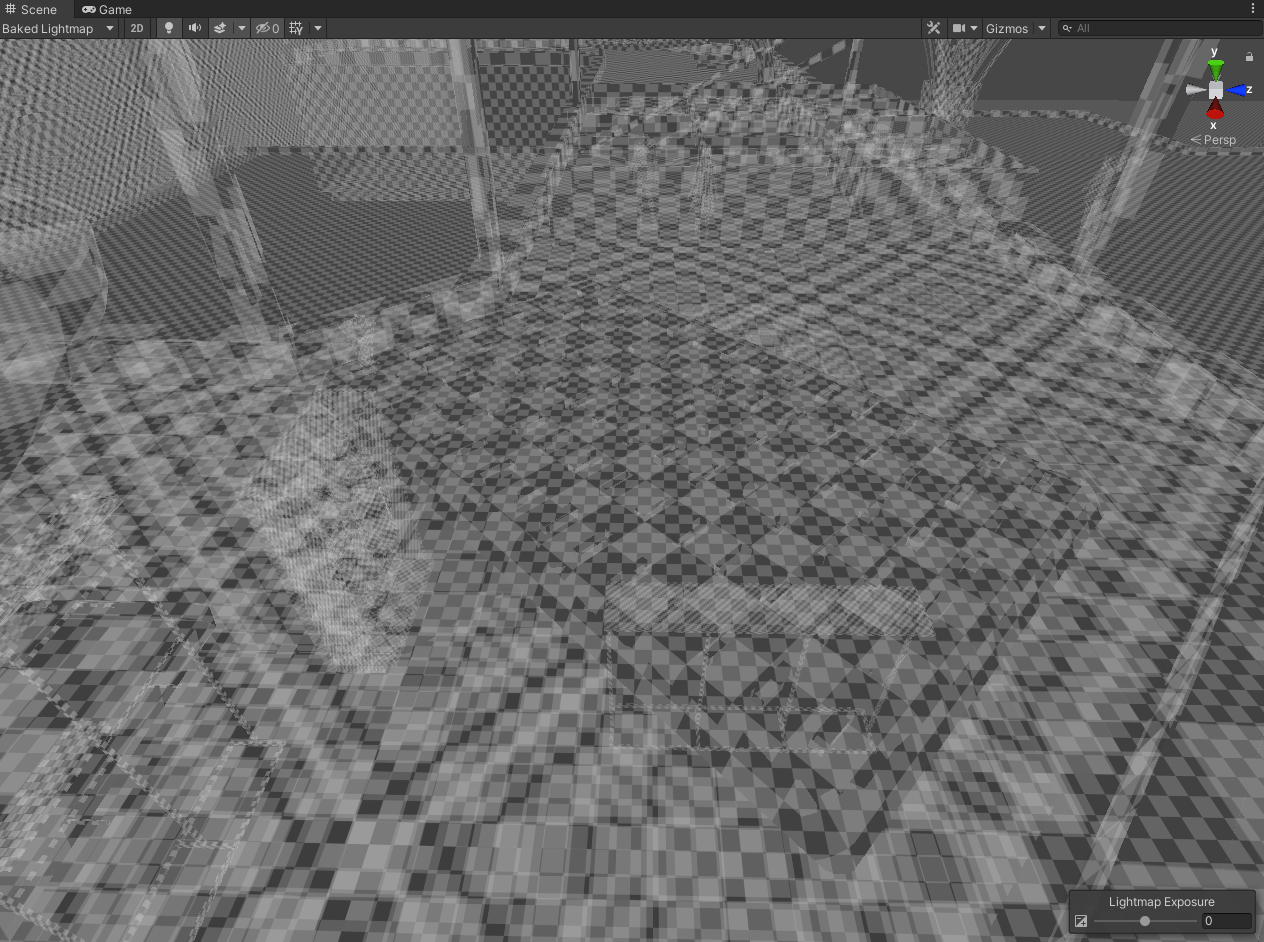
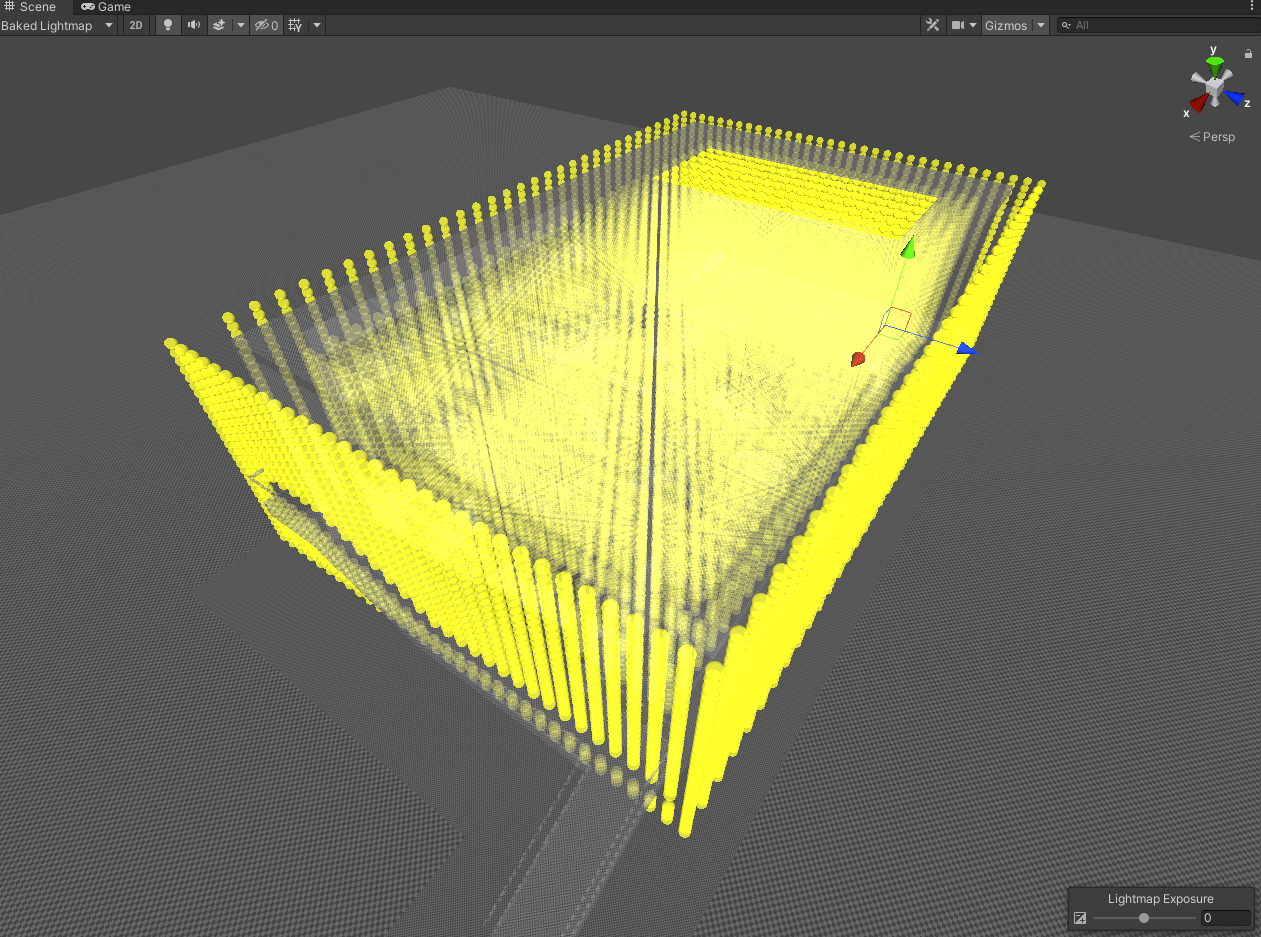
Once we have checked the Contribute GI Static Flag for all Game Objects in the scene, we want to see a preview of the lightmapping resolution to check its validity of it.
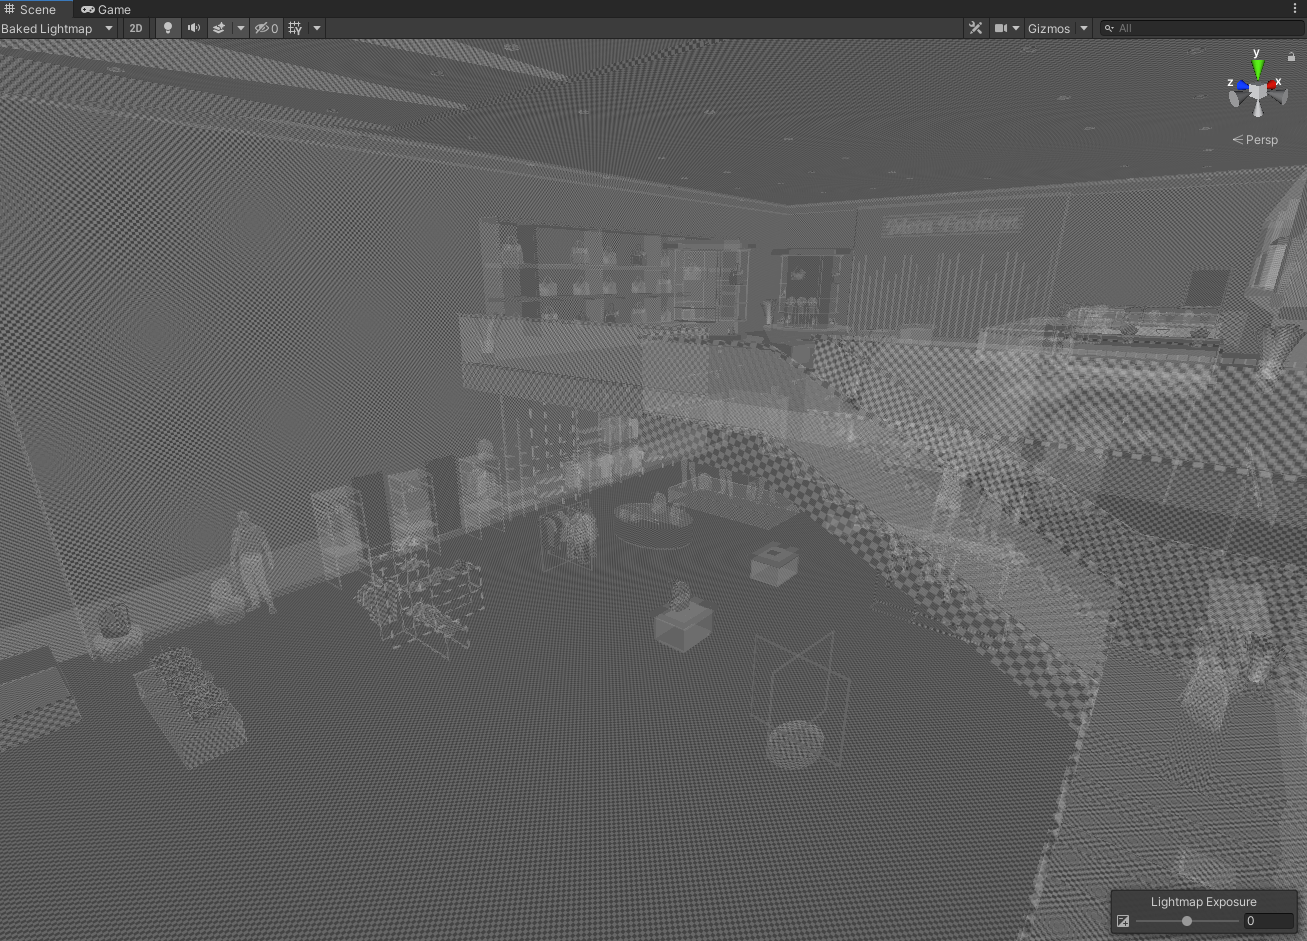
In this mode, Unity overlays a checkerboard texture over all objects that have a Mesh Renderer and are marked static. Each square in the checkerboard here represents a texel (which is a lightmap pixel). The smaller these squares are, the higher resolution the lightmap will be.
We are in this mode because we want to do the following...
- Ensure that objects that are smaller than a texel are not included in the bake. (This not only reduces the extra computation and space needed for objects that are too small to be visible in the lightmap but also reduces potential artifacts that can appear in the final bake)
- Ensure that objects have a roughly consistent density of texels. (So that some objects won't appear to have a lower or higher resolution than other objects)
- Ensure that any dynamic/interactable objects are not included in the bake. (This is important to reduce any errors or glitches we get when moving objects that are not supposed to be included in the bake, as the lighting will not change when they are moved)
For objects that will have the Contribute GI Static Flag unchecked, this will mean that they will not be included in the lightmap and the lighting won't match the rest of the scene. With that said, later on in the tutorial we will show you how to correct those unchecked objects lighting with Light Probes so that they match the rest of the scene.
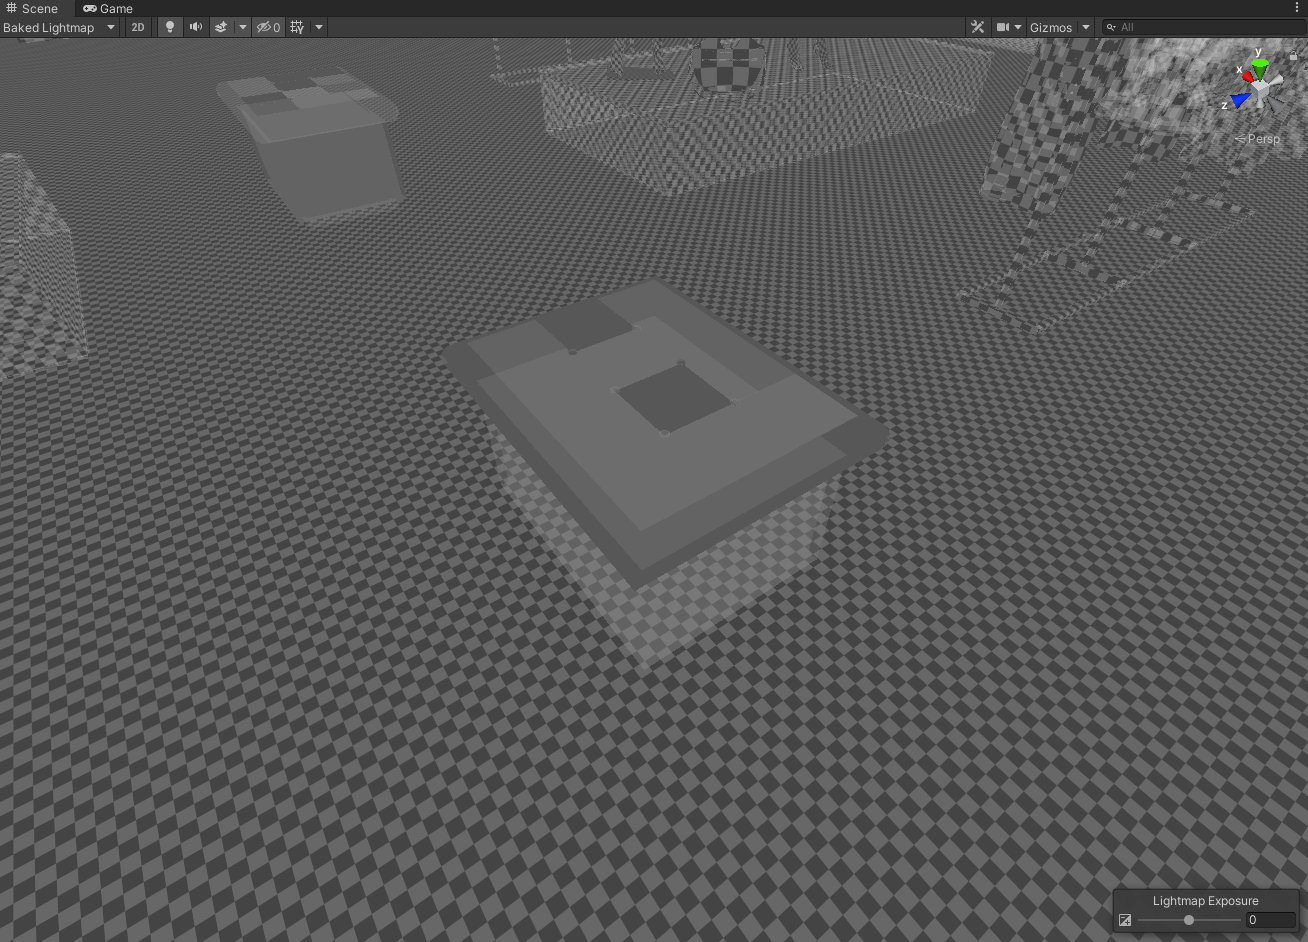
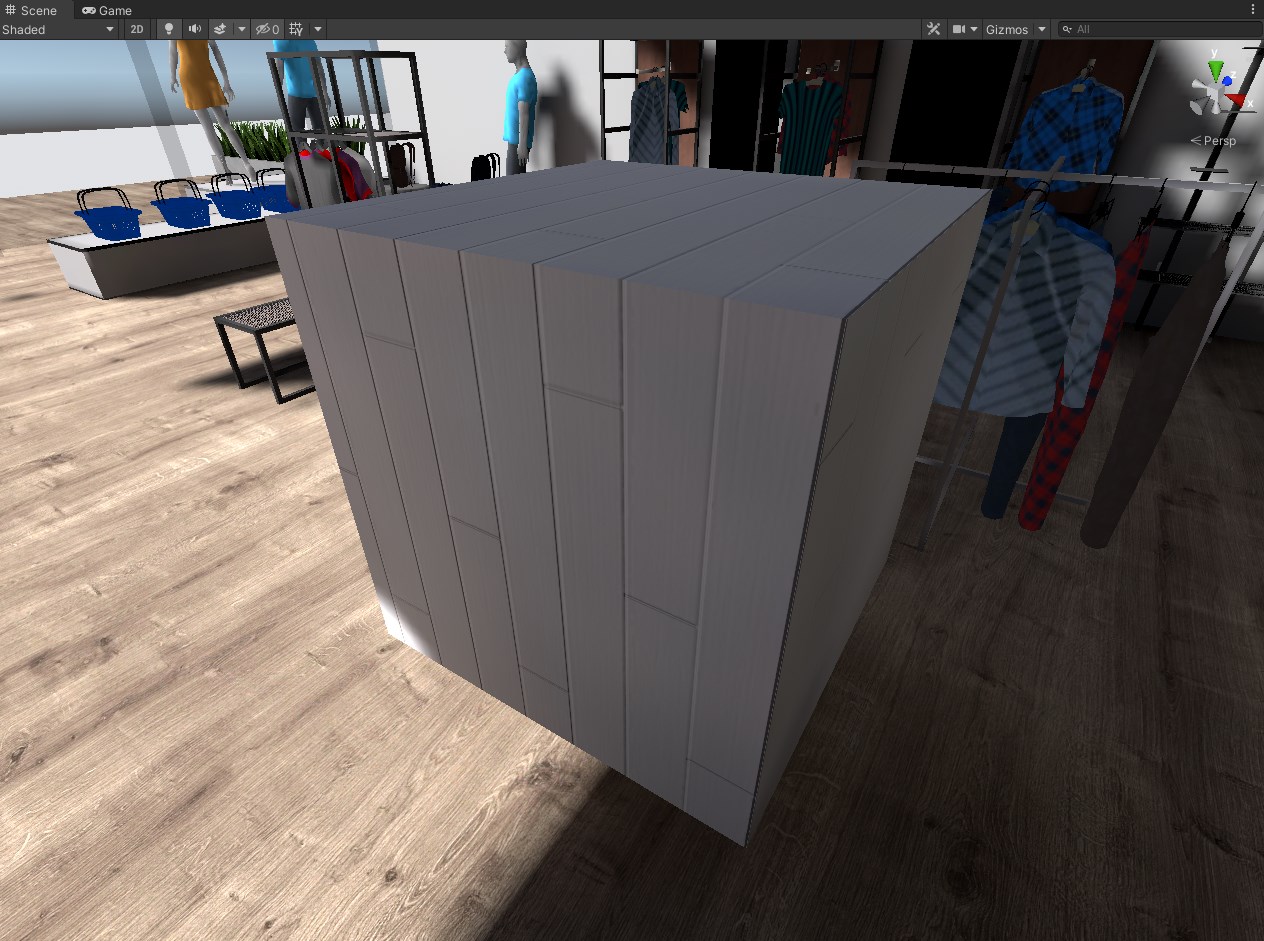
This is an example of an object that doesn't have the correct density of texels compared to the surrounding geometry. This is apparent when we view it in the baked lightmap scene preview. As evidenced by the floor the object is large enough to be represented by multiple texels.
There are a couple of ways to fix the density of the texels for this object.
- Increase the scale factor of the object in the lightmap.
- Generating Lightmap UVs for the mesh in the import settings.
To increase the scale of the object in the lightmap, we select the Game Object with the Mesh Renderer component, and in the inspector tab, there will be a field called Scale In Lightmap under the Lightmapping tab for the component.
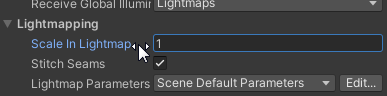
Adjust this value until the density of the texels on the object is matched closely with the density on the floor mesh. If adjusting the scale doesn't work, then it's likely that the object has improper Lightmap UVs.
Luckily in Unity, we can manually Generate New Lightmap UVs for the object.
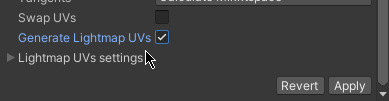
In the mesh import settings, there is an option to have Unity Generate Lightmap UVs for the mesh. Check the field on and apply the changes to the mesh for the UVs to be calculated.
Once they have been generated, or the lightmap scale has been adjusted, it should look like the following...
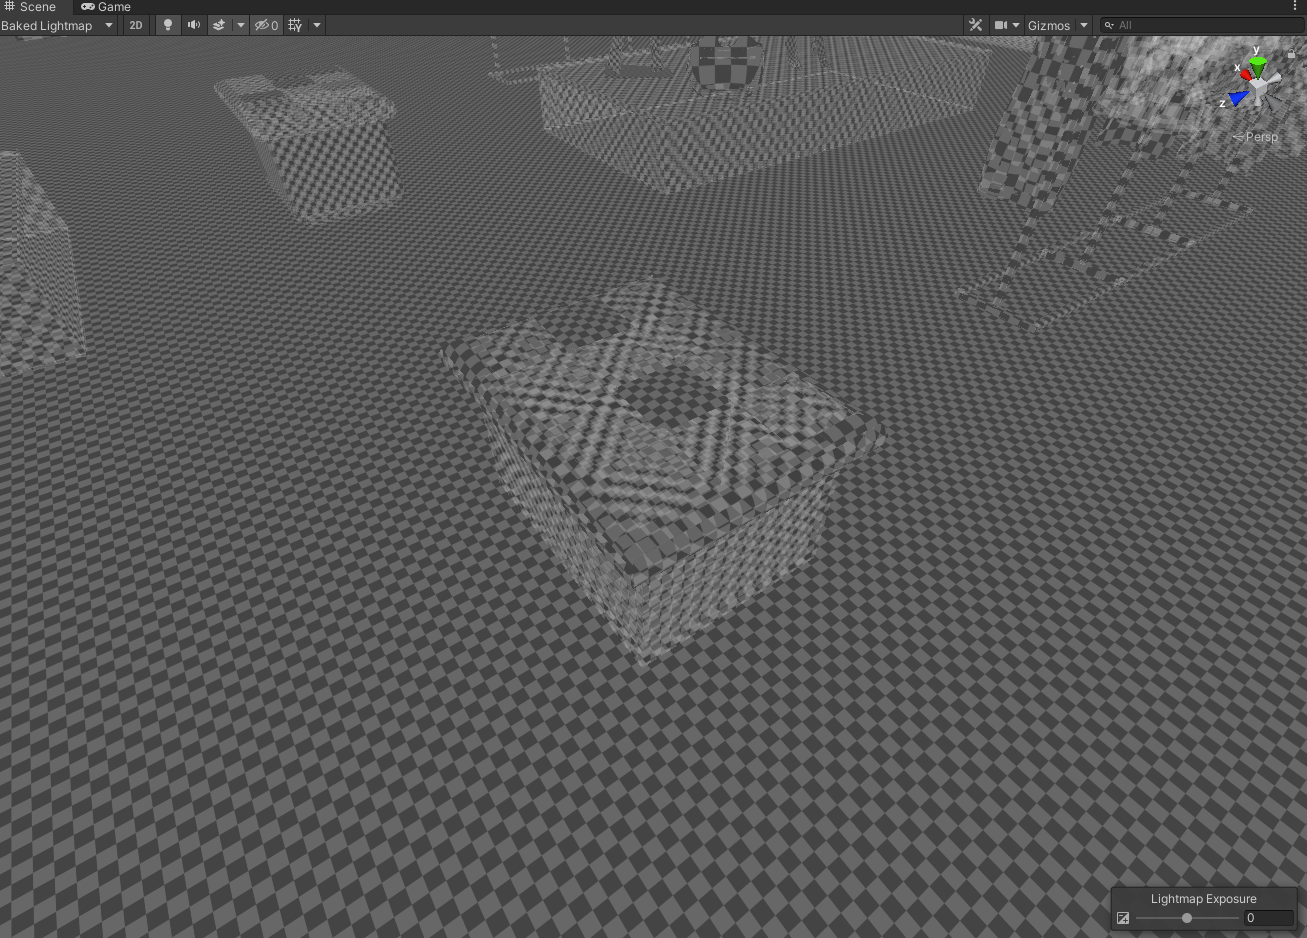
With our adjustments, the object will show up correctly in the lightmap with little to no artifacts. With that corrected, we will also move elsewhere in the scene to check other objects.
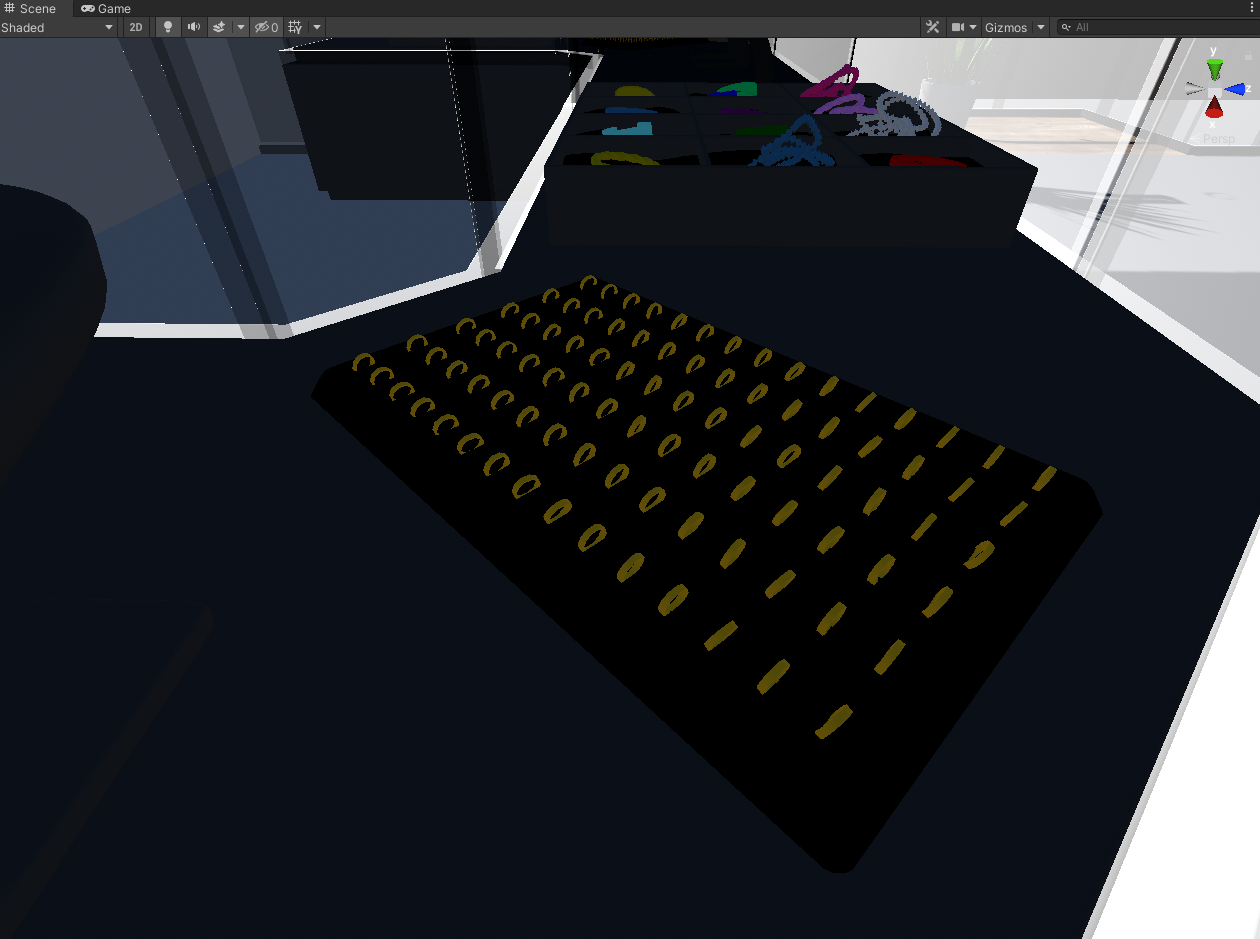
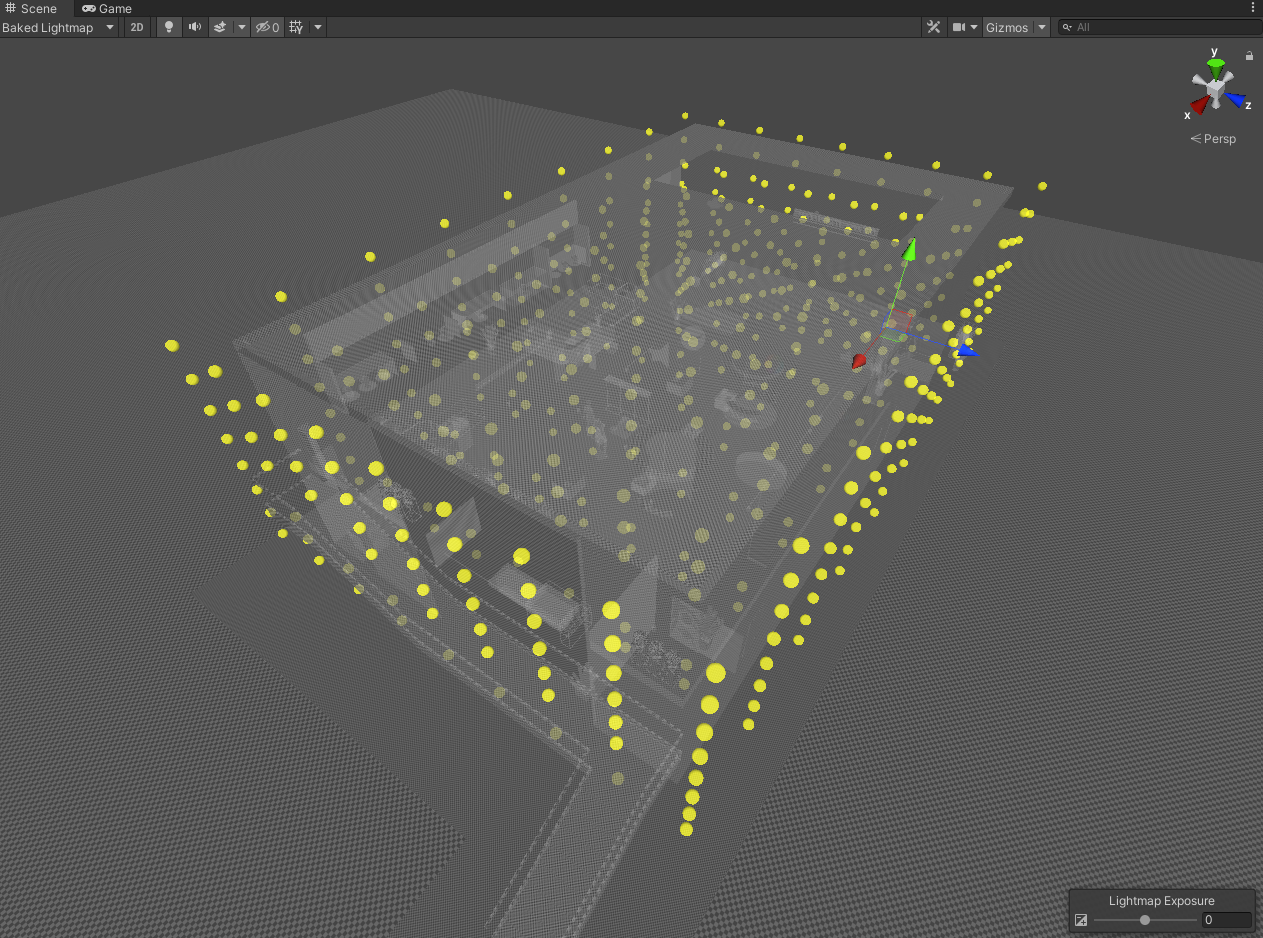
In the scene, we have a lot of small mesh objects as shown above. However, when we switched the scene view to the Baked Lightmap we can see some issues.
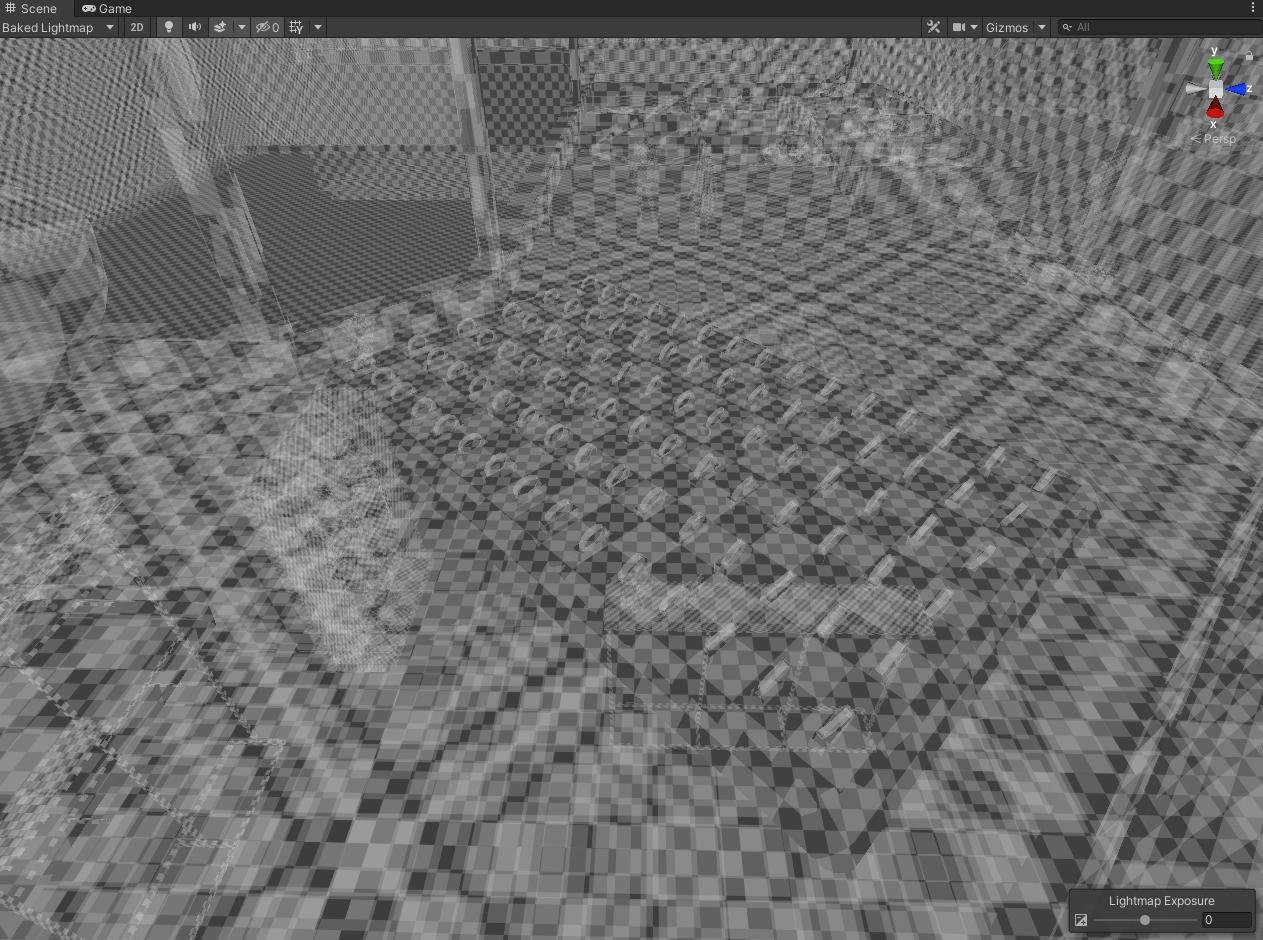
The density of the texels matches the surrounding objects, however, the ring objects themselves are smaller than a texel. To prevent extra computation and artifacts we need to exclude these objects from the lightmap as they are too small to be represented accurately in the final bake.
Now they won't be visible in the final bake, potentially causing artifacts in the final bake.
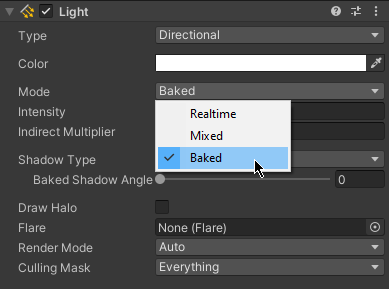
In the final preparation step, we want to make sure that our lights in the scene also are included in the bake. Since we added a directional light in the scene, and we don't need to recalculate the lighting every frame because it won't change, we will change the mode to Baked.
4. Lightmapping the Scene⚓︎
With the scene prepared for lightmapping, we can now begin the actual lightmapping computation. In the lighting tab for the scene, we have different lightmapper's we can choose from.
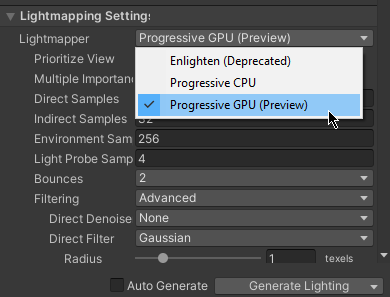
- Progressive CPU - Traditional Path Traced light mapper that uses the CPU.
- Progressive GPU - Same as Progressive CPU except it's performed on the GPU. It is much faster than the CPU, however, it can be more prone to failures.
- Enlighten - Similar to the progressive, however, it is unique in that it can also generate indirect lighting in real-time.
For our scene, because the environment is completely static and the lighting won't change. We will use the Progressive Lightmapper. (Progressive GPU because it's very fast).
We will also enable Importance Sampling which will help speed up the light mapping. We can also enable Prioritize View which means that during the lightmap it will prioritize the view of the scene camera, this is helpful for iteration to quickly see the results of the lightmap before it finishes the rest of the scene.
After that then click Generate Lighting which will begin the lightmapping process. Depending on your hardware the time it takes to lightmap can take longer, but for this tutorial wait until the light mapper completes.

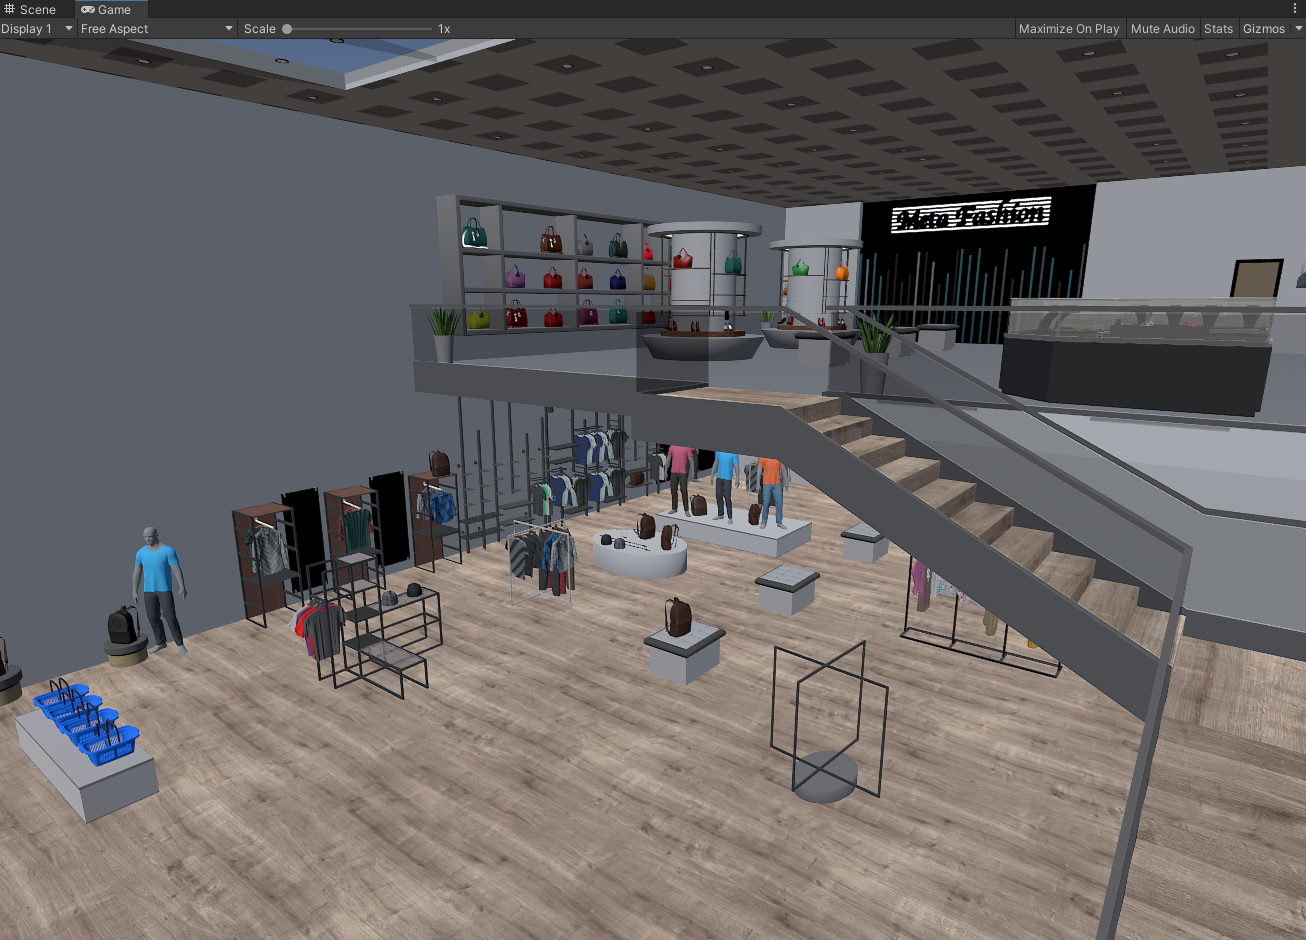
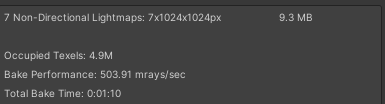
Once our lightmap is completed we can see an immediate quality improvement compared to real-time lighting. It's a lot more accurate and natural compared to before. However, there are a few more things we need to do, to ensure that lighting for all objects in the scene is unified and complete.
Before we do that, since the lighting is now fully baked we can do a performance test with the profiler to see the performance improvement.

The rendering phase on the CPU now takes only 5 ms (Roughly 200 fps) with baked lighting. We are well under the target framerate for virtual reality.
It's worth mentioning also that lightmapping also increases the memory usage in the scene for the lightmap textures. Previously the texture memory usage in the scene was 151.3 MB, but after lightmapping, it grew into 292.5 MB.
Not only that, we can now add as many baked lights in the scene as needed to light the store. It won't affect performance because it's all baked into textures.
5. Improving the Lightmapping - Filtering⚓︎
With our first bake completed, and the performance assessed we can focus on improving the lightmap quality.
Do a thorough flythrough around your scene and verify how certain areas and objects look. Making sure there aren't any artifacts, missed objects or other issues that might be present.
During this step, we will iterate and rebake the lighting as we adjust certain settings to improve the quality of the light mapping.
In dark areas of the scene, there are some artifacts due to low sample counts in the light mapping settings.
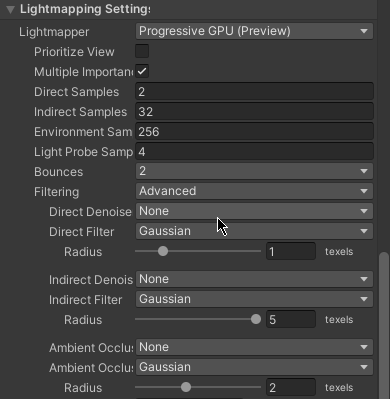
Our Direct Samples count is set to 2, and our Indirect Samples count is set to 32. Which for our lightmapper is pretty low. There are a couple of ways to fix these artifacts.
We can increase the sample counts and give the light mapper more samples to work with. Unfortunately by doing this, it leads to much longer baking times when increasing the sample counts.
We can instead use filtering to smooth out the artifacts without needing to increase the sample counts, and by extension, decrease the time needed to compute the lightmap.
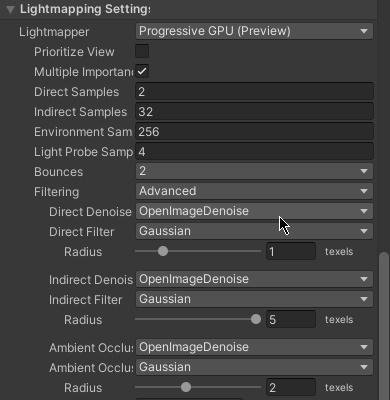
By setting a filter for the Direct, Indirect, and Ambient Occlusion terms of the lightmap, we need to rebake the lightmap for the filters to take effect.
After applying the filters we can see an immediate improvement, the artifacts are now smoothed out and the final result is much cleaner. With the added benifit of a lower sample count, and a faster convergence on the lightmap result.
6. Improving the Lightmapping - Ambient Occlusion⚓︎
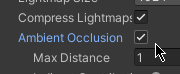
Another option that we can enable the lightmap settings is Ambient Occlusion.
Note
Enabling this will require you to rebake the lightmap for the effect to appear.
Ambient Occlusion On...

Ambient Occlusion Off...
Ambient Occlusion adds additional indirect shadowing to the final bake. Helping to increase contrast and separation between geometry, adding more visual depth information. This is optional and is based on personal preference.
7. Improving the Lightmapping - Increasing Resolution⚓︎

This is also a good chance to assess the overall texel quality of the lightmap, if the resolution is too low we can increase the quality of the lightmap.
Note
Increasing the resolution/size will increase the time it takes to bake the lightmap.

We can increase the Lightmap Resolution or Lightmap Size to increase the texel density of the lightmap for better quality.

Increasing the Lightmap Resolution to 80 texels doubles the number of texels in the lightmap.

The texel density is much higher compared to the initial bake. We can rebake the lightmap and the resolution of the overall lightmap will be much higher.

It's important to note that changing the Lightmap Size to a higher resolution will double the amount of space (and memory) that your scene lightmaps will consume.
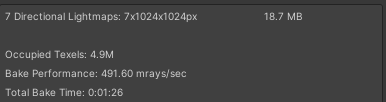
With 1024 Lightmap Size...
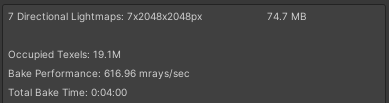
With 2048 Lightmap Size...
The amount of data consumed by the lightmap grows 4 times. Not only that we can see that the time it takes to bake a higher resolution lightmap also quadruples.
8. Improving the Lightmapping - Directional Lightmaps⚓︎
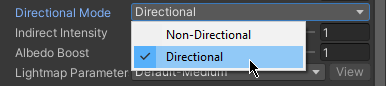
Another way we can improve the quality of the lightmap is to bake in a Directional Mode.
Directional Lightmaps attempt to maintain directional information of lights, and use that to enhance the quality of the bake by shading the diffuse using the normal map on the materials in the bake.
Directional Lightmaps On...

Directional Lightmaps Off...
Baking Directional Lightmaps means that there is an additional lightmap that contains directional information. This will add additional data on the disk, and also in the memory.
Directional Lightmaps On...
Directional Lightmaps Off...
9. Lighting Dynamic Objects⚓︎
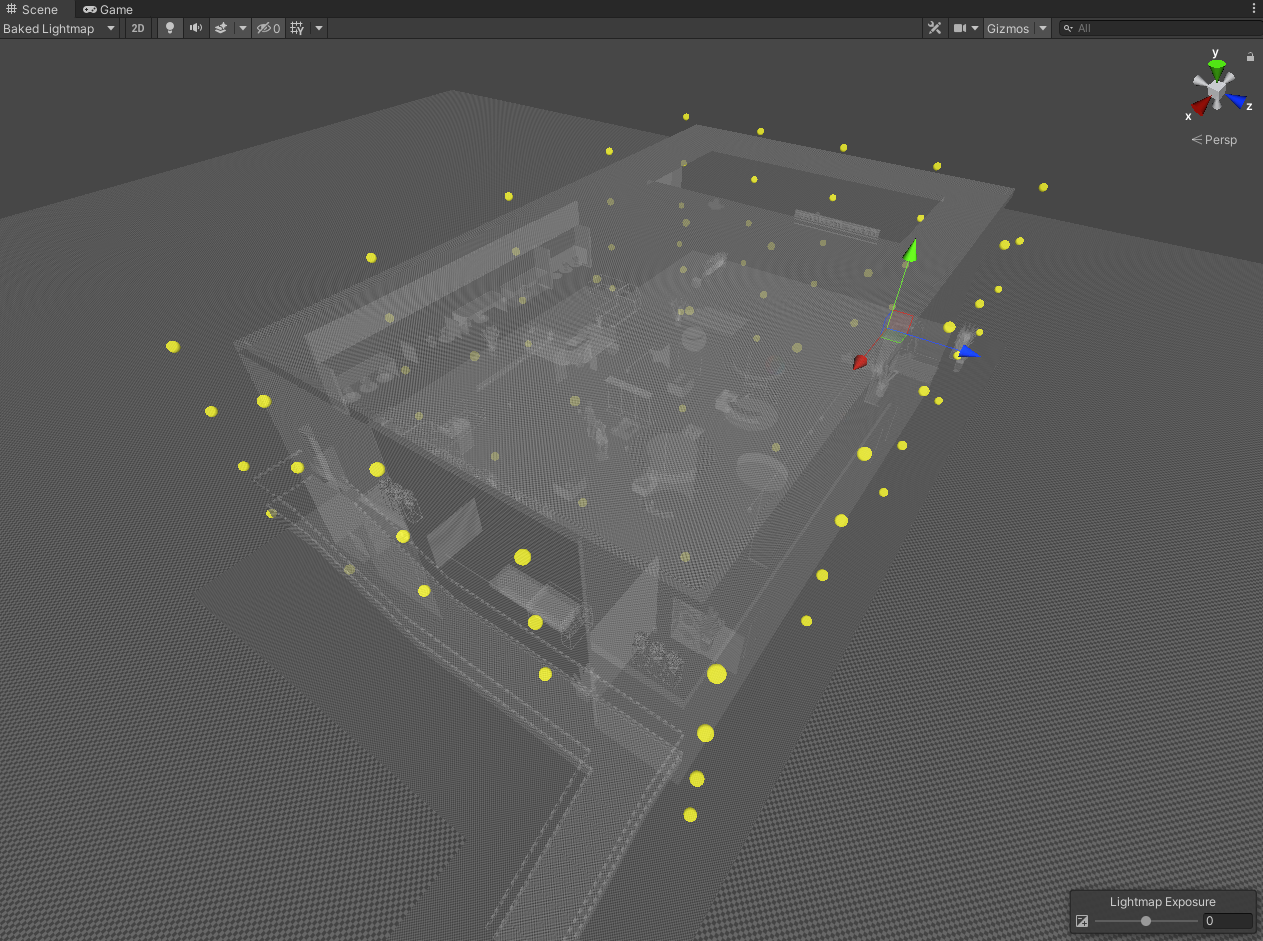
Once our lightmap settings are dialed in and look acceptable. We can now use a system called Light Probes to match the excluded objects from the lightmap, but also any dynamic/interactable objects that are in the scene.
Light Probes are essentially an array of points in a scene, and during lightmapping, they sample the lighting at a specific position. This data is then stored, and at runtime, a dynamic object will sample the closest point from that array and use it to light the object.
The density of this grid depends on the scene if there are a lot of objects in the scene and lots of areas where there are lots of drastic changes in lighting. Grids with a lot of probes may be appropriate.
Low-Density Probe Grid...
Medium Density Probe Grid...
High-Density Probe Grid...
Performance impact on the CPU and memory with Light Probes are small, however with that with probe densities it's best to keep it to a reasonable amount.
For instance, for the kind of world that we currently have, we will only use a medium density grid as it will suffice for objects in the scene.
Light Probes Off...
Light Probes On...
With Light Probes, we can see how all dynamic objects (or objects excluded from the lightmap) in the scene are now inheriting lighting from the scene. Grounding them all within the scene.
With our scene now correctly lit, and all dynamic objects blending correctly. There are a couple of more steps needed to perfect the lighting in the scene.
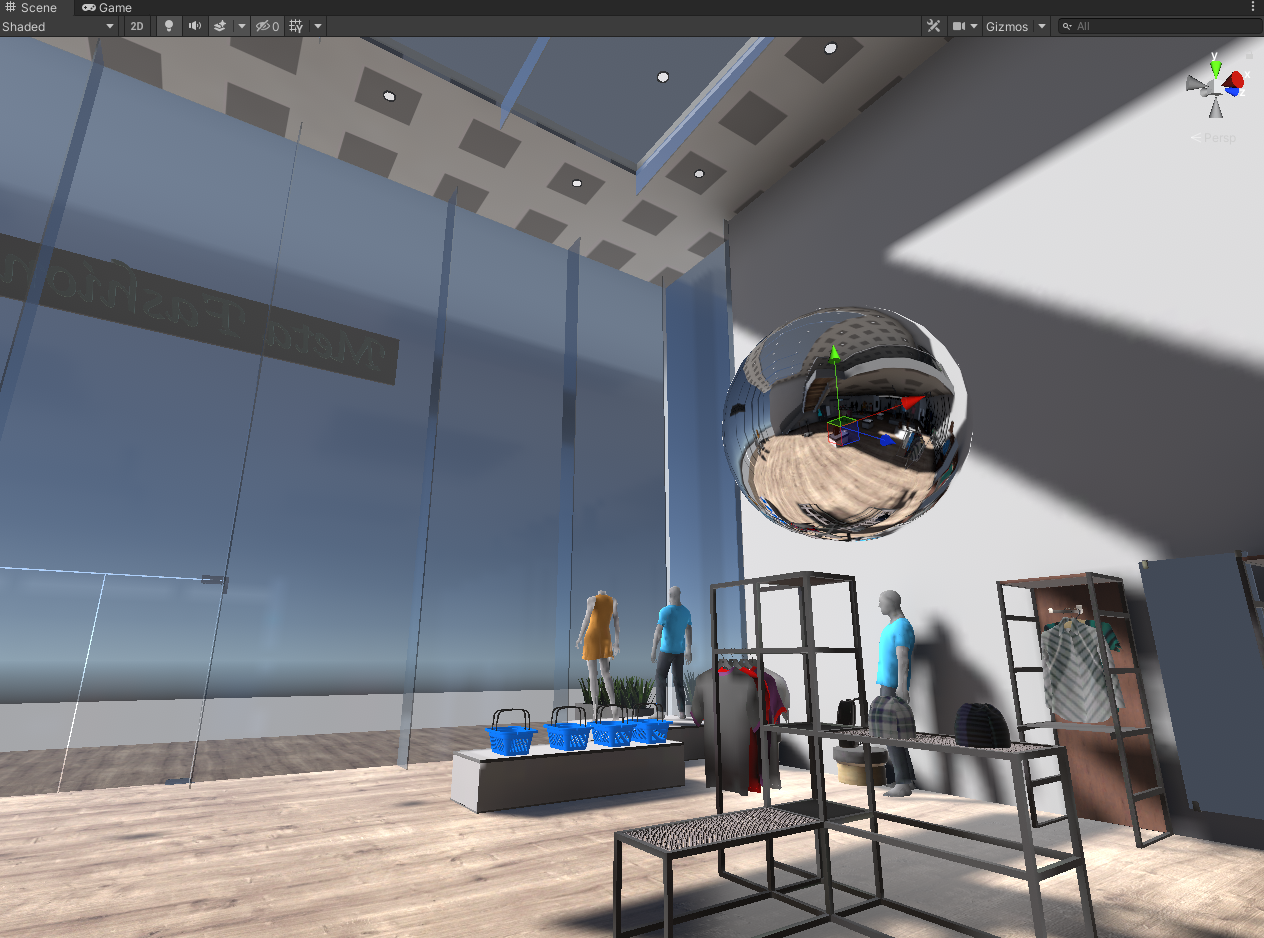
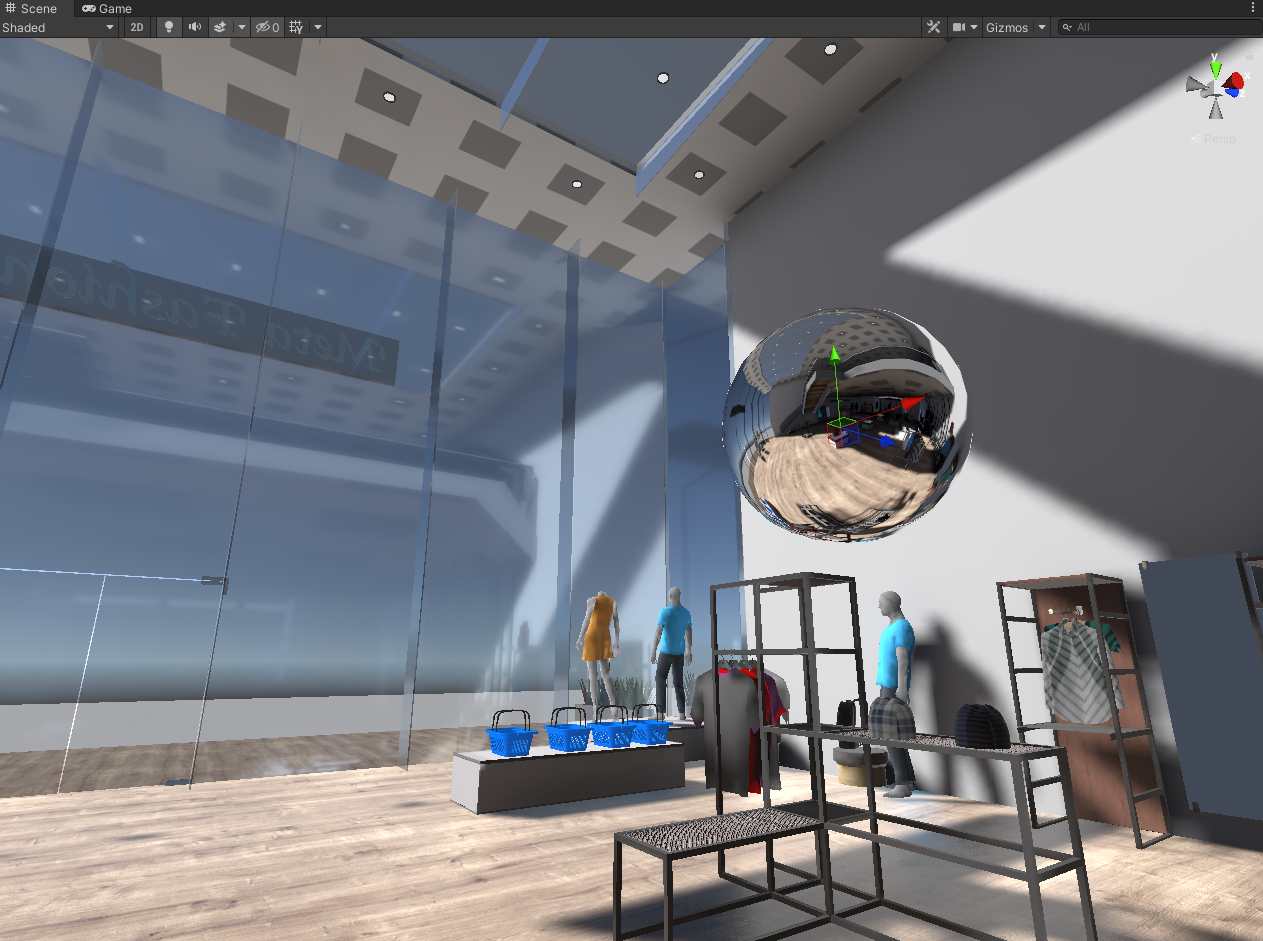
10. Reflection Probes⚓︎
Reflection Probes help objects blend seamlessly in the scene more by providing specular information about the surrounding geometry in space. Specularity is an important part of shading.
No Reflection Probes... (Just using the default reflection probe generated from the skybox)
With Reflection Probes...
Unity also provides a unique feature for Reflection Probes that can be utilized to increase their perceived quality of them by utilizing box projections. Box Projected Reflection Probes are a technique to take traditional cube map reflections and project them in a rectangular volume to approximate the reflections of a given area.
When creating a Reflection Probe, there is a bounding box that defines what objects within this bounding box are utilizing the reflection provided by the probe. This bounding box is also used to define the box projected volume of the reflection.
With the shop there are a large number of reflective surfaces in the space, so defining reflection probes are critically important.
Box Projection Off...
Box Projection On...
We can see when enabling box projection on the probe, how the reflection of the shop is corrected to match the rest of the shop. Given also that it's projected in a volume there is the proper parallax of the reflection when moving in the space.
No Reflections...
With Reflections...
Note
Even if your scene has mostly diffuse materials, it's best to still include reflection probes as all materials in the scene with the standard shader still sample reflection probes at the lowest mip level.
11. Tonemapping⚓︎
This last part of the lighting tutorial is an important step in perfecting the look of a world. We will utilize Post Processing to use an effect called Tonemapping. With Post Processing we can add additional effects like Vignette or Bloom, however we will focus on Tonemapping as it's the most transformative.
Note
The Post Processing can be obtained through the package manager. Download and install it in your project for this step.
Tonemapping is an effect that prevents the clipping of colors and highlights in brightness values, effectively expanding the dynamic range of your image. When a value reaches its full brightness it becomes white and there is no detail or color information preserved.
This allows you when lighting or shading your world to use either very saturated colors, or very bright light intensities, and all of the information will be preserved instead of clipping to white.
As an example, in the shop to make the sunlight feel strong we boosted the intensity. However, we can see that because it's so bright, the textures and colors in the sunlight have become pure white now.
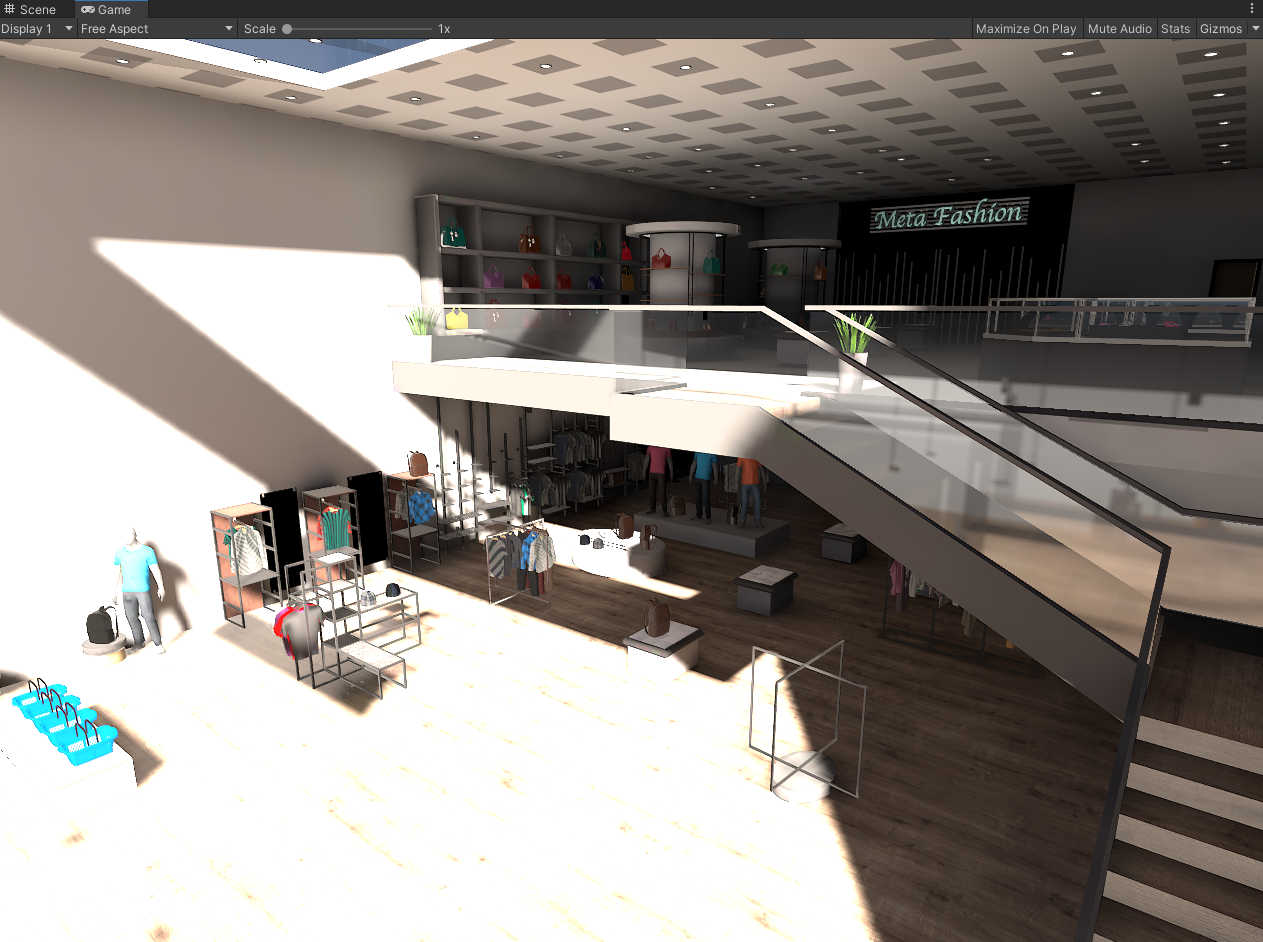
By utilizing Tonemapping, from the Post Processing package. We can preserve the colors from the overexposed parts of the scene and bring them back into range without having to lower the Directional Light intensity.
Note
To get post processing to show up in your scene, you will need to have a camera with a post processing layer. Massive Loop supports post processing, however to avoid camera conflict issues be sure to disable/delete the camera before building/uploading a world.
Conclusion⚓︎
That concludes the lighting tutorial. We have learned how to be conscious of how many lights we have. Also learning how to utilize lightmapping to our advantage to reach the target framerate for Virtual Reality, and in doing so the fidelity of the world has been increased dramatically.