Build A Massive Loop World⚓︎
Prerequisites⚓︎
Goal⚓︎
To create a bare minimum world and build it, while learning about the steps required to build a World, and the layout of the Massive Loop SDK.
Steps⚓︎
1 - Create your world on the Web⚓︎
Create your world definition on the web.
Open the massive loop website and login to your account. In Worlds tab, select My Worlds and click on Create. Fill out the information on the form about your world. You can come back anytime to edit this information.
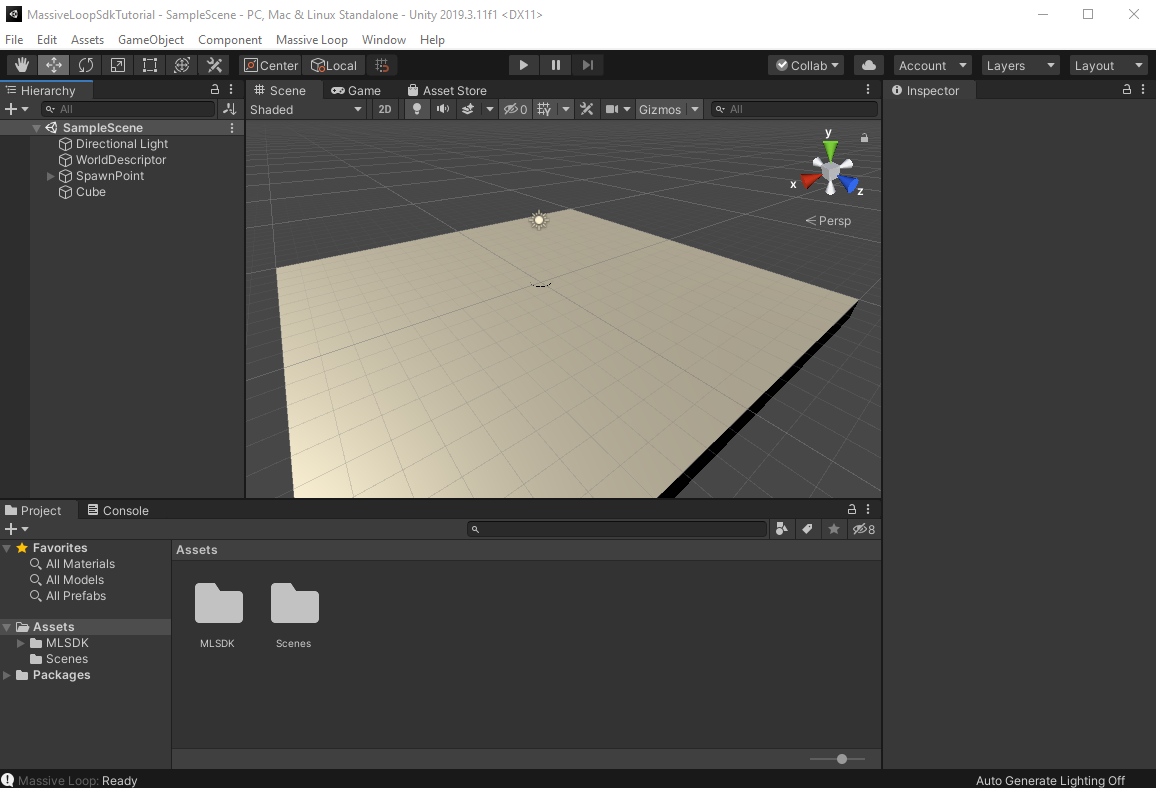
2 - Create an empty scene⚓︎
Open the Unity Editor with SDK installed and create a new scene and save the scene.
Note that when creating a new Unity Project, Unity creates a default scene named SampleScene. You can use this for creating your world, but you can also rename it, or create a new scene if desired.
Warning
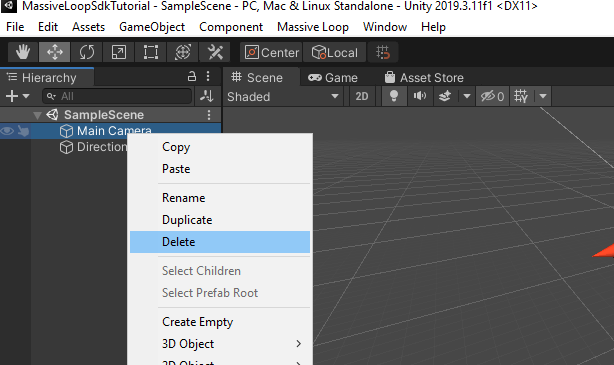
Remove the default Camera from sample scene. When building a world, you should avoid adding any cameras to your scenes. This will cause render and audio conflicts with players which will be instantiated to your world on run time.
However, it's acceptable to use cameras that render to a Render Texture to create screens, but be sure that these cameras don't have an AudioListener component so it doesn't conflict with Massive Loop cameras.
Right Click on Main Camera and click Delete.
3 - Add WorldDescriptor and SpawnPoints to the scene.⚓︎
World Descriptor:⚓︎
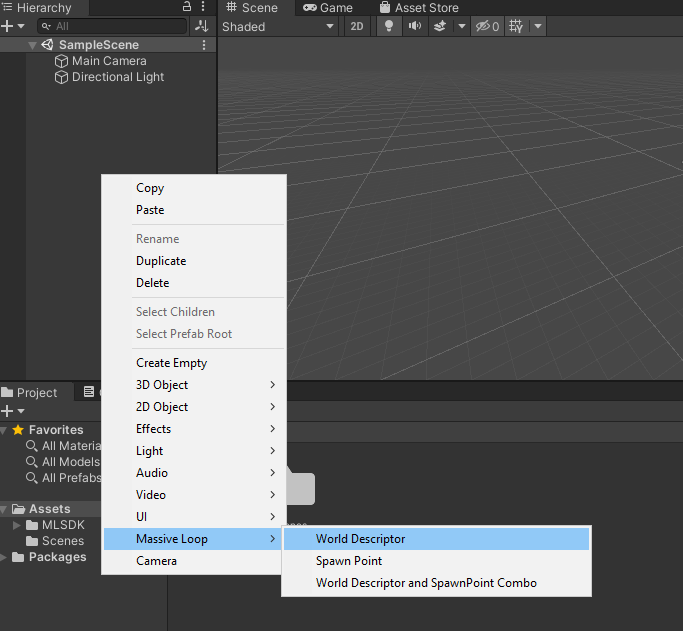
Every scene in Massive Loop requires a WorldDescriptor object.
To add one, right-click in scene hierarchy and select: Massive Loop > World Descriptor.
Warning
Do not add more than one World Descriptor in a scene. One is all you need.
Spawn Location⚓︎
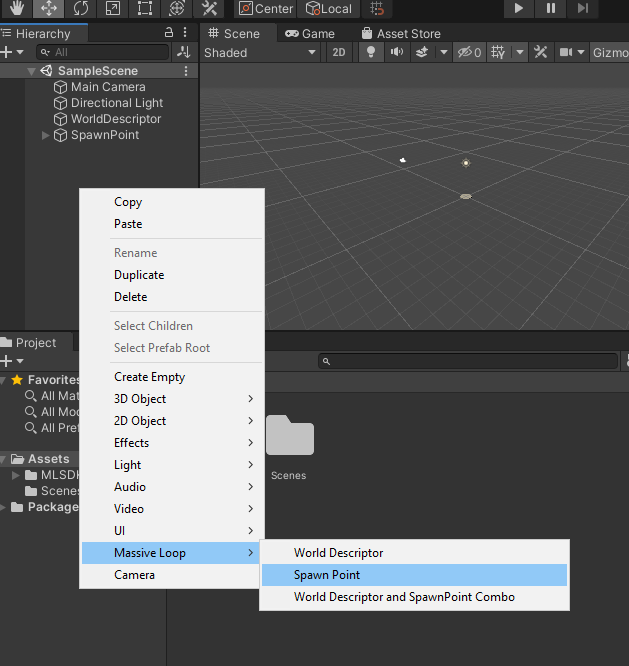
Spawn Locations are game objects which the client used to spawn players to the scene. You can have as many spawn locations as you like. Spawn Locations are not necessary but highly recommended. When there are no spawn locations in a scene, the World Descriptor will be used as a spawn location.
To add a Spawn Location, right-click in scene hierarchy and select :
Massive Loop > Spawn Point
Be careful, if you do not include a spawn point in the scene, make sure that the World Descriptor is in a suitable location in your scene for a player to spawn in.
Important: You need to add your spawn point in the World Descriptor list!
To add spawn points to the World Descriptor list,
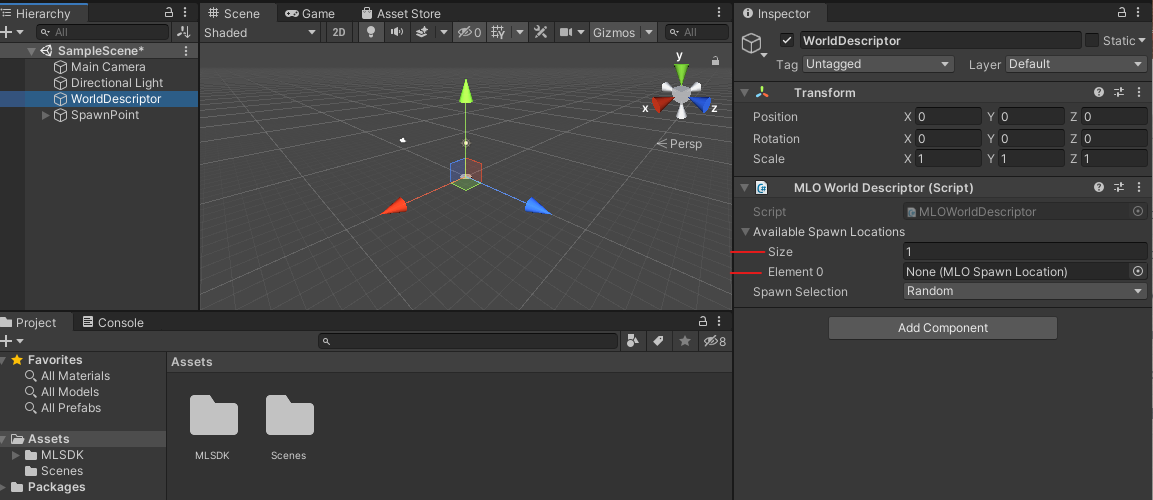
First, click the World Descriptor object in the scene hierarchy.
In the World Descriptor Inspector, under MLO World Descriptor, Open the Available Spawn Location dropdown, increase the size to 1, and drag and drop the spawn point from the hierarchy tab to Element 0 opened fields.
Drag and drop:
You can create as many spawn points as you want. Just increase the size and drag and drop the spawn points.
An Easy shortcut!⚓︎
You can do all this with the press of a single button.
Right-click on scene hierarchy and select Massive Loop > World Descriptor and Spawn Point Combo.
This will add both a World Descriptor and a Spawn Location and add it to the world descriptor's list automatically.
4 - Build the world⚓︎
When you finally finished constructing the scene to your liking, it's time to make a build.
For this purpose of the tutorial, a Cube game object was positioned at (0, -0.5, 0), and scaled to (20, 1, 20). The game object also has a BoxCollider component to prevent players from falling through the platform when they spawn into the world.
Now Open the Massive Loop Control Panel and log in to your account.
On top menu: Massive Loop > Control Panel
After you logged in, open the Worlds tab and select the world you want to build from the list.
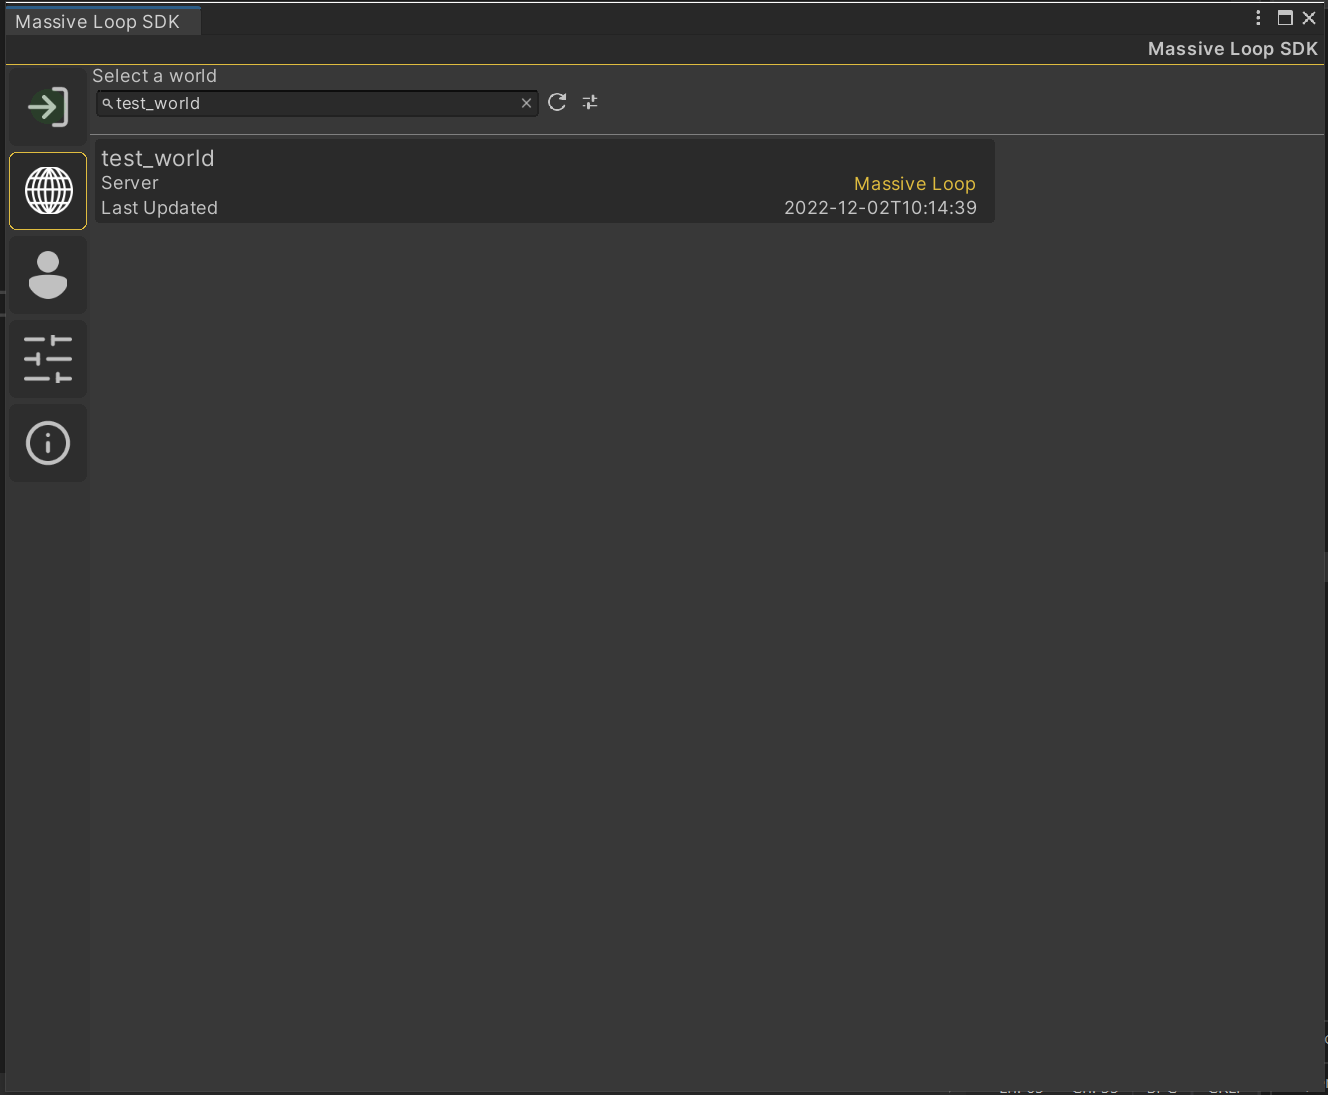
After selecting the world, you will be prompted by the final build page.
Here you can select either Build and Run to run a local test, or Build and Upload to perform a full build that uploads to the Massive Loop servers.
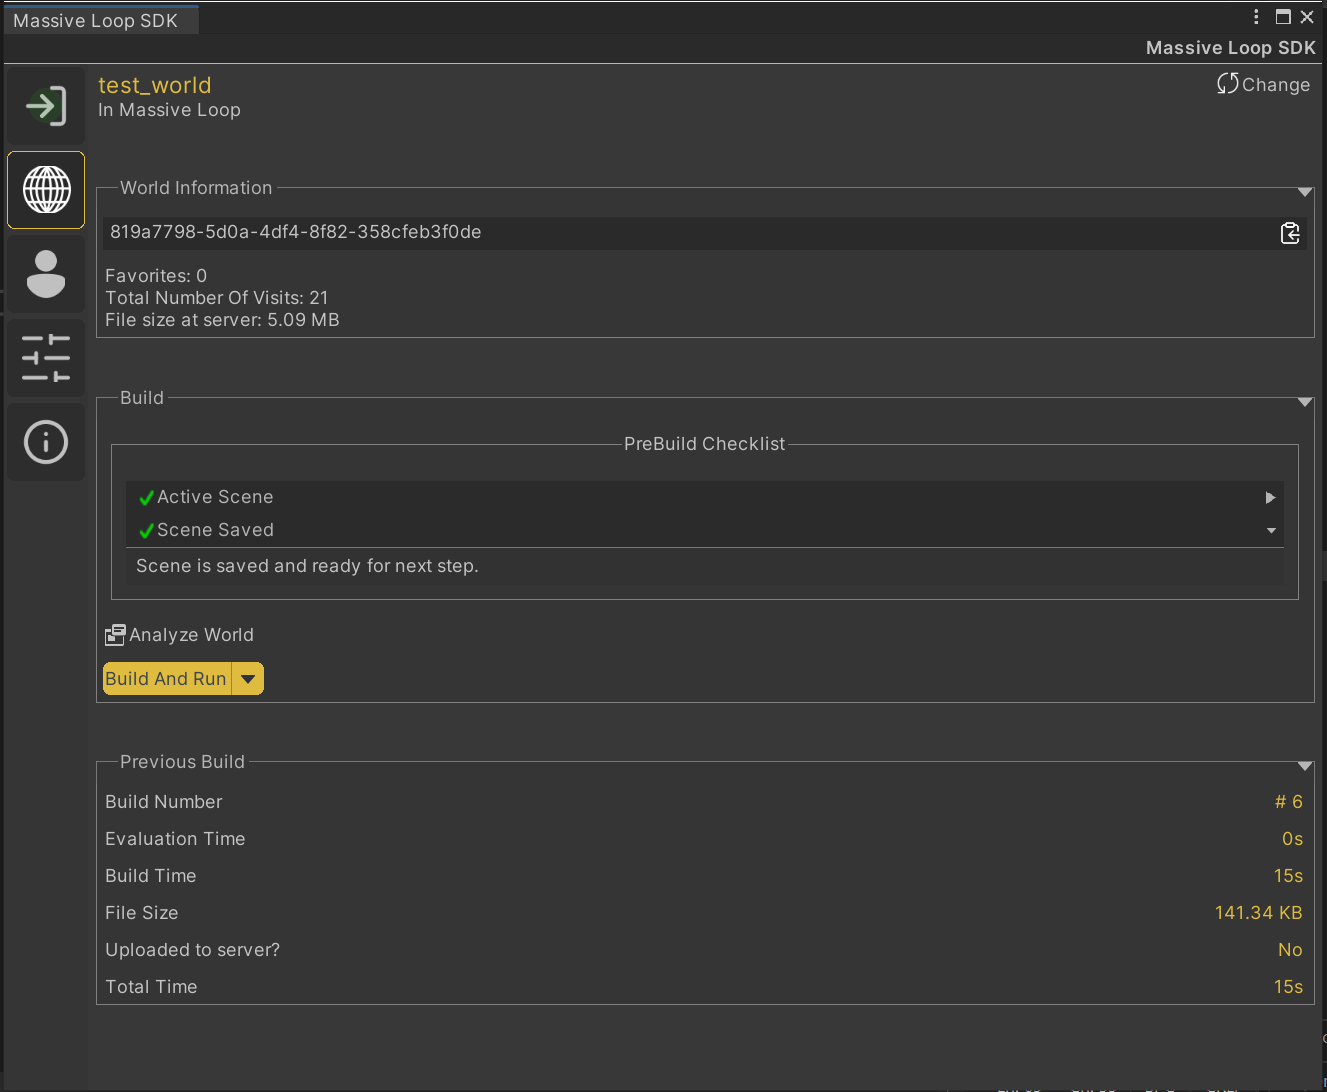
World Information⚓︎
This section shows the Name and GUID of the selected world. You can change the world by pressing Change.
PreBuild Checklist⚓︎
Before any build, the SDK must perform a pre-build check of scenes and assets. Any errors and warnings will be shown here.
Analyze World⚓︎
You can initiate a manual pre-build check by clicking this button. This will checks the scene and all the assets to make sure everything is in order for a build. Any issue will be shown on a evaluation summary pop-up window.
Build And Run⚓︎
Will build the world and open a local Massive Loop VR Client to test the world, without officially submitting it to the Server.
Run Last Build⚓︎
Locally runs the last successful build.
Build And Upload⚓︎
Builds and upload the world to the Massive Loop Server.
Note: Building the world takes a while.
Upload Last build⚓︎
Uploads the last successful build to Massive Loop Server.
Previous Build⚓︎
Shows information about the previous build.