Upload an Avatar⚓︎
When you have your avatar FBX model ready, uploading it to the Massive Loop is easy.
Prerequisites⚓︎
-
Have a Massive Loop Account.
-
Unity Editor with the Massive Loop SDK package installed. How to do that
- Have your avatar
.fbxmodel in T-Pose (Recommended) ready.
Note:⚓︎
This is not a tutorial on how to make an avatar model. There are plenty of tutorials out in internet on how to create a avatar. You may need to use a proper modelling software such as Blender™ .
Step 0: Create the Avatar Entry on Massive Loop website:⚓︎
Similar to the worlds, you need to create a new avatar in the Massive Loop website first. Here you input the required information for your avatar.
- Login to your account in massive loop website.
- Head to
Avatarstab. - Open
My Avatars - Press
Create - Fill the information about the avatar and click
Submit.
Step 1: Import model and unpack.⚓︎
You cannot upload the .fbx model directly. The model required to be unpacked and be in unity prefab format.
- Import the
.fbxmodel.
Textures not showing up for a fbx model?
For some .fbx model, you need to extract the textures from it. Check out this unity documentation Models: Materials tab. Click Extract Textures.
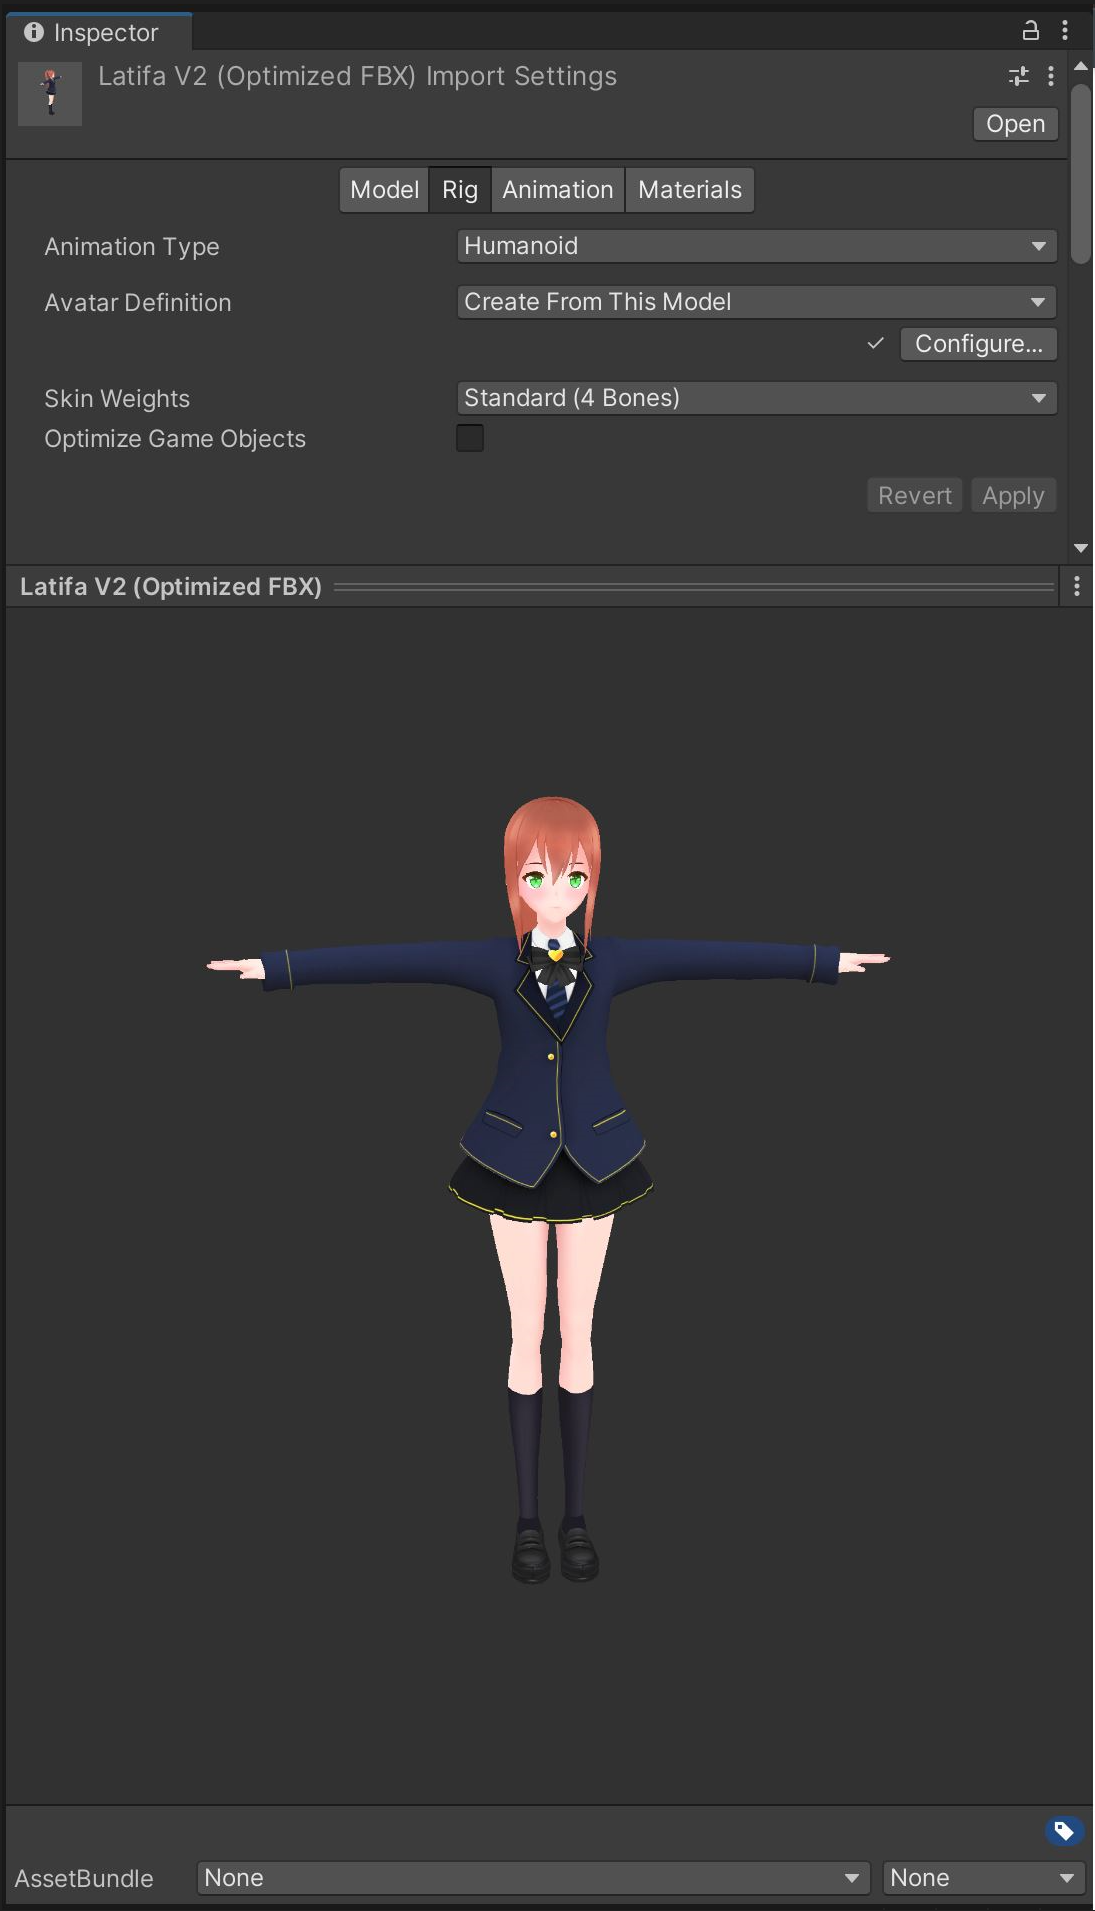
- Make sure that the avatar rig is set to humanoid. If not, set it to humanoid and press apply.
- [Optional, Maybe required] Set the model scale on Model Tab.
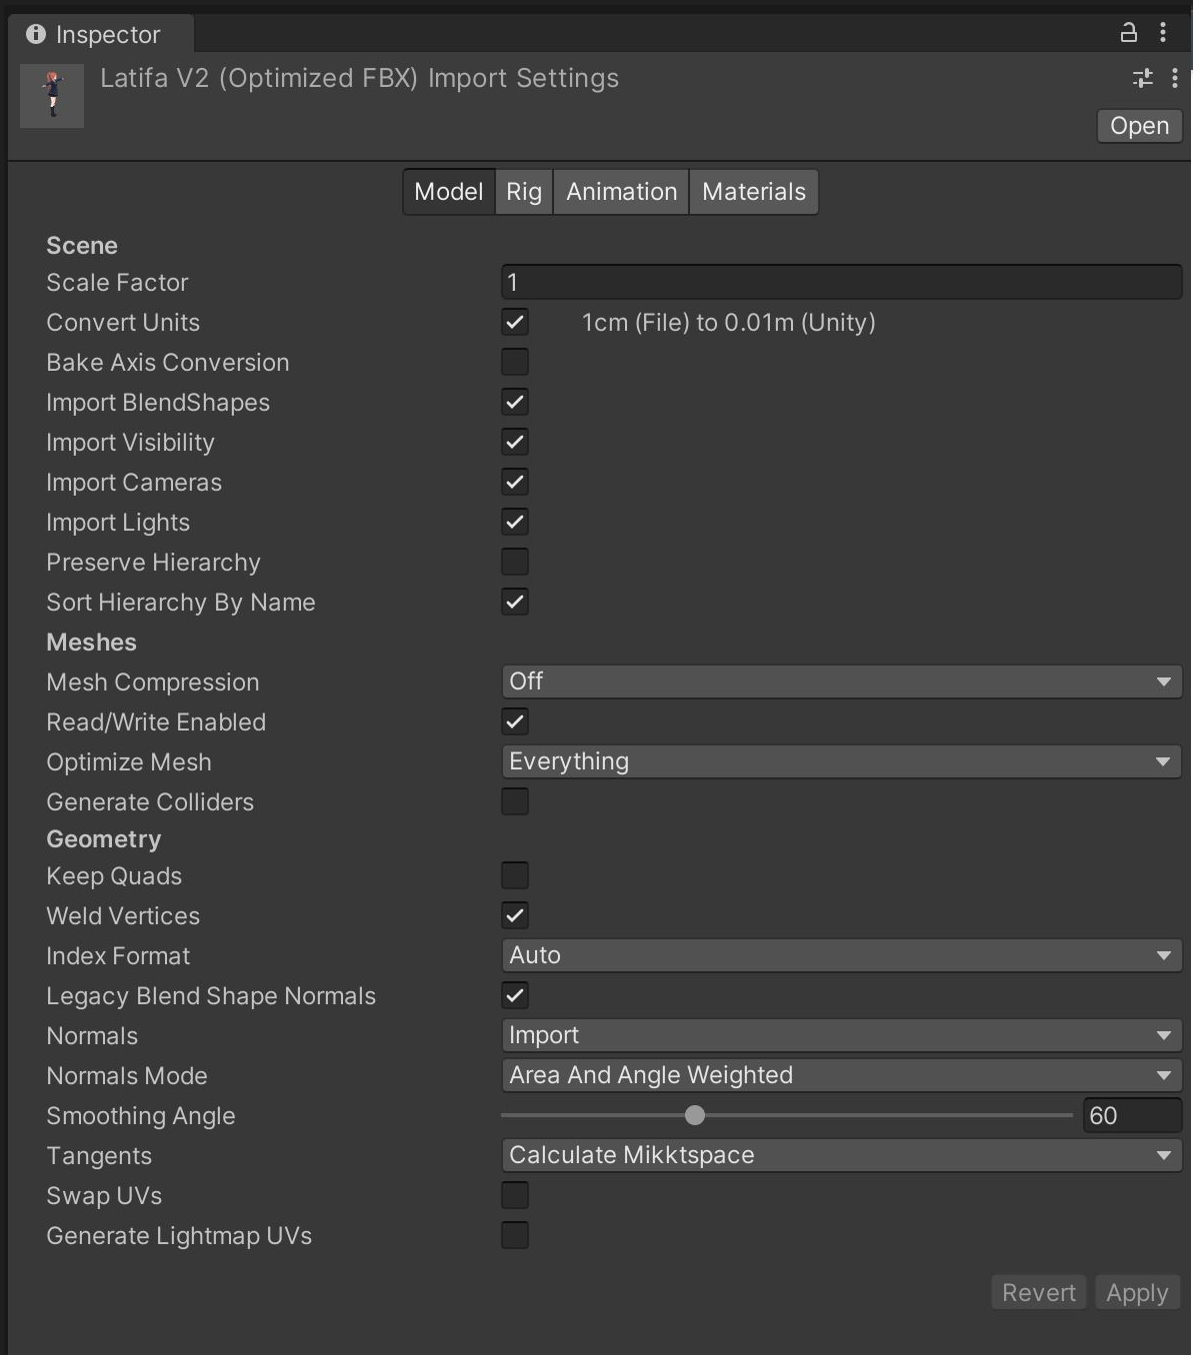
You may need to adjust this scale if the model is too big or too small. Remember that each unit in Massive Loop is 1 Meter.
-
The maximum allowed size for avatars is 5 meter in height.
-
The minimum allowed size for avatars is 0.5 meter in height.
- Drag the
.fbxmodel it to a (any) scene.
Make sure that the Model is facing toward + Z direction, and position to (0,0,0).
Then select the model in hierarchy, right click and select Unpack prefab completely
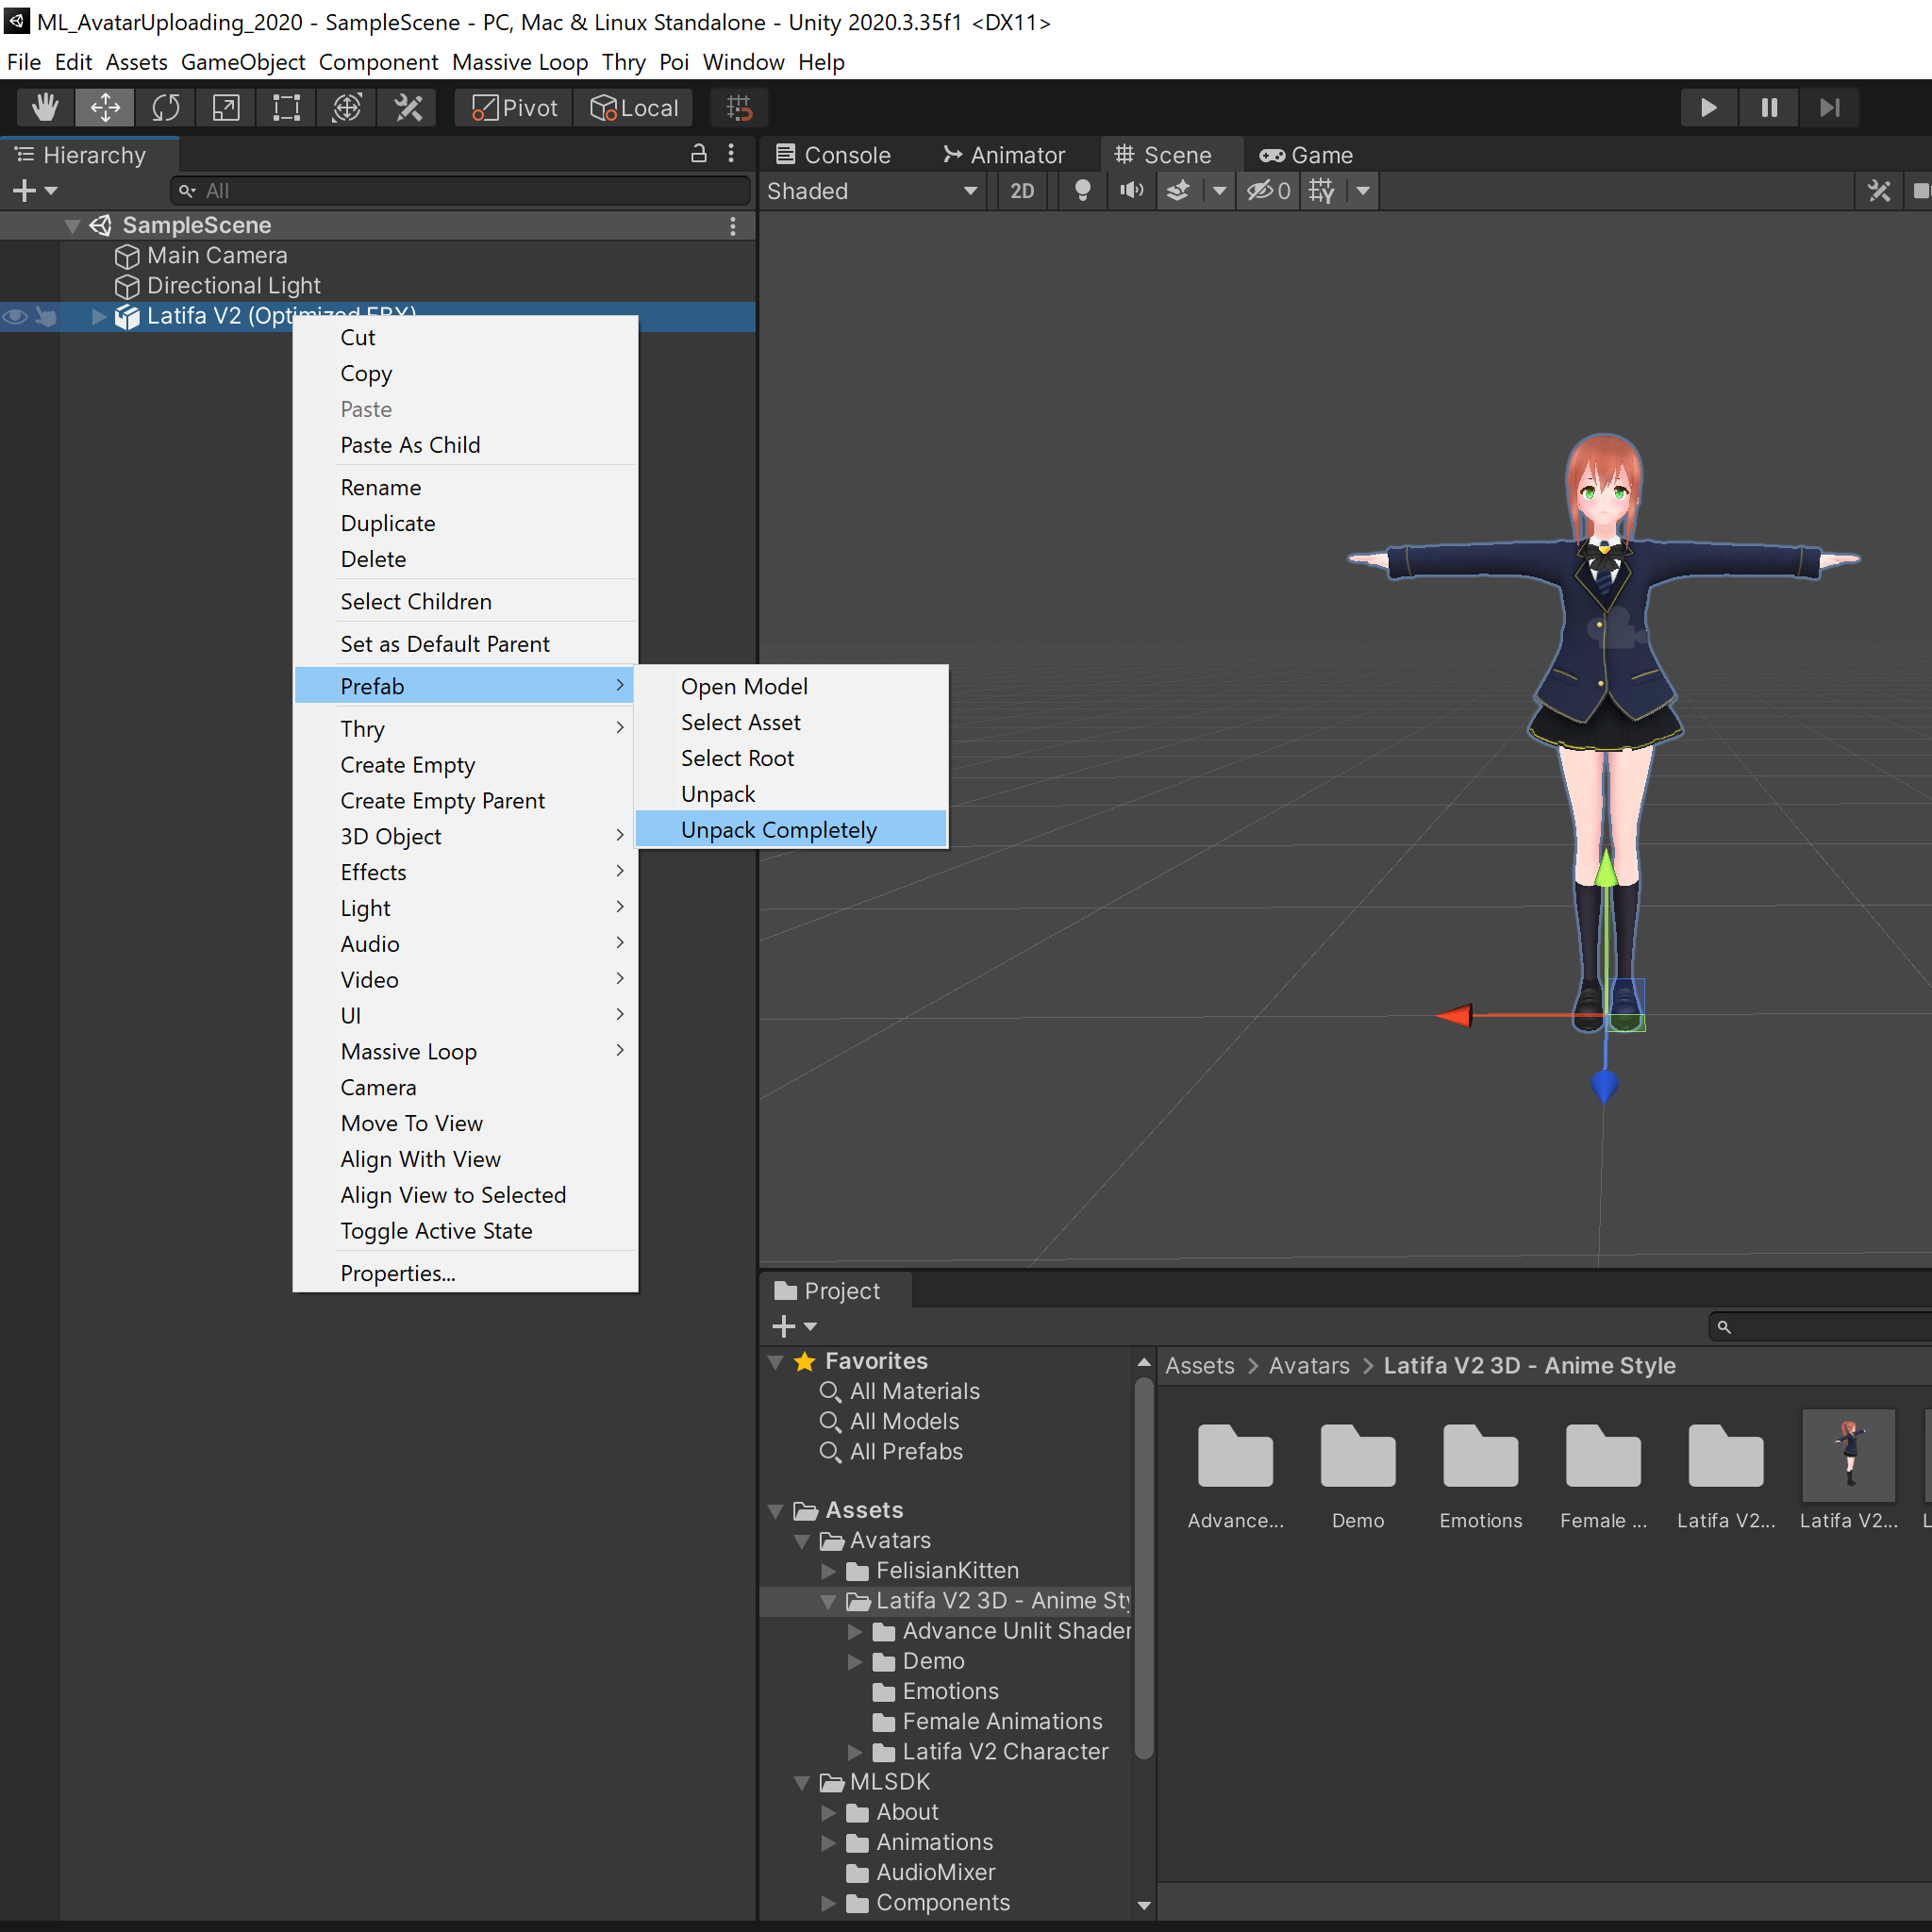
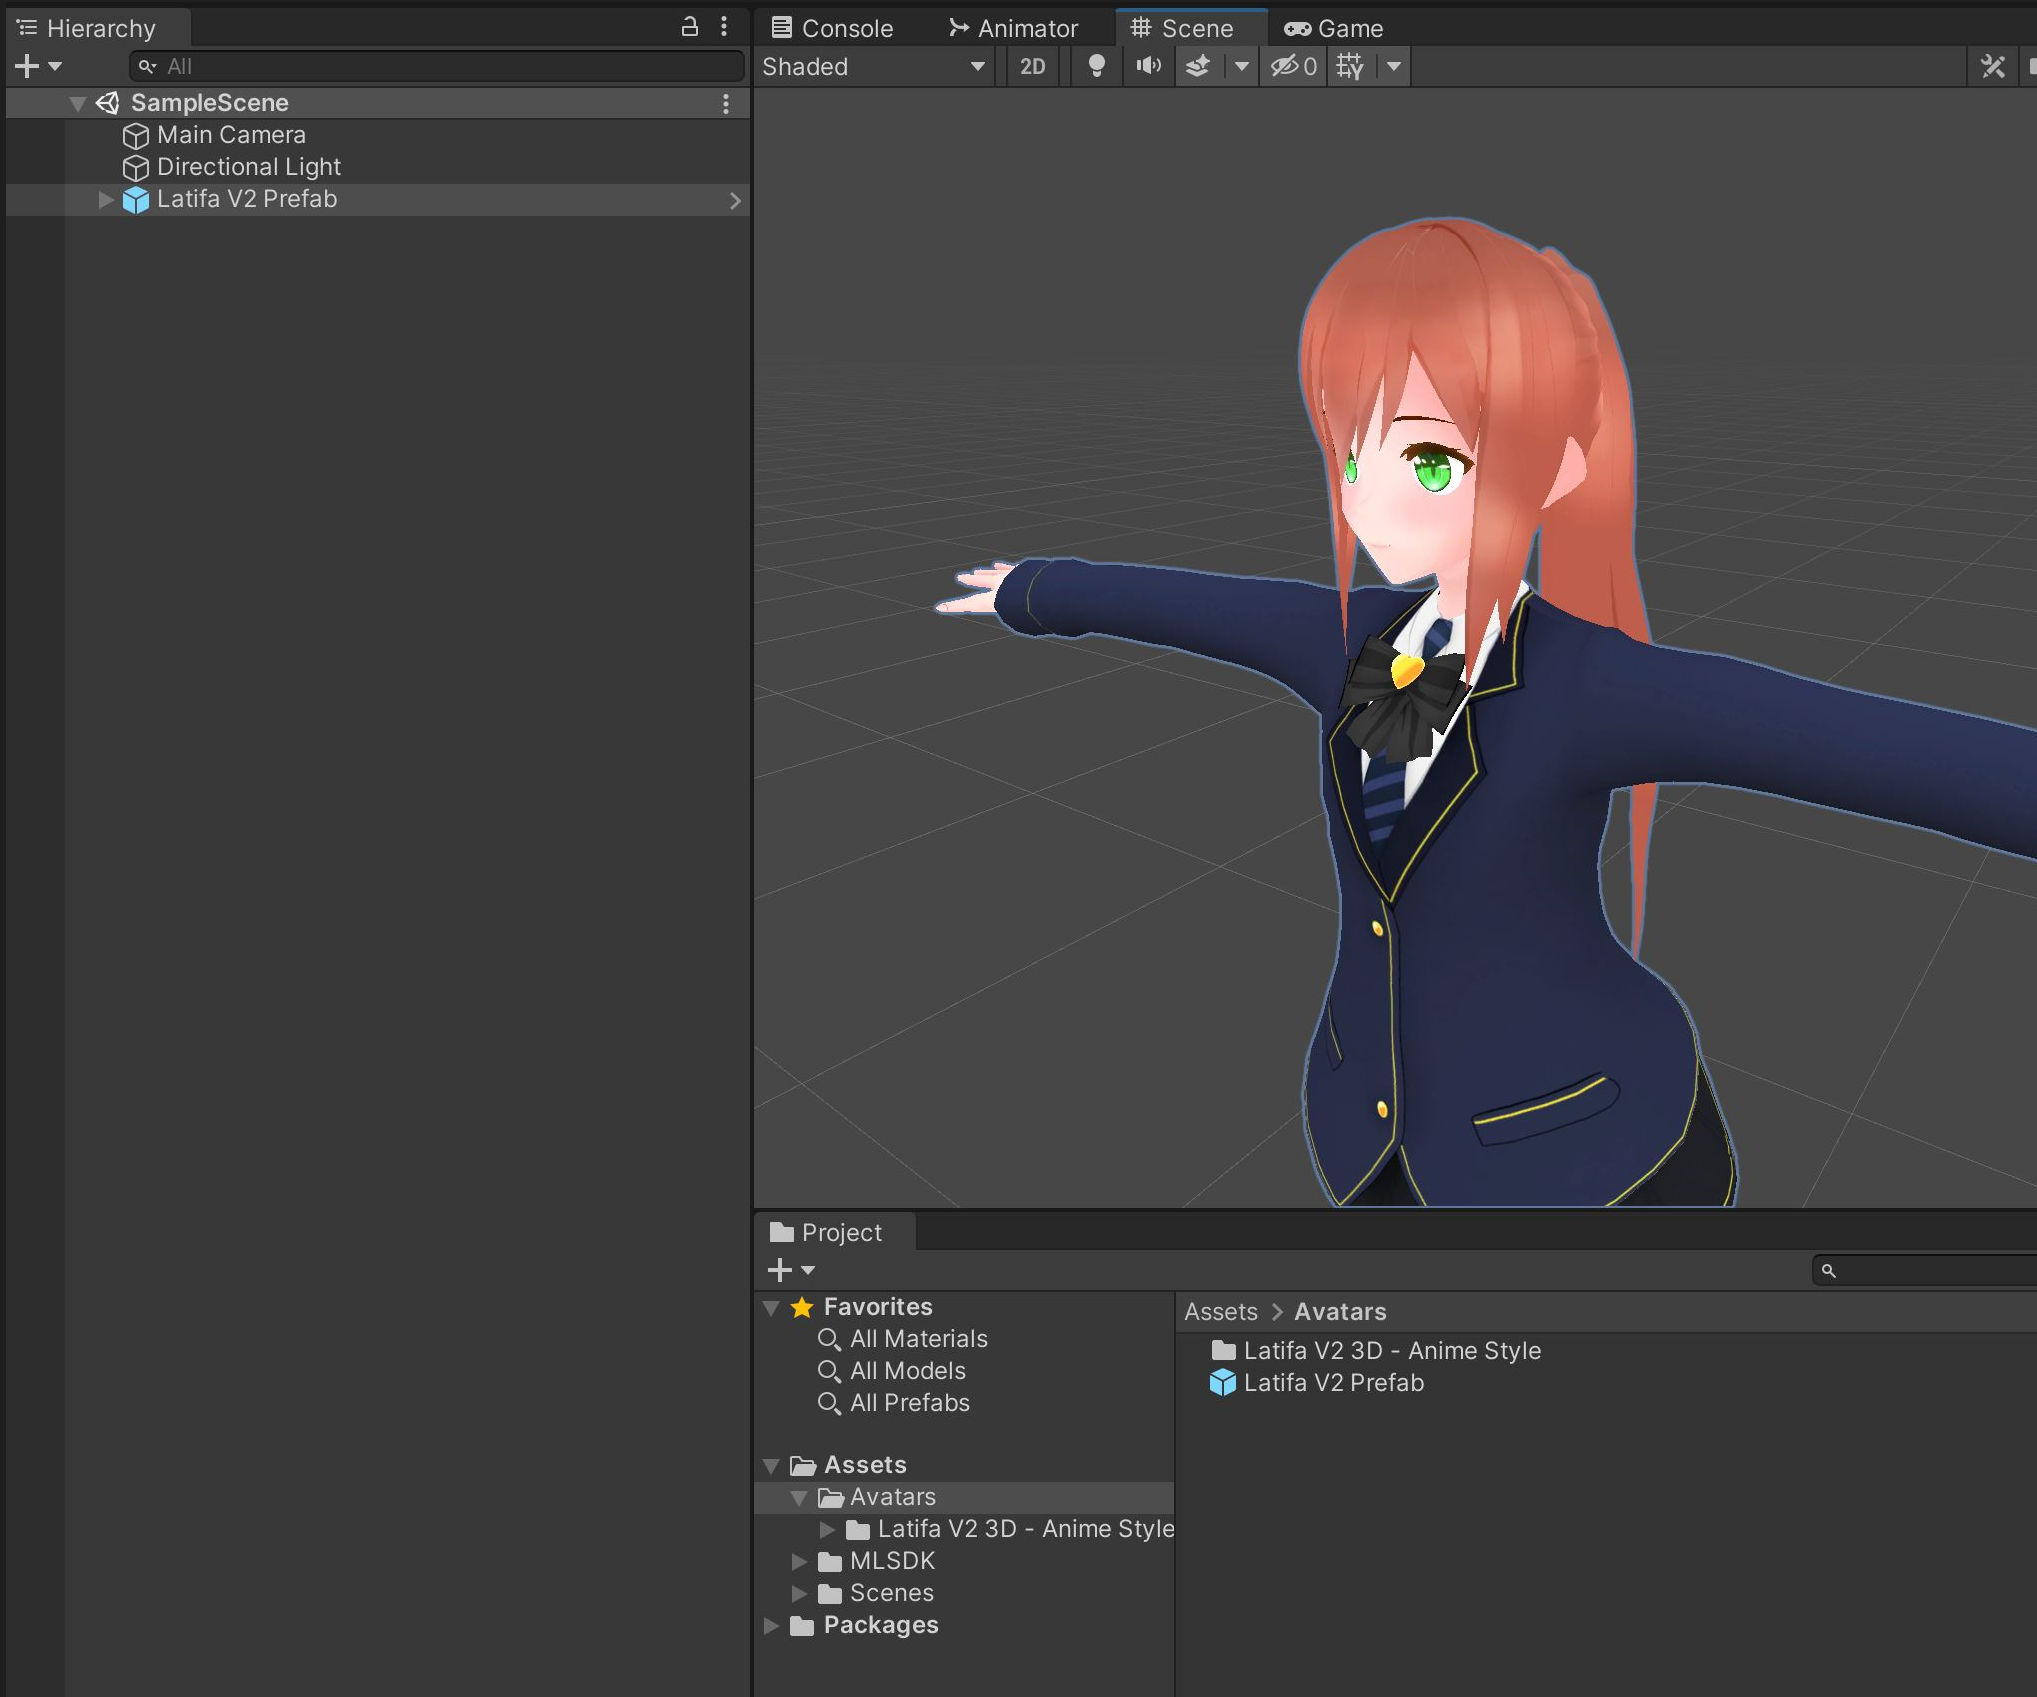
- Now drag back the avatar root game object back from scene to file explorer to create a Unity Prefab
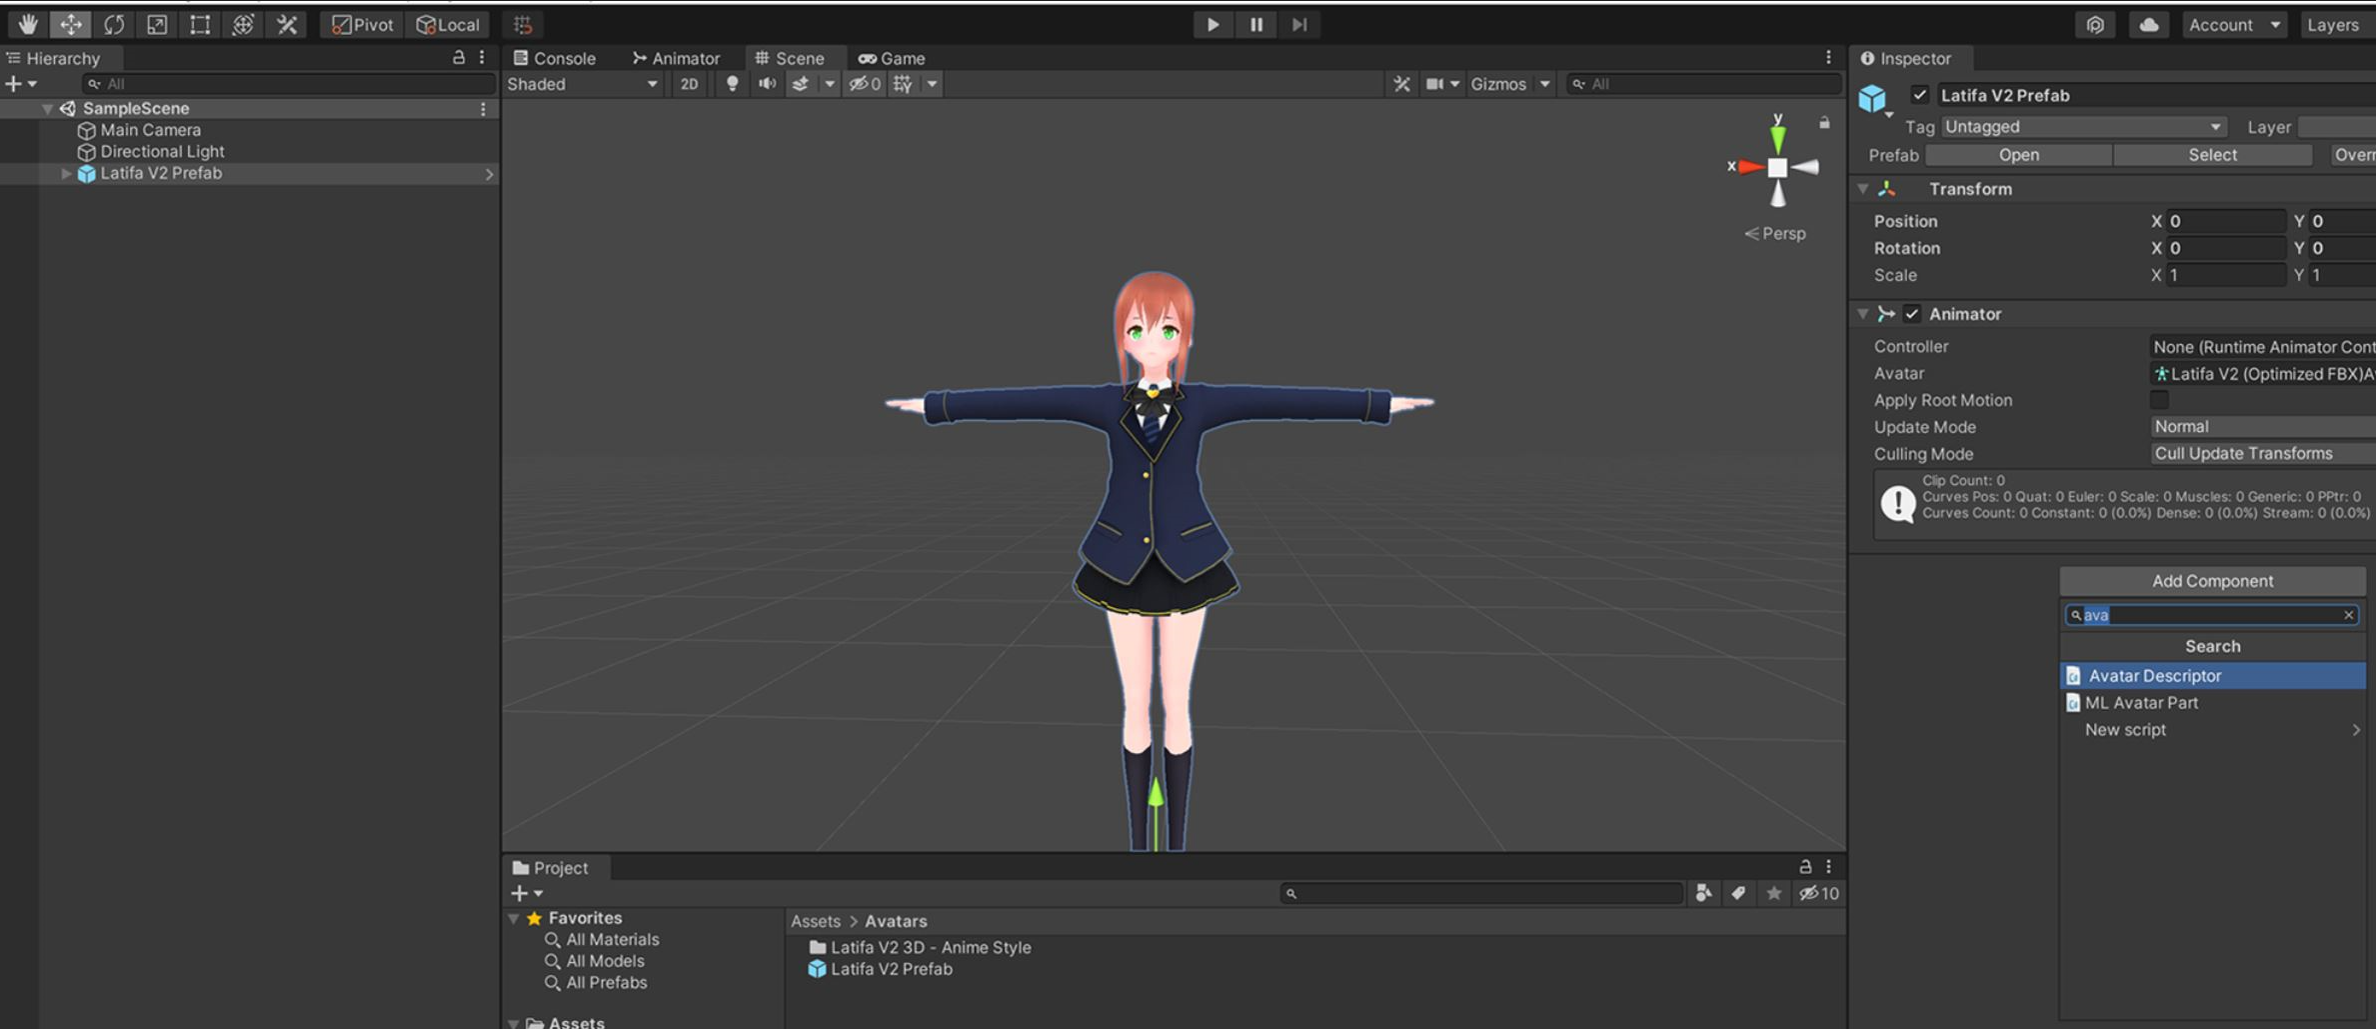
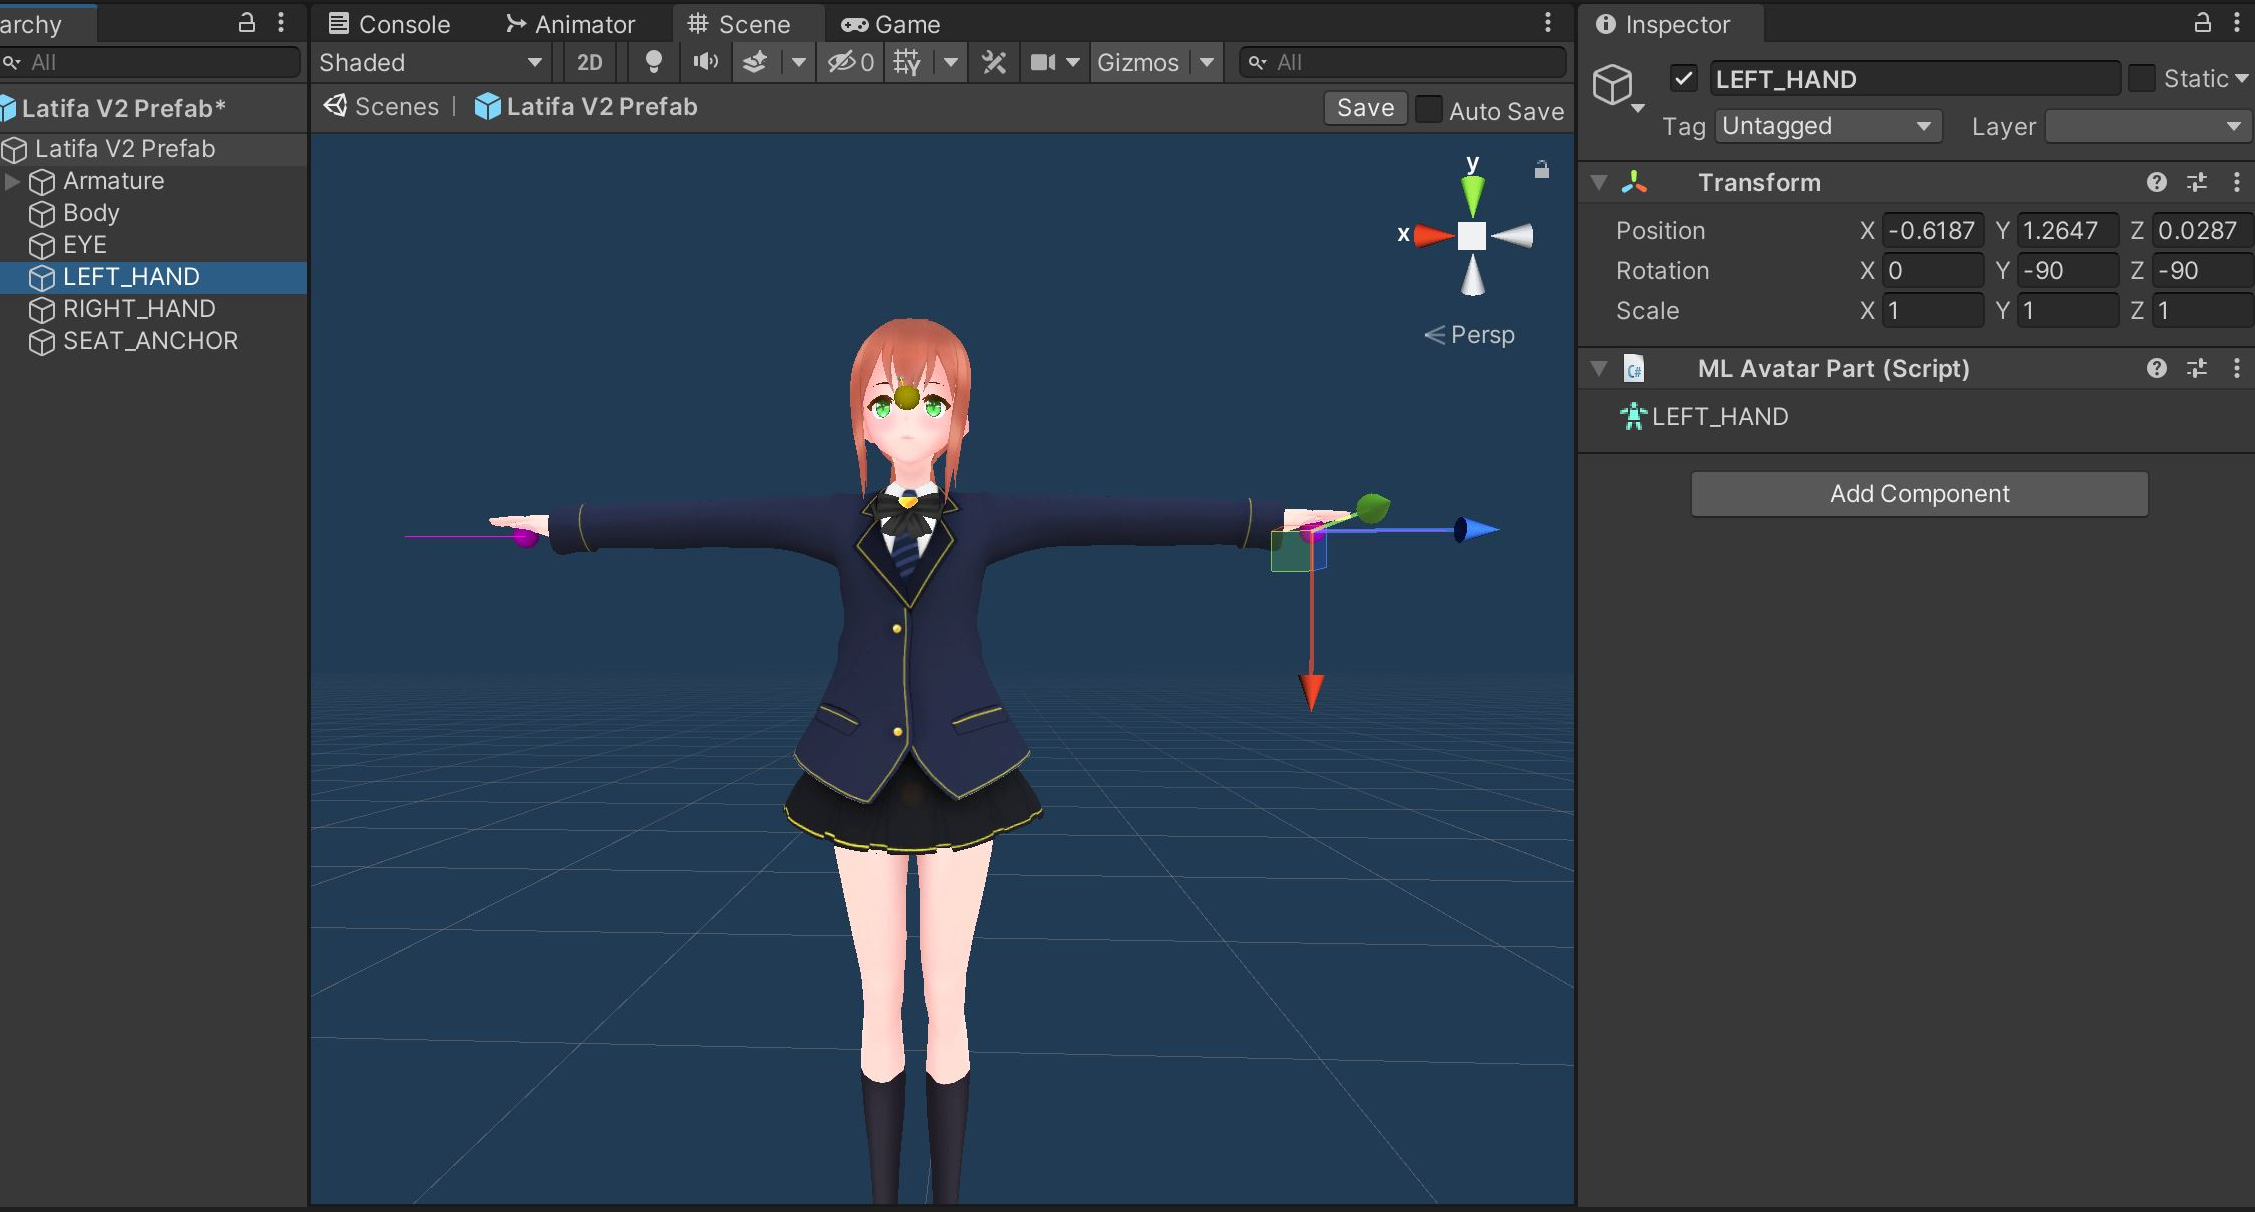
Step 2: Add Required component and parts to Prefab⚓︎
You need to add MLAvatarDescriptor component to prefab root object and assign a location to avatar head and hands.
- Open Avatar Prefab
- Add
Avatar Descriptorto Avatar Root object.
-
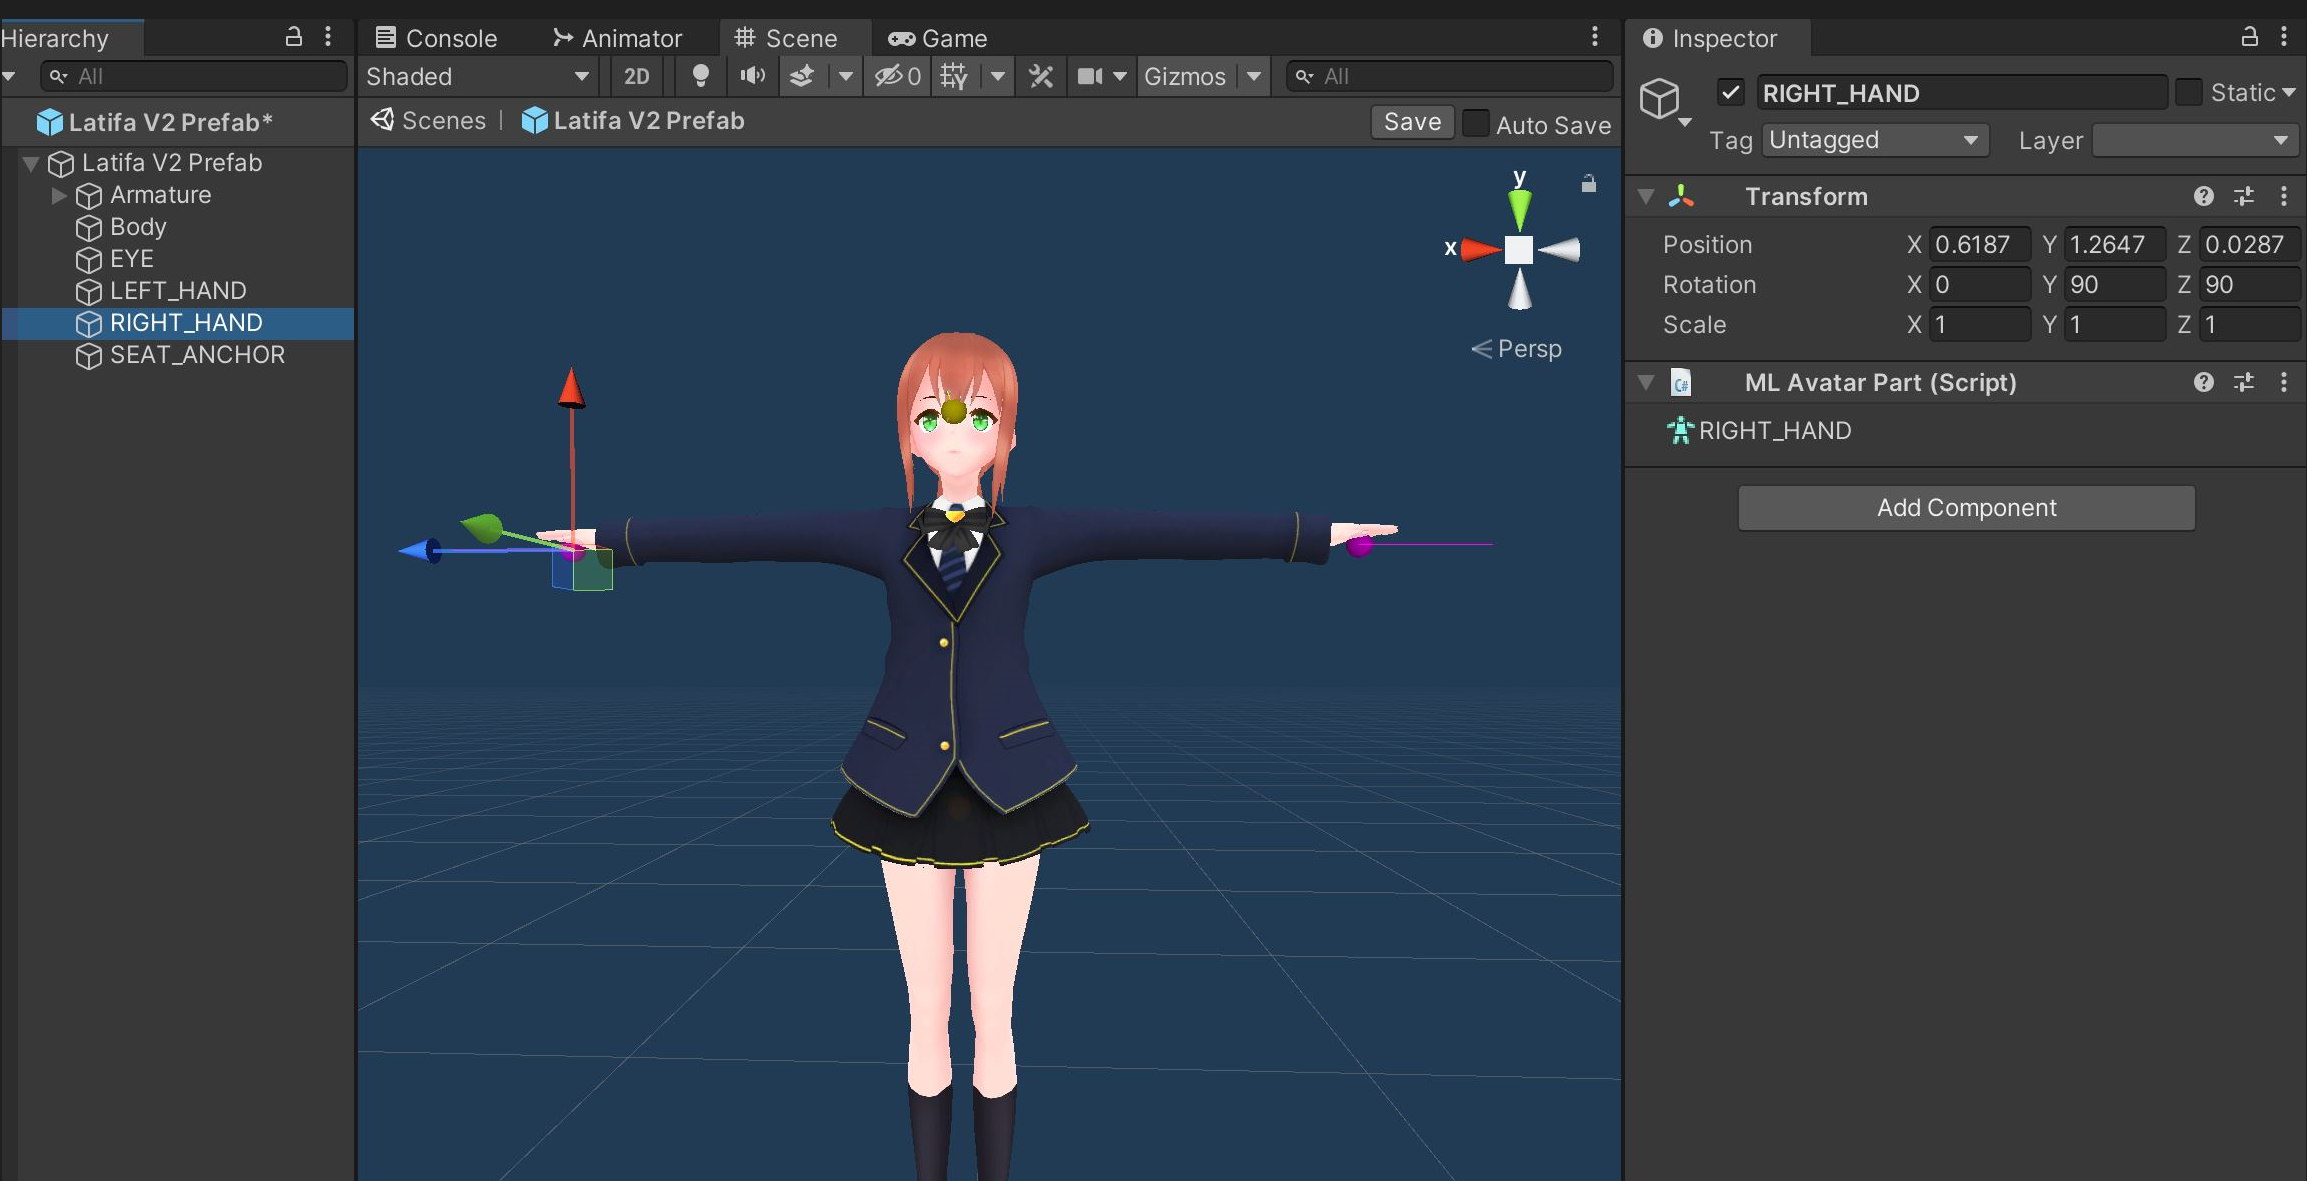
The Avatar Descriptor will create six empty game objects for Camera Position, Left Hand, Right Hand, L Laser Start, R Laser Start and Seat Anchor. Find these object in hierarchy and move / rotate them to appropriate locations within avatar. These objects parent must be the avatar root.
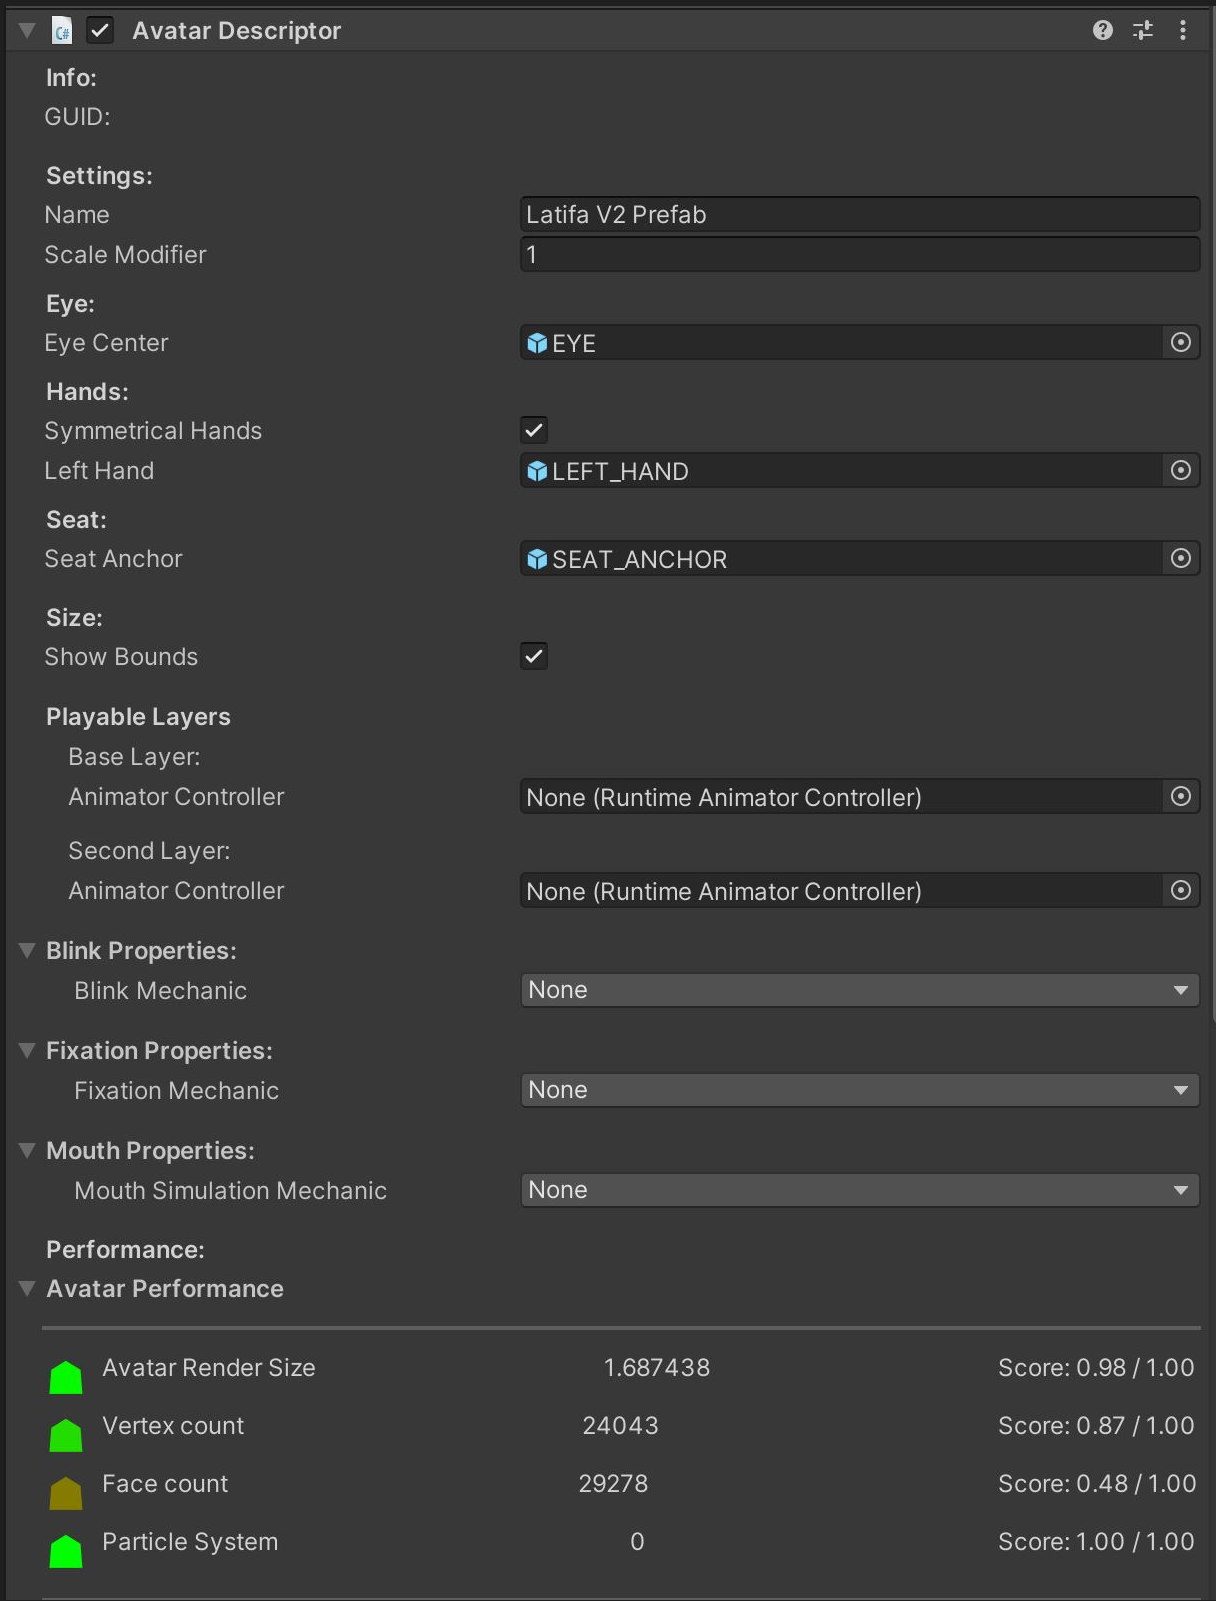
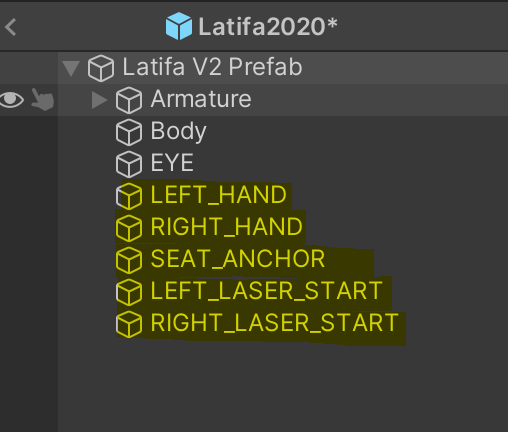
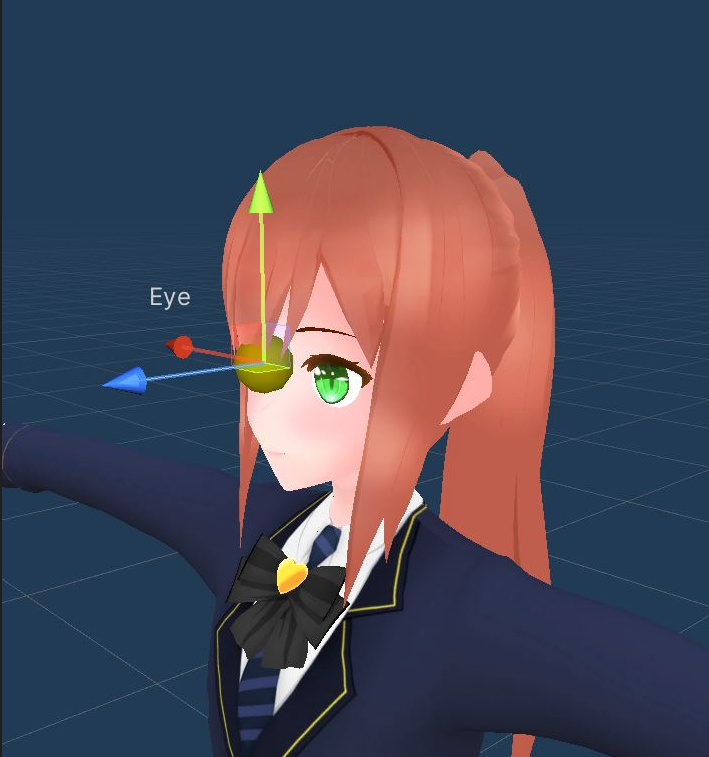
- EYE: The Eye will be shown as a yellow ball. Move the eye to be between the eyes of the avatar, clearing the head.
- LEFT_HAND
Move the Left Hand anchor to be between the thumb and the index finger. Rotate it such that it's +Z axis points in the direction of the fingers, and +Y axis points towards the thumb.
-
LEFT_LASER_START
Move the left Laser Start anchor to the index finger. Rotate it such that it's +Z axis points in the direction of the finger, and +Y axis points to global +Z axis.
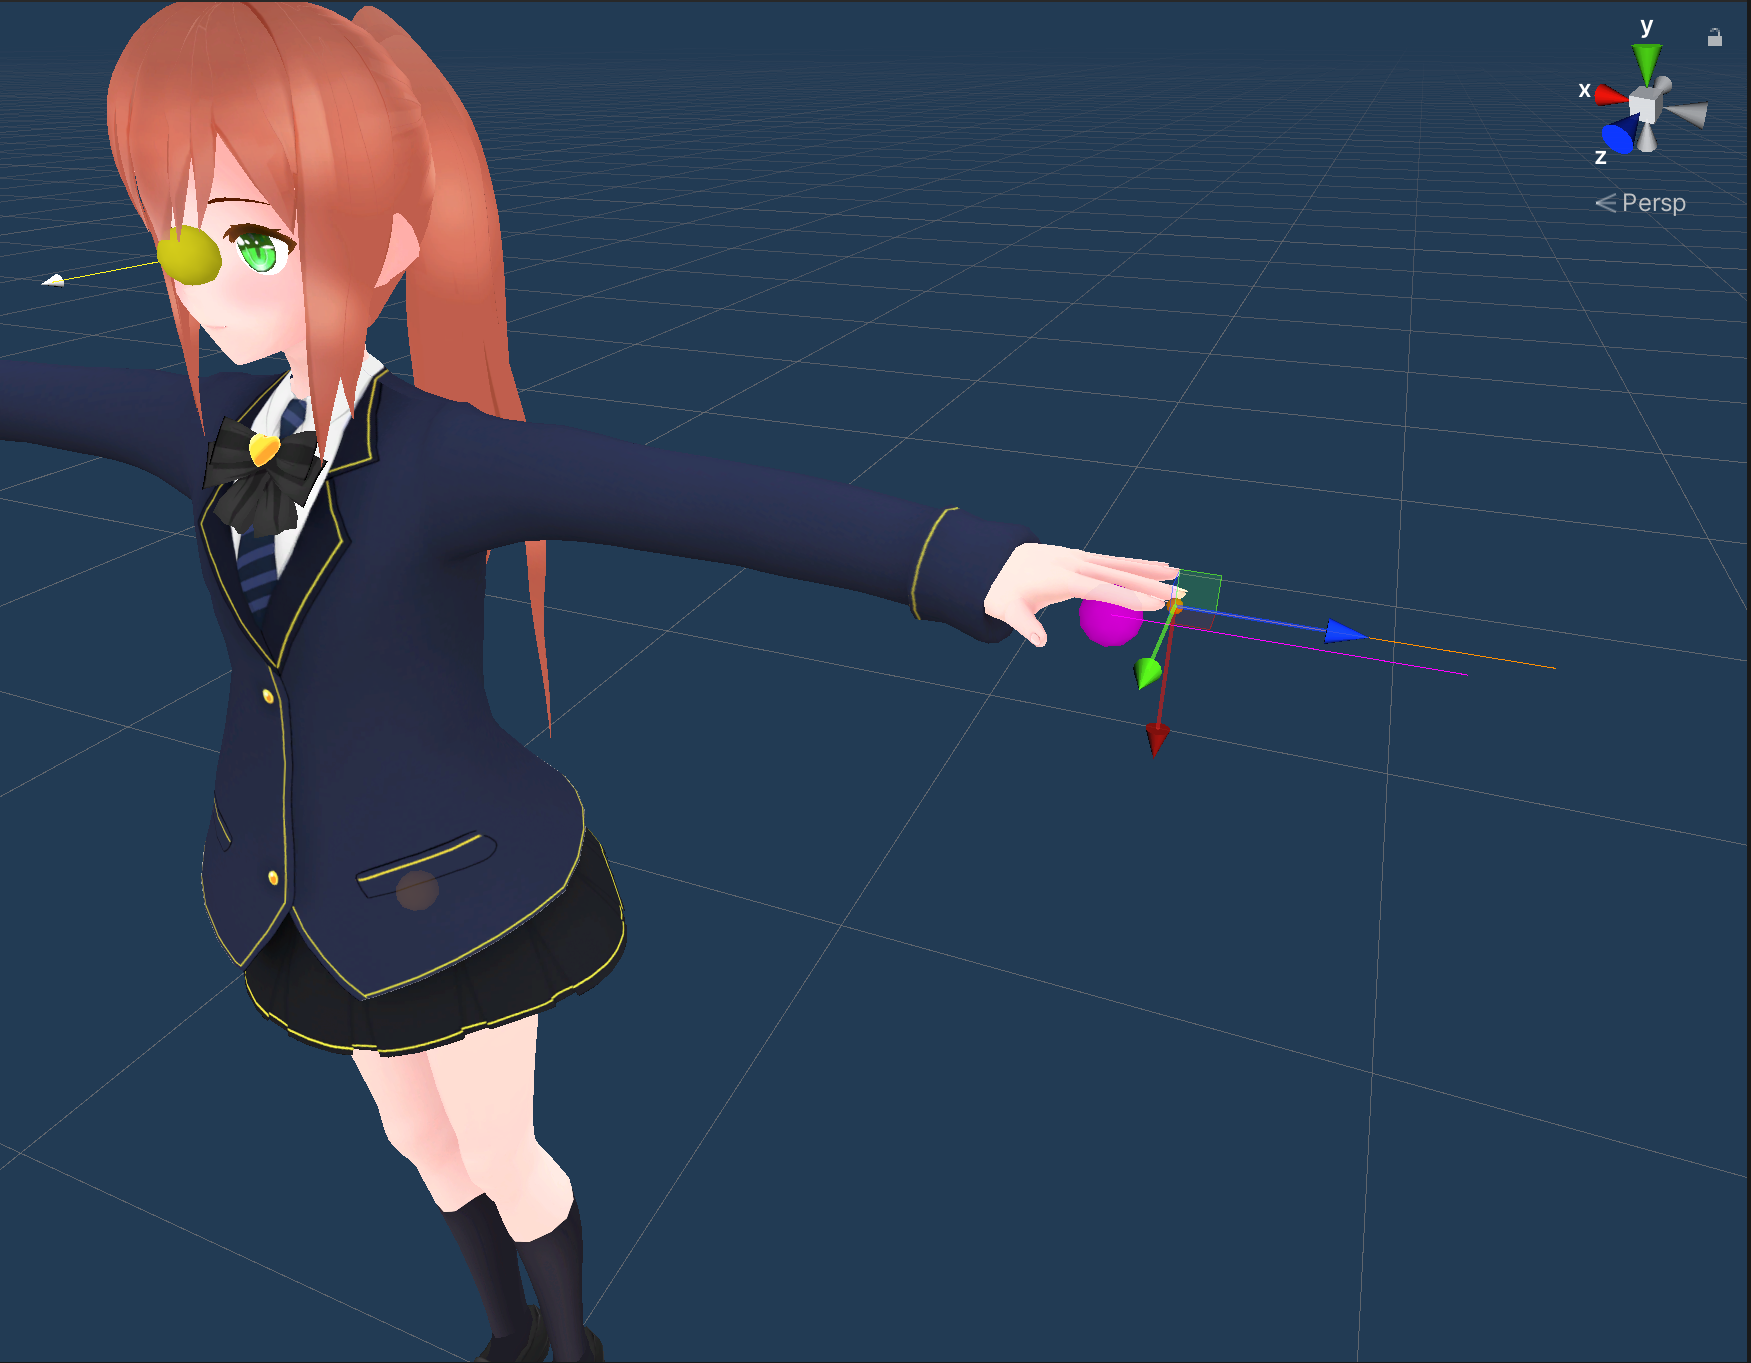
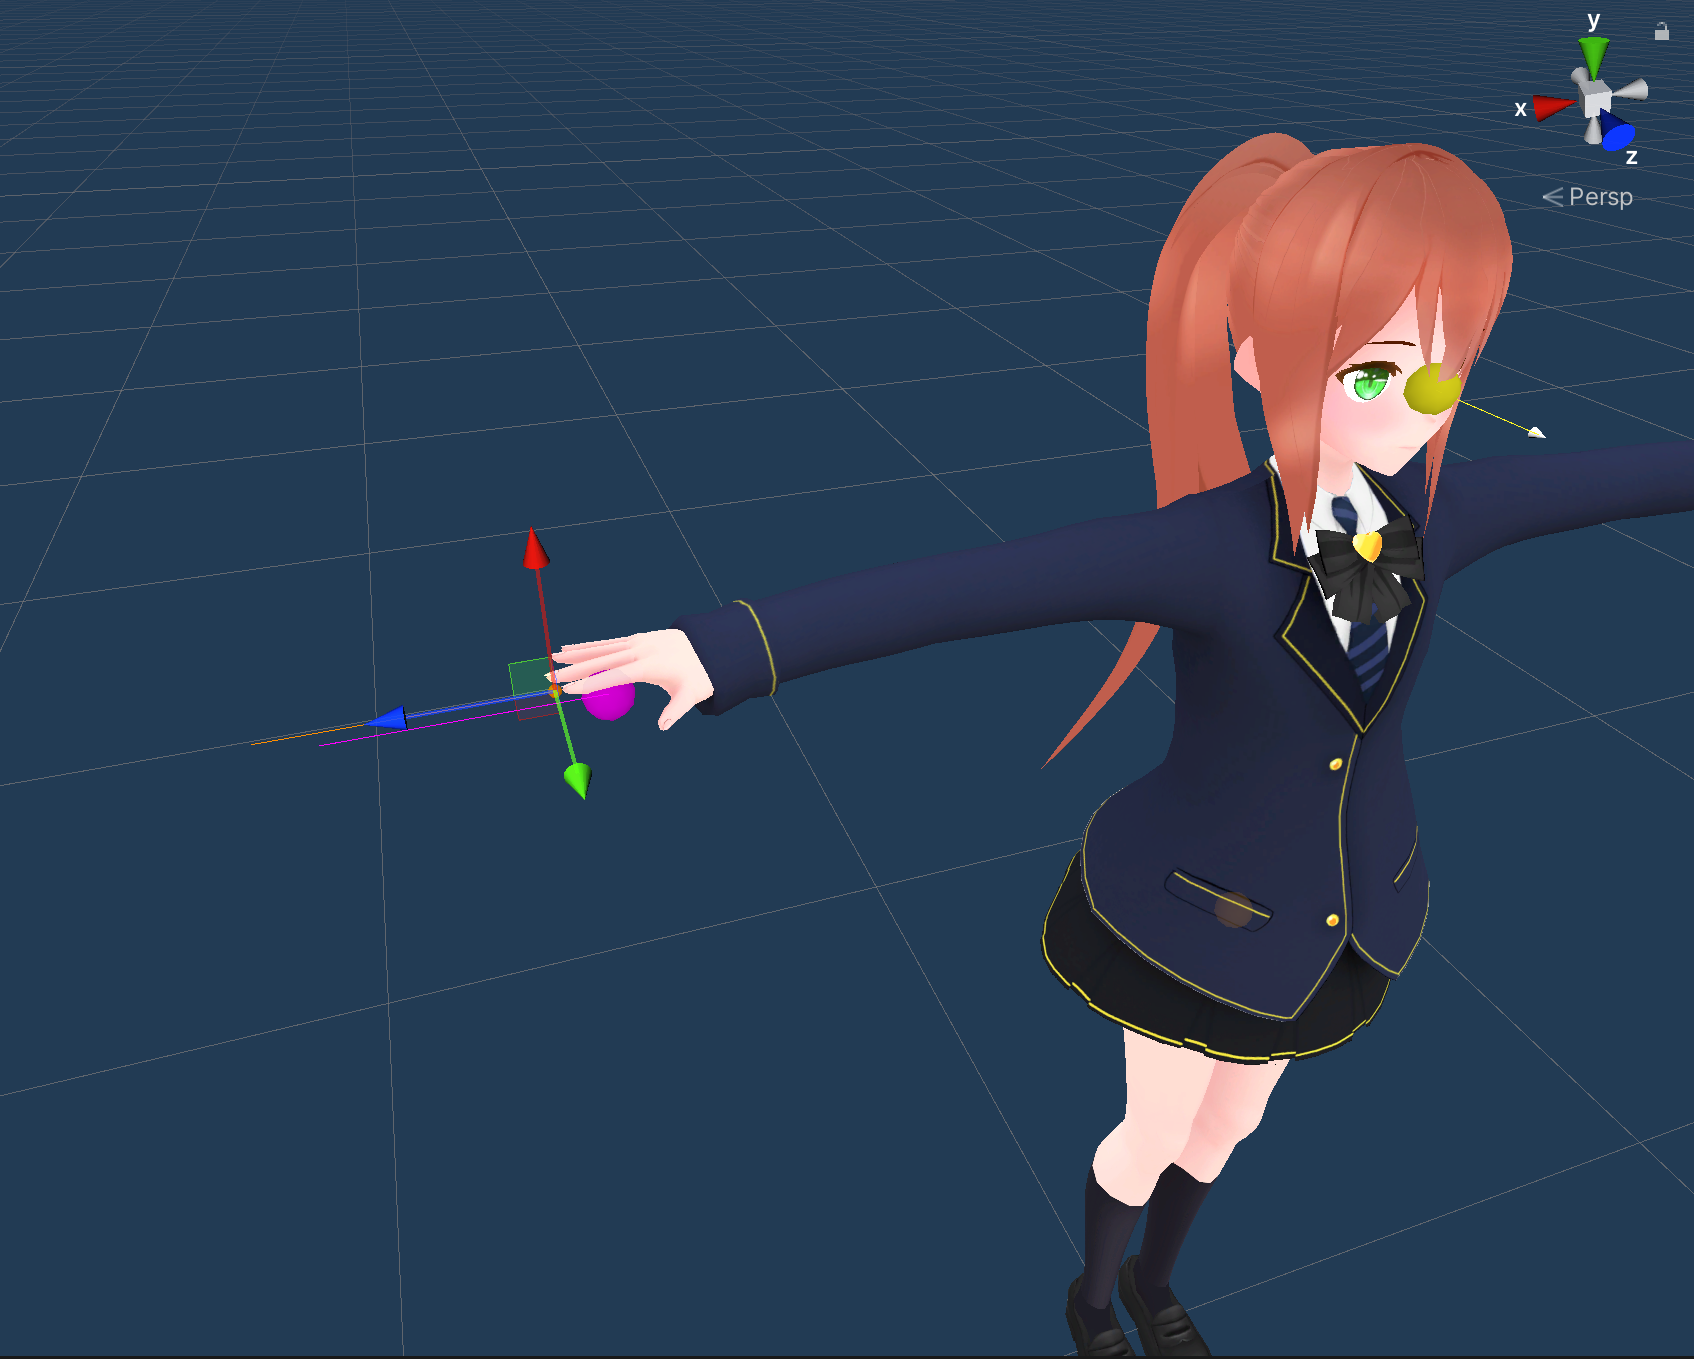
- RIGHT_HAND
Same as left hand.
-
RIGHT_LASER_START
Same as left hand.
Symmetric hands
If you select Symmetrical Hands option in Avatar Descriptor, adjusting the left hand will automatically adjust the right hand.

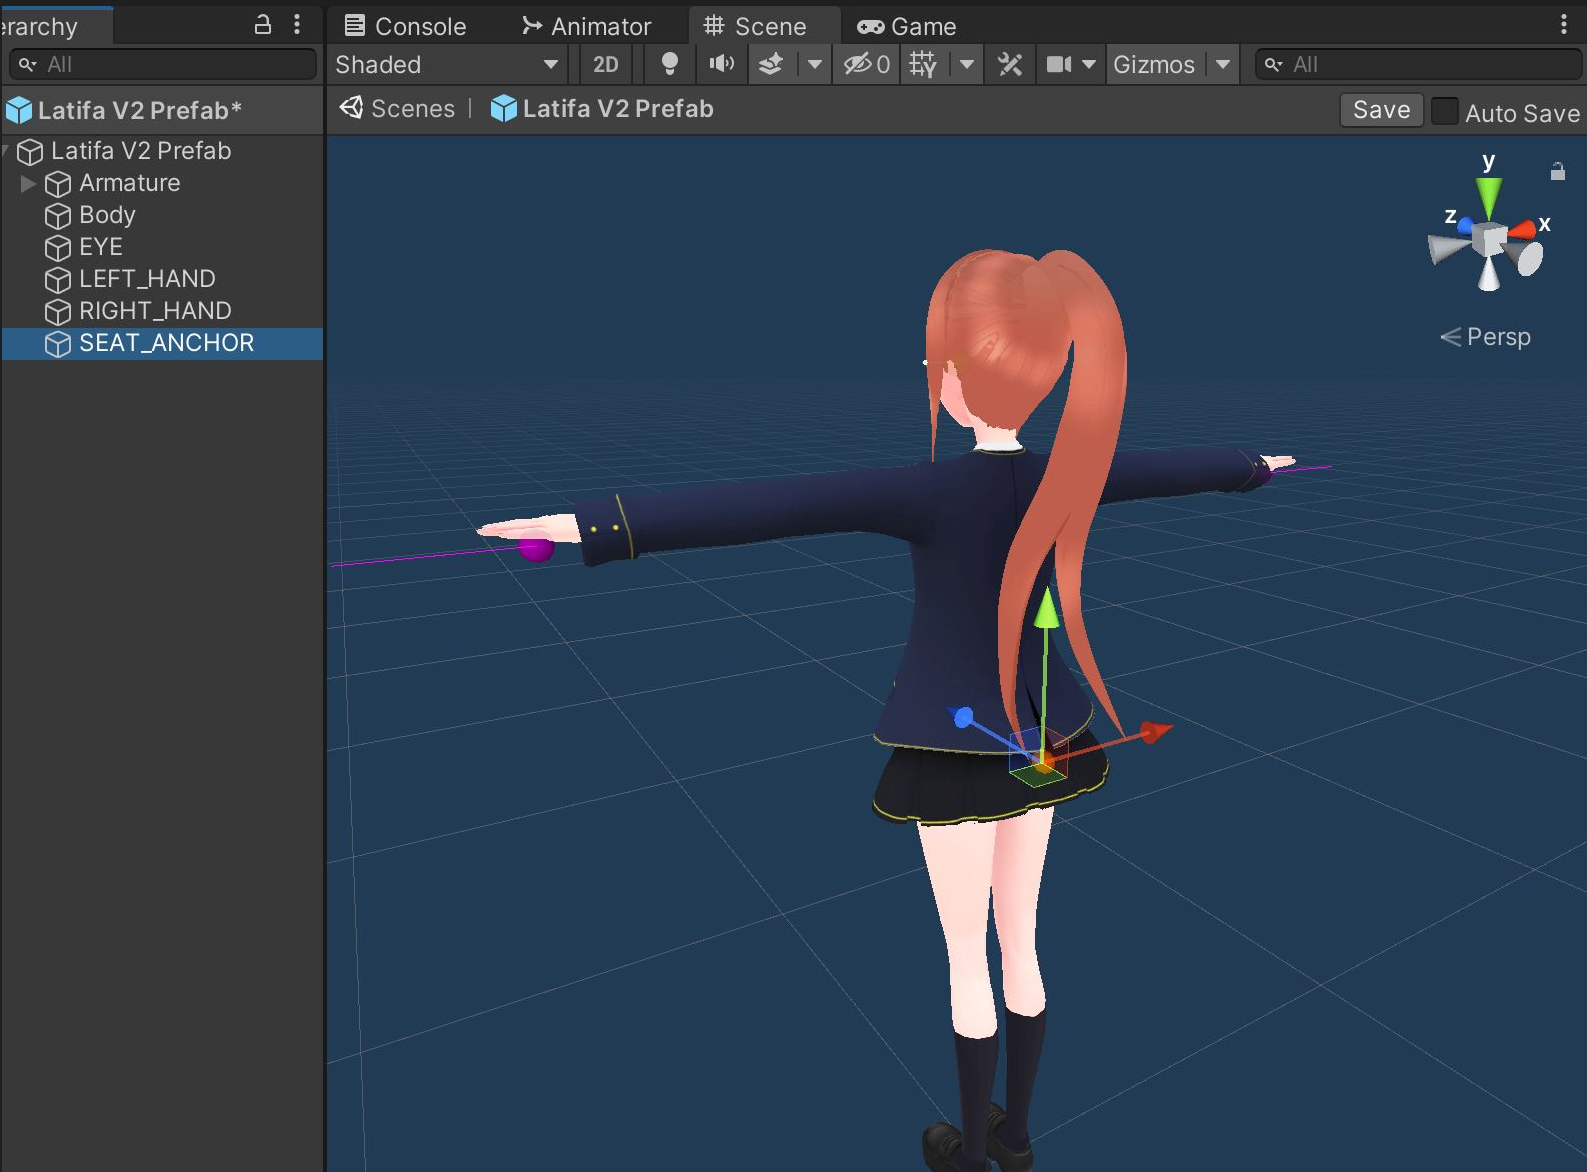
-
SEAT_ANCHOR
Move and adjust the seat anchor to be where the avatar will be seated when using station.
Step 3: Make required modifications⚓︎
A few more settings needs to be adjusted before upload.
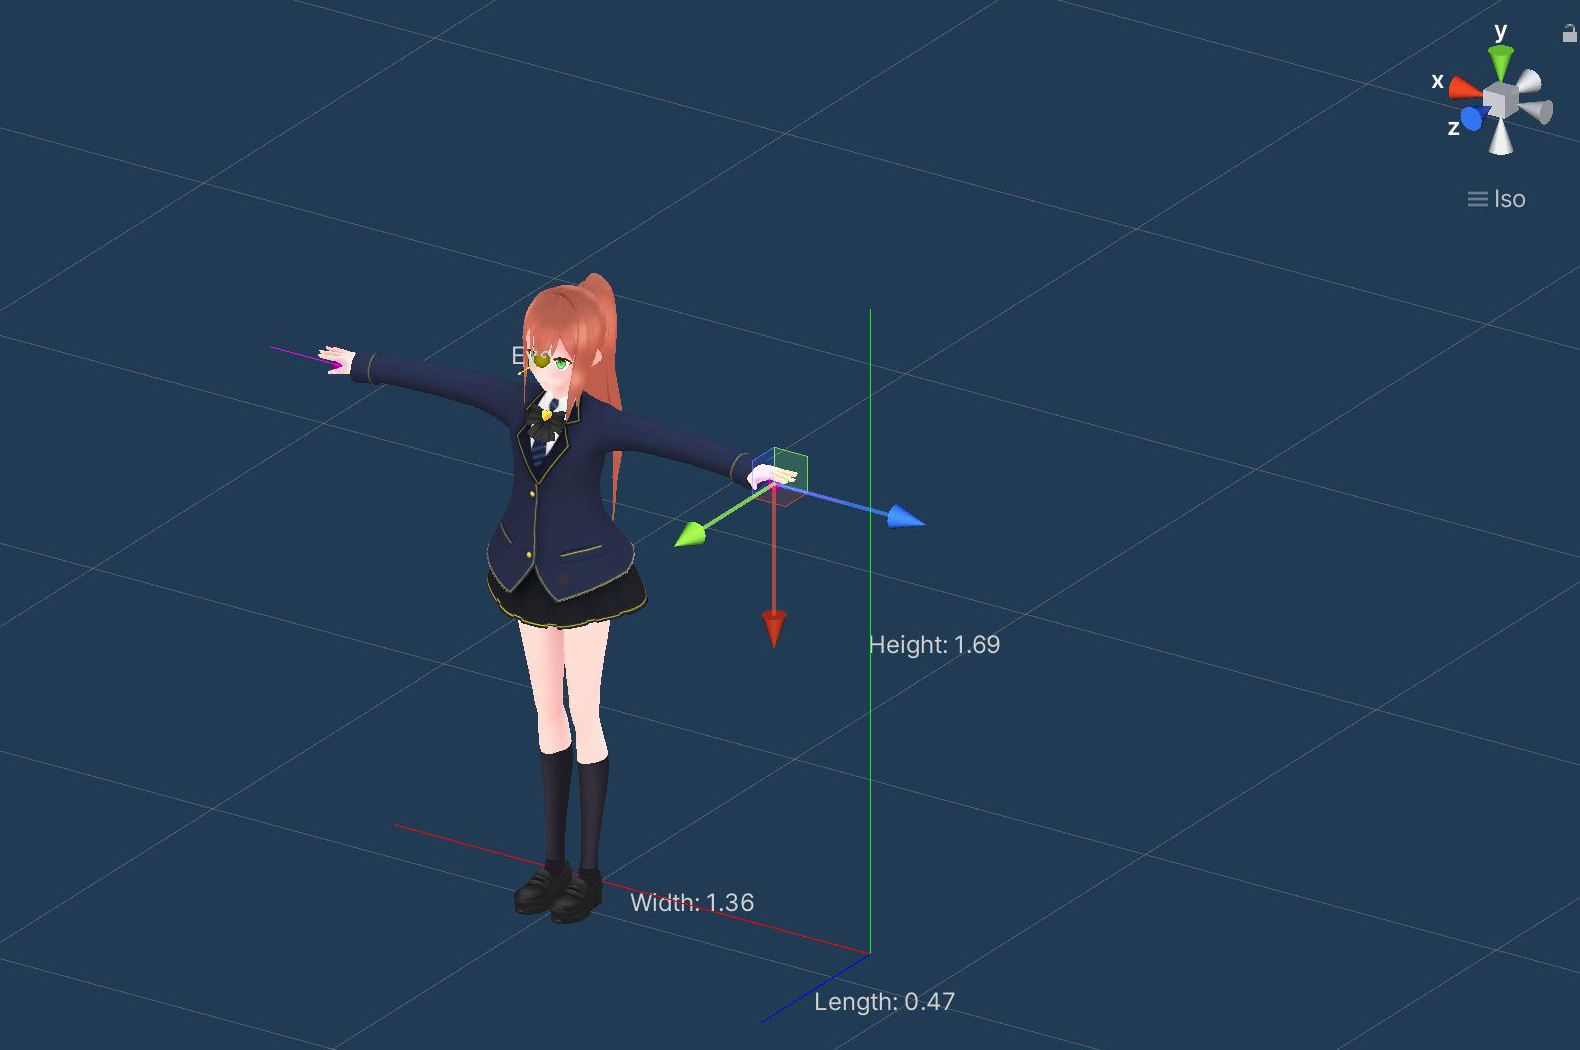
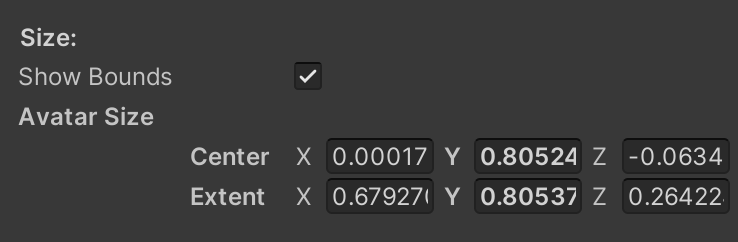
- Show Bounds and Avatar Size
[Optional] You many need to update the bounds of your avatar, you can do so by checking the show bounds, and adjusting the bounding box gizmo handles in the scene or by updating the values of the Center and Extent in the inspector.
![]()
- Scale Modifier
If you changed the scale of the .fbx file in step 1.3, change the scale modifier in Avatar descriptor to reflect the inverse of that change. For example, if the fbx file came with scale of 0.01 and you change it to 0.001, it means you Multiplied it by 0.1, so you should put 10 on scale modifier.
If you have not changed the scale in .fbx file, just leave the Scale modifier in avatar descriptor as 1.
- Animation and playable layers
The SDK package comes with the animation controllers ready to be attach to the avatar. These are default generic animations but you can make your own animations and customize the animation controllers if you wish. You can find the comprehensive guide for it here.
There are three layers of animation controllers we need to attach to the avatar.
For the base layer, find and select the ML_Default_Locomotion_Controller. This will control the locomotion animations.

For the second layer, find and select the ML_Default_Hand_controller. This will control the hand animations.

For the Emote layer, find and select the ML_Emote_controller. This contains the emote animations.

Step 4: Eye and Mouth Simulation [Optional]⚓︎
There are few more settings that need to be adjusted if you want your avatar eyes to perform movement, blinking and want to simulate mouth movements. These settings are optional, your avatar will work even if you don't set these settings.
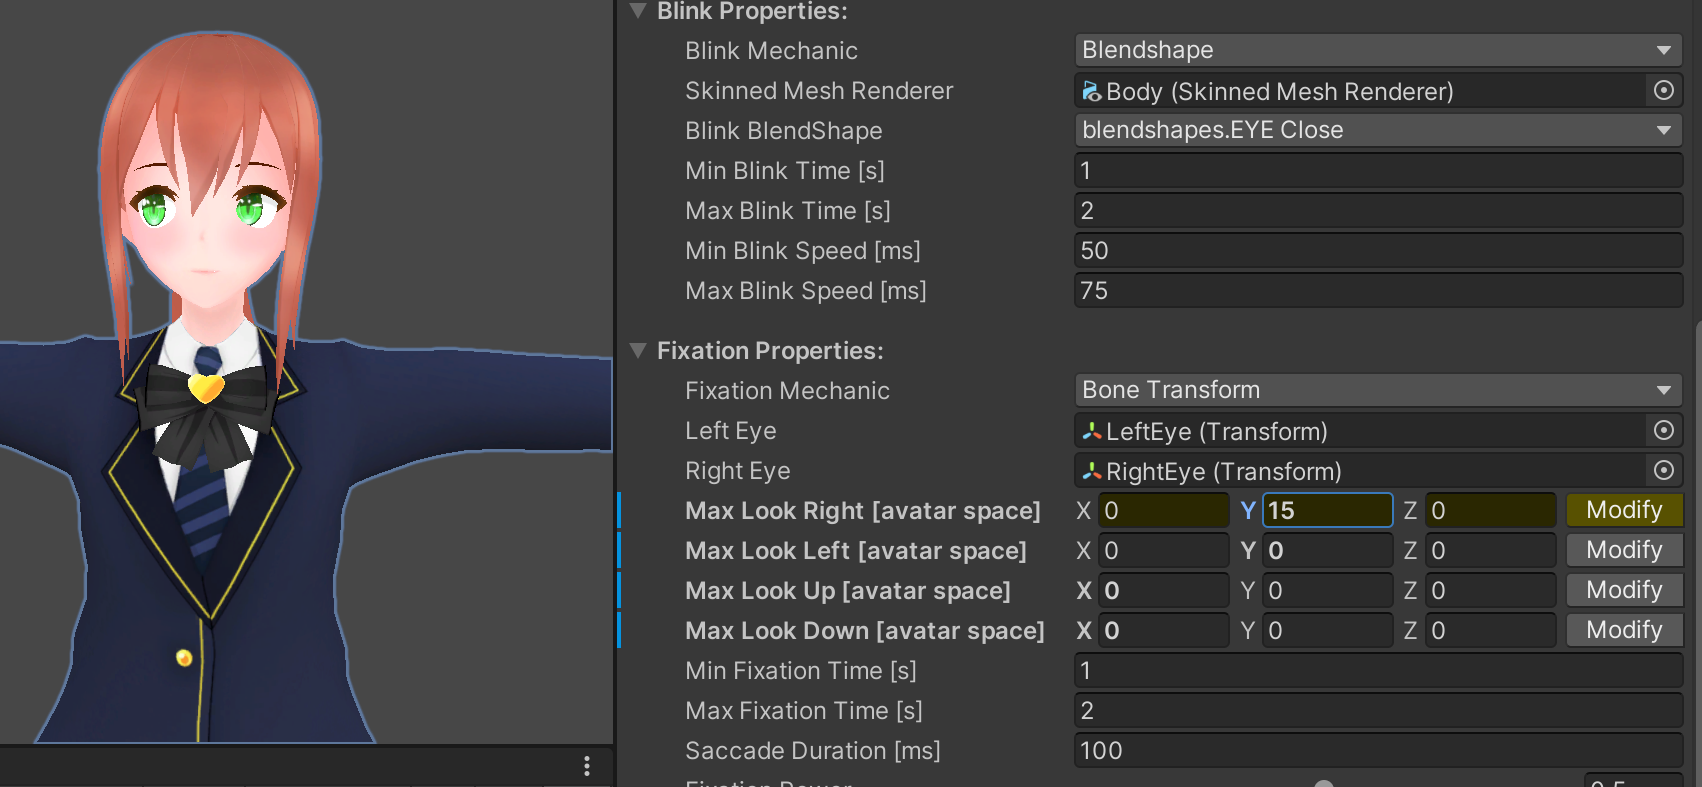
If you want your avatar to perform eye blink simulation, you will have to update the settings under Blink Properties section.
-
BLINK MECHANIC
There are no. of options available you can select from None, Blendshape, TextureOffset, and Bone Transform. Appropriate suboptions will show up based on the selection. Select None, if you want to disable blinking simulation.
For this tutorial we will be using Blendshape blink mechanic.

Common Properties
- MIN BLINK TIME
-
MAX BLINK TIME
These properties randomizes the blink, will set the minimum blink time to 1, and maximum blink time to 2. you can play around these values to get the desired result.
-
MIN BLINK SPEED
-
MAX BLINK SPEED
These properties randomizes the blink speed, will set the minimum blink speed to 50, and maximum blink speed to 75. Again you can play around these values to get the desired result.
Blendshape Specific Properties
-
SKINNED MESH RENDERER
Now we need to assign the Skinned Mesh Renderer which contains the blendshape that we want to use for eye blinking. All the blendshape for this avatar are under the Body Skinned Mesh Renderer so we will assign that.

- BLINK BLENDSHAPE
If the Skinned Mesh Renderer you assigned contains the blendshapes they will show up in the dropdown. We will select the blendshapes.Eye Close.
This is how the blink properties will look like.

If you want your avatar to perform eye movement simulation, you will have to update the settings under Fixation Properties section.
-
FIXATION MECHANIC
There are no. of options available you can select from None, Bone Transform and TextureOffset. Appropriate suboptions will show up based on the selection. Select None, if you want to disable eye movement simulation.
For this tutorial we will be using Bone Transform fixation mechanic.
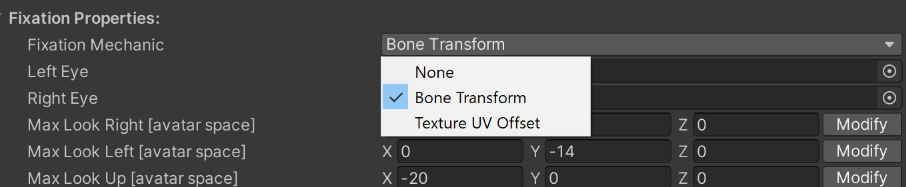
Bone Transform Specific Properites
- LEFT EYE
- RIGHT EYE
Will assign the left eye transform and right eye transform.
![]()
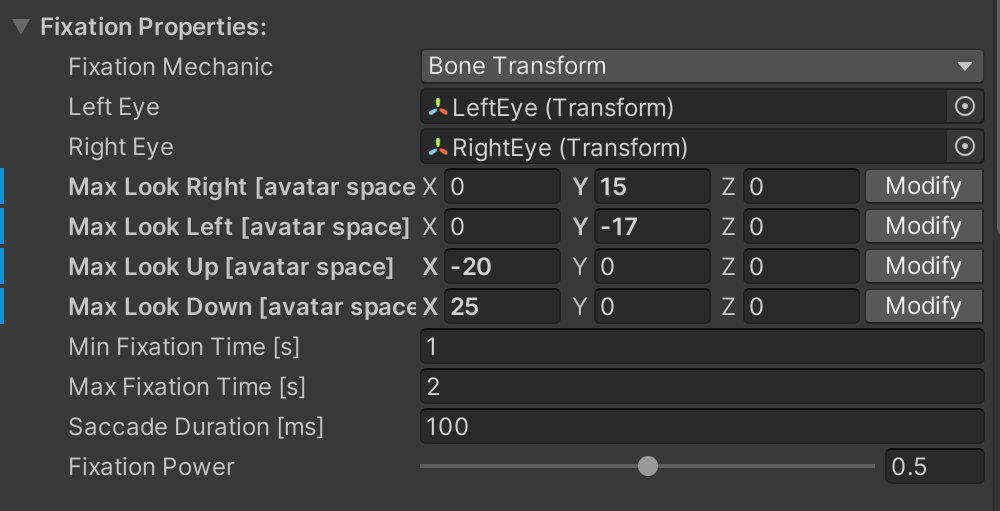
Common Properties
-
MAX LOOK RIGHT
Will set the max look right value to (0,15,0). you can press Modify button to view the eye rotation in the scene view, press again when you are done setting.
-
MAX LOOK LEFT
Will set the max look left value to (0,-17,0). Toggle Modify button to view the eye rotation in the scene view.
-
MAX LOOK UP
Will set the max look up value to (-20,0,0). Toggle Modify button to view the eye rotation in the scene view.
-
MAX LOOK DOWN
Will set the max look down value to (25,0,0). Toggle Modify button to view the eye rotation in the scene view.
-
MIN FIXATION TIME
-
MAX FIXATION TIME
Will set the minimum fixation time to 1, and maximum fixation time to 2.
-
SACCADE DURATION
Will set the saccade duration to 100.
-
FIXATION POWER
Will set the fixation power to 0.5.
This is how the fixation properties will look like.
If you want your avatar to perform mouth movements, you will have to update the settings under Mouth Properties section.
-
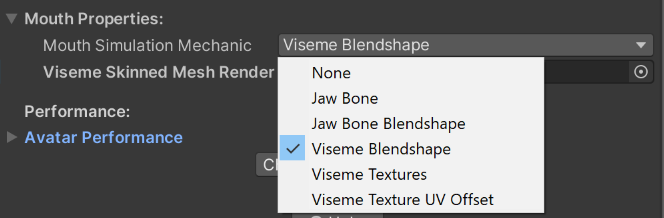
MOUTH SIMULATION MECHANIC
There are no. of options available you can select from None, Jaw Bone, JawBoneBlendshape, VisemeBlendshape, VisemeTextures, and VisemeTextureUVOffset. Appropriate suboptions will show up based on the selection. Select None, if you want to disable mouth simulation.
For this tutorial will be using VisemeBlendshape.
Viseme Blendshape Specific Properties
-
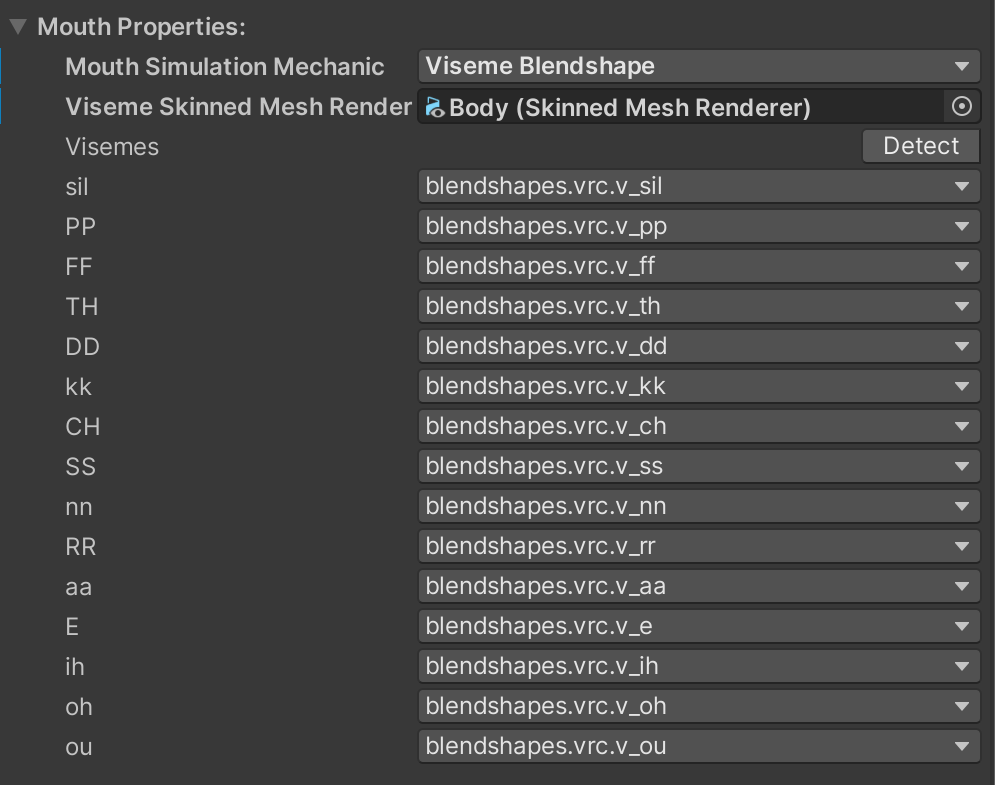
VISEME SKINNED MESH RENDERER
Will assign the Skinned mesh renderer that contains the visemes blendshape, since all the blendshapes are under body skinned mesh renderer will assign that one.
-
VISEMES
You will notice visemes option filled with default blendshape showed up if the skinned mesh renderer you assigned contains the blendshapes, now we have to assign the correct viseme. You can press the "Detect" button, to auto fill the visemes. Note : It doesn't guarantee correct detection.
Check if the visemes are corretly assigned.
This is how the mouth properties will look like.
-
Emotes
find and select the
EmoteMenuthat contains the information about emote inputs, animation parameters and submenus. This will create an entry for emotes in the Quick Menu. Refer to Emote Menu for more info.

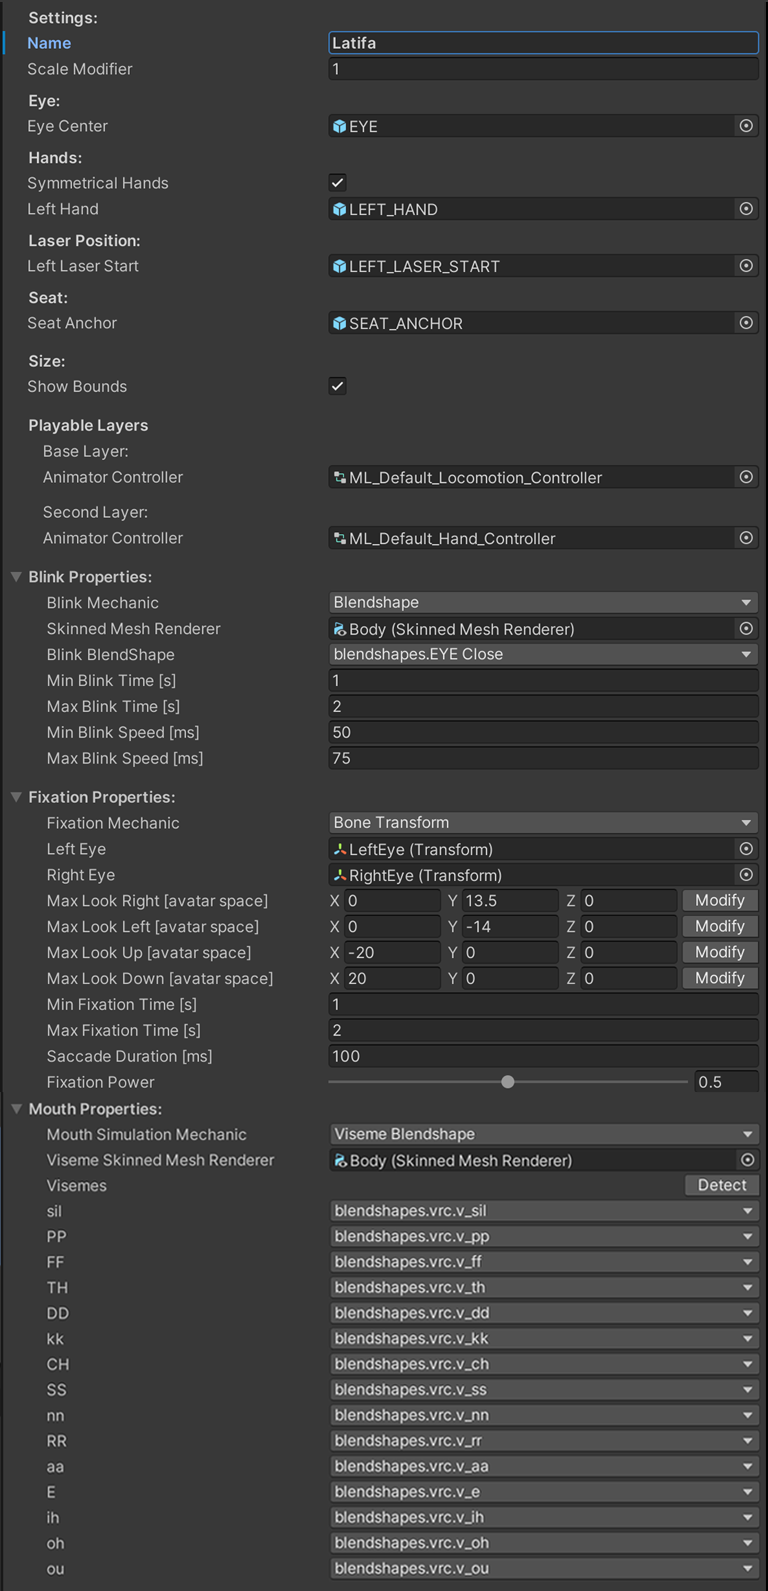
And we are done! this is how the avatar descriptor looks like:
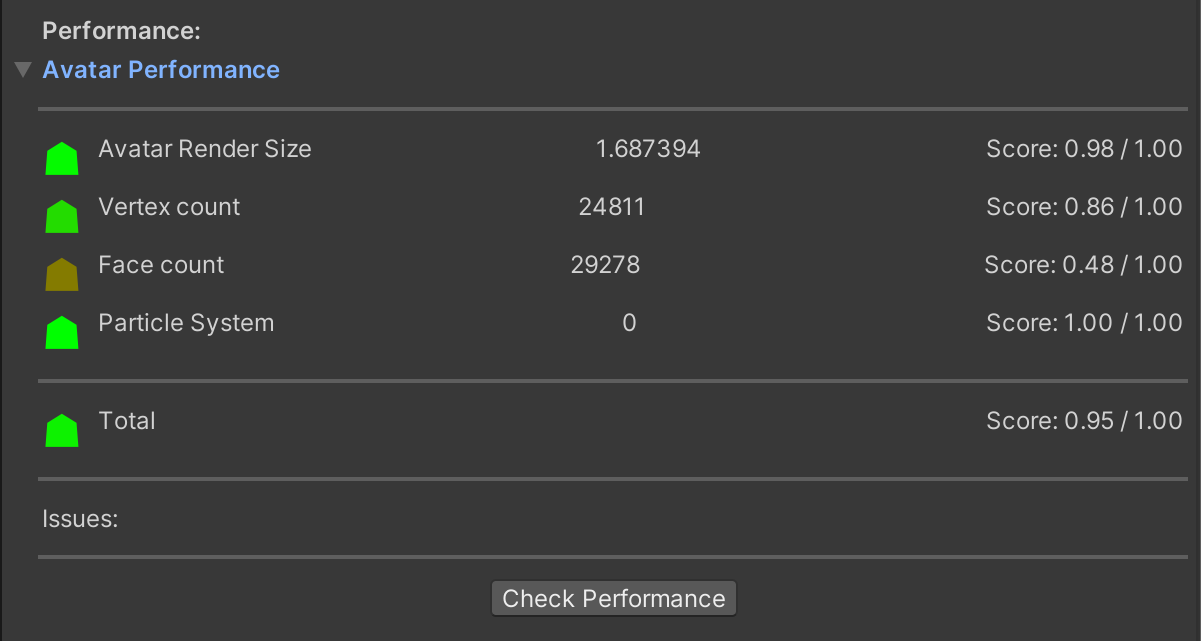
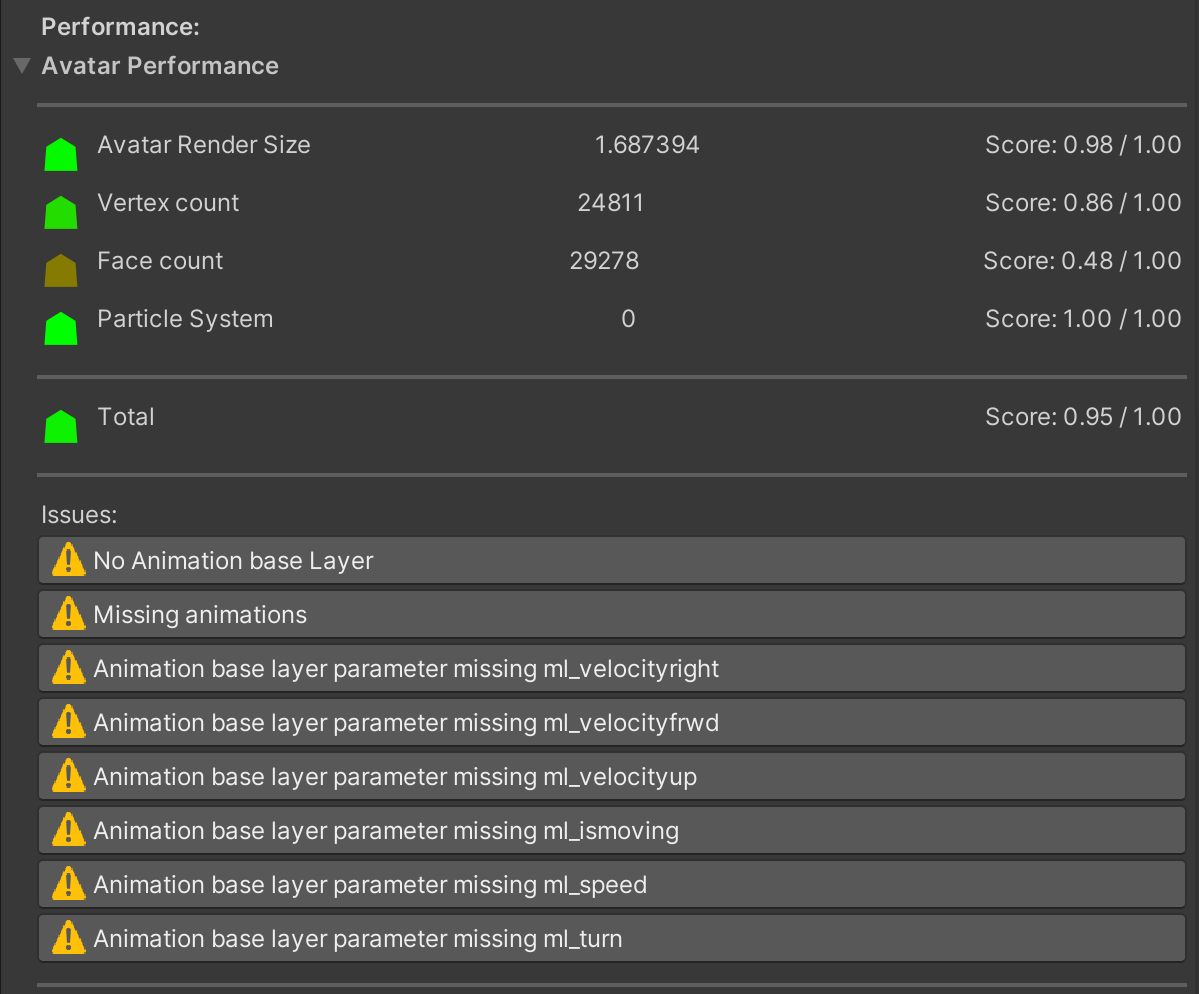
Step 5: Check pre determined performance⚓︎
The editor predetermines a performance score for each avatar. The performance score calculated based on multiple factors. Each category will be shown under the performance in Avatar Descriptor:
Note
We will add more performance categories later.
If there are any issues with avatars will be shown under the issues.
Step 6: Build, Test And Upload⚓︎
We are ready to test and upload this avatar.
-
from editor top menu, Open
Massive Loop>Control Panel, -
Login to you account and open the Avatar Tab
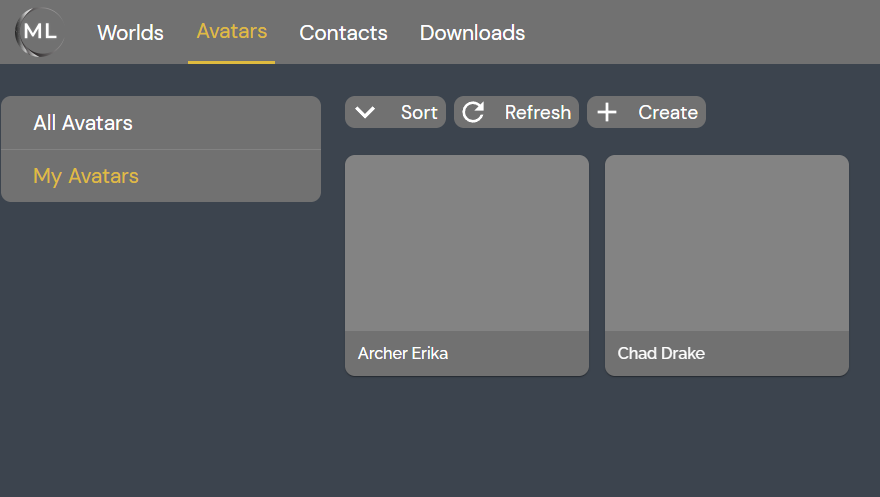
-
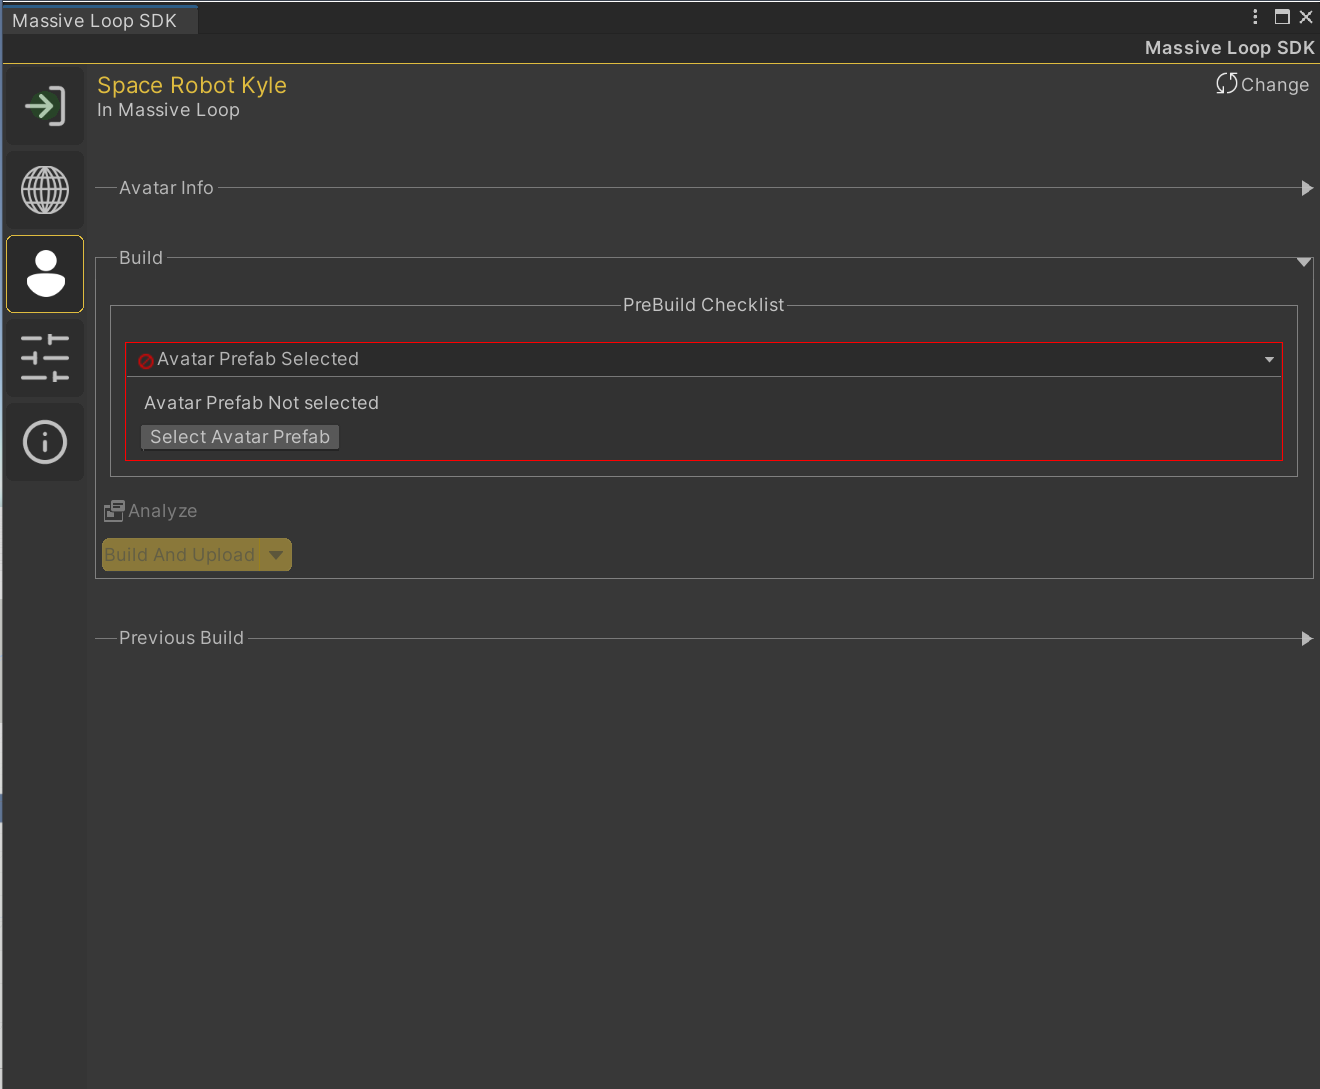
Here you will see a list of Avatars that belong to you. Select the avatar you want to upload to.
![]()
- Now you need to select the prefab you like to upload. Under avatar prefab, click
Select Prefab. A new window will appear with the list of prefabs which have Avatar Descriptor attached to them. Select the proper prefab:
![]()

- Press
Build and Runto test the avatar in a local client. This option will not upload your avatar. - Press
Build and Uploadto build and upload your avatar.