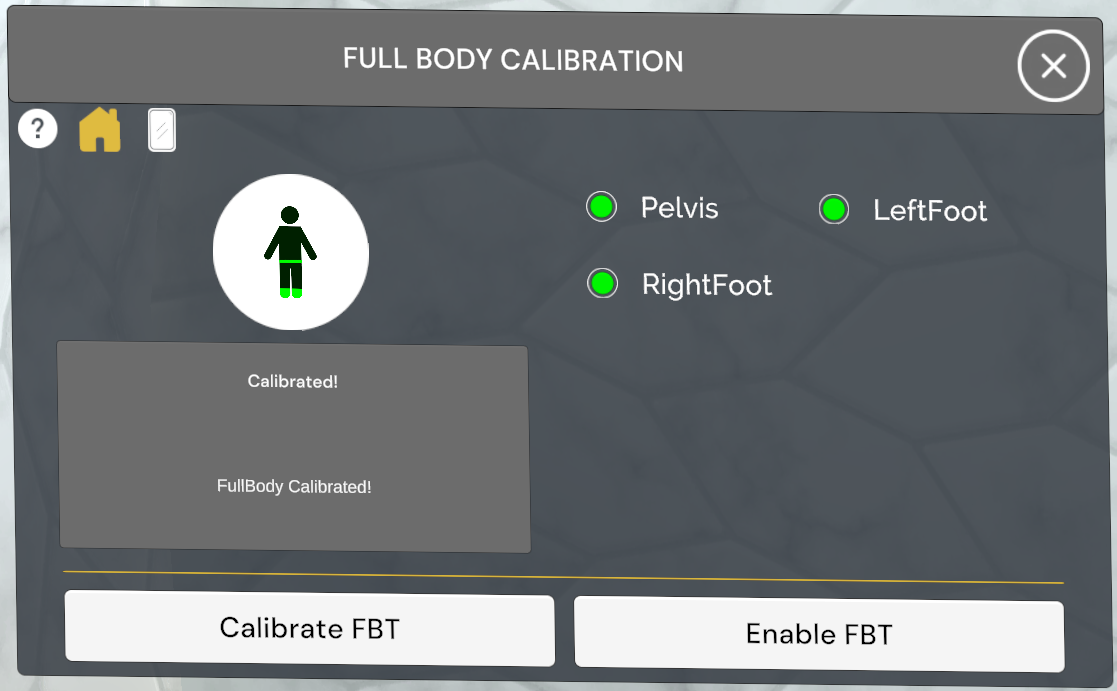
FBC (Full Body Calibration) 🕺
FBC (Full Body Calibration) 🕺
The Full Body Calibration app is your go-to tool for checking tracker connectivity and performing full-body calibration.
Massive Loop uses OpenXR to enable full-body calibration using VIVE Trackers.
It supports tracking at up to six points, including the headset and controllers:
•	Head (via HMD)
•	Hands (via controllers)
•	Hips
•	Feet
Note:
The full-body calibration app is only available in VR mode.
Note:
It is recommended to set up the trackers before launching Massive Loop.
Setup
Download and Install SteamVR:
Installing SteamVR
Select the OpenXR runtime to SteamVR.
Set OpenXR Runtime: SteamVR
Using the Dongle
Note.
• When using VIVE Trackers you must connect the included dongle to your PC.
• Place the dongle in a stable position where it won't move during use.
- Plug the USB Type-C cable into the dongle cradle.
- Insert the dongle into the cradle.
- Connect the other end of the USB Type-C cable to a USB port on your computer.
https://www.vive.com/us/support/tracker3/category_howto/using-the-dongle.html
Pairing VIVE tracker
- Open the SteamVR App
- Click on hamburger menu and go to Devices.
- Select Pair Controller
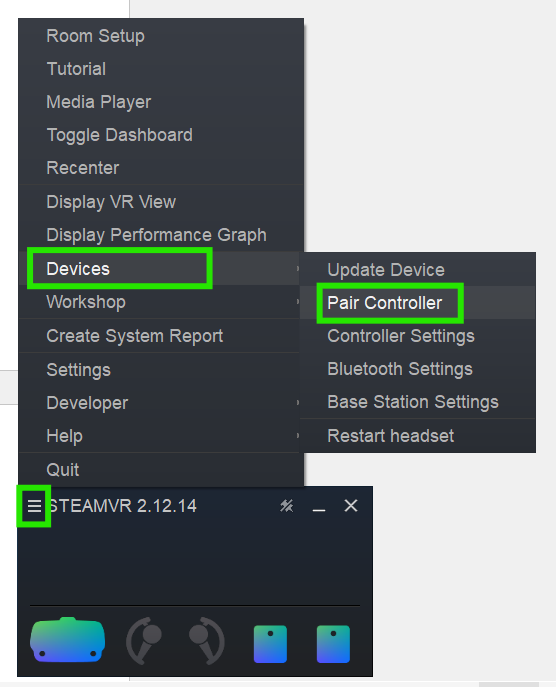
Note.
• If you don't see VIVE Tracker in the Controller Pairing window.
• Click I want to pair a different type of controller and choose HTC VIVE Tracker.
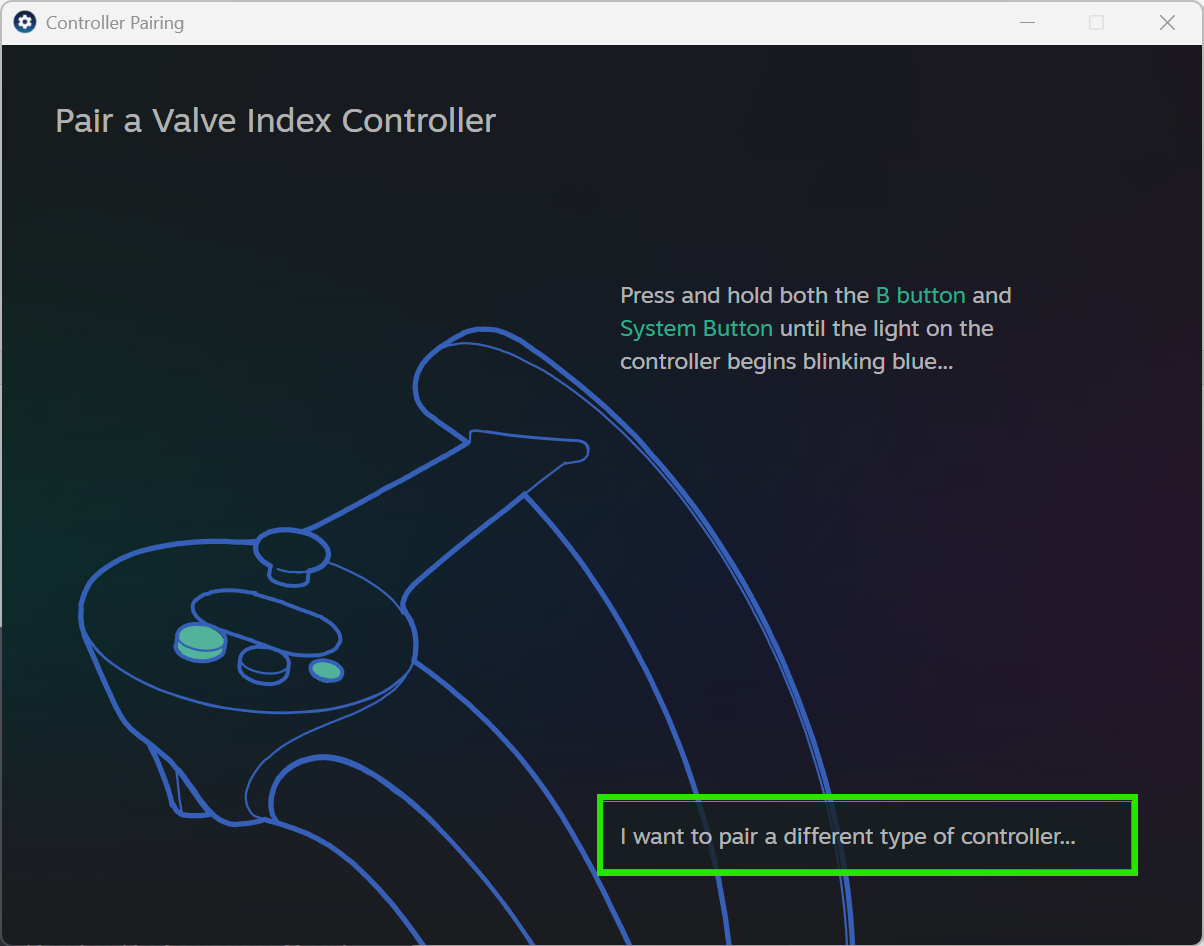
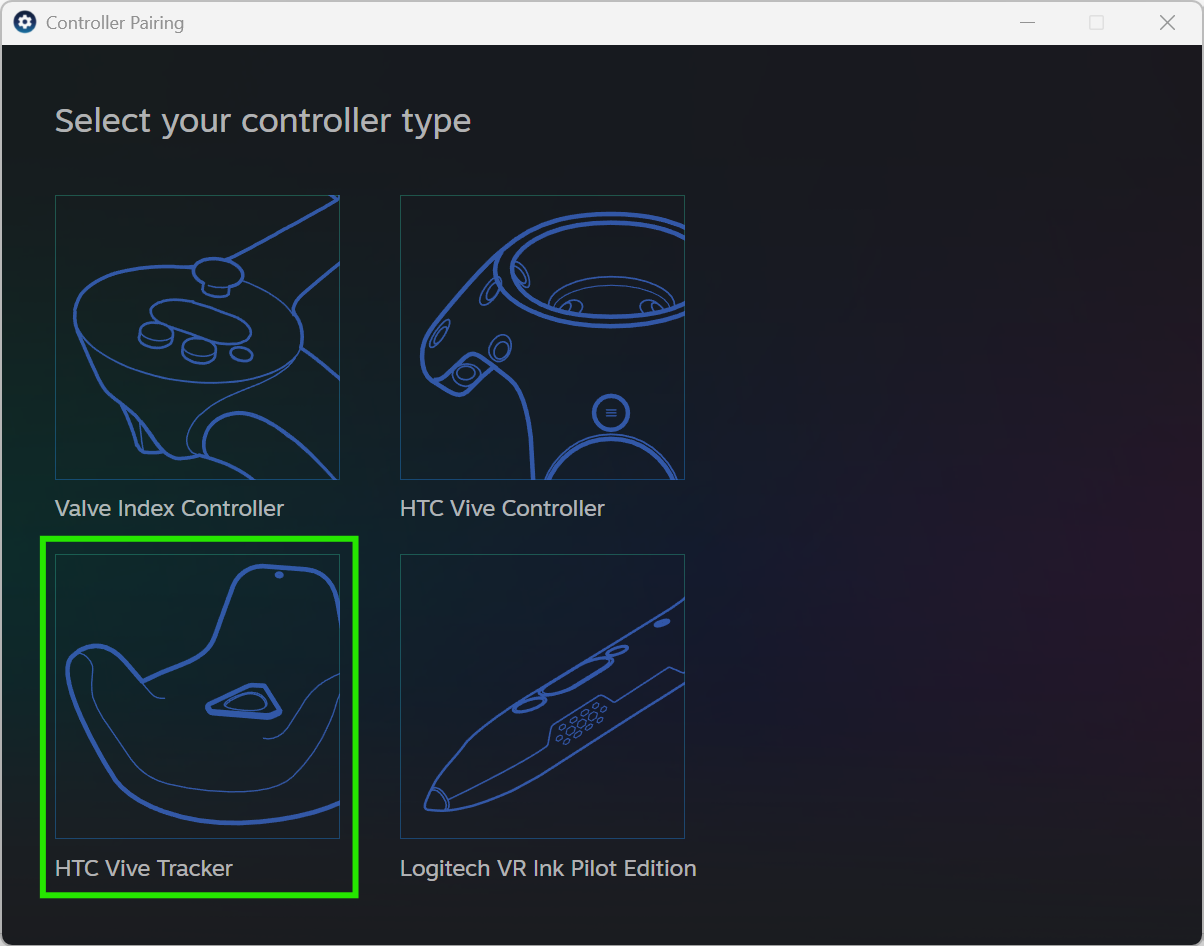
- Press and hold the Power button on the tracker for around 2 seconds.
The status light will blink blue. - Once the light turns green, pairing is successful.
- In the Controller Pairing window, click Done. You should see the tracker on the SteamVR app
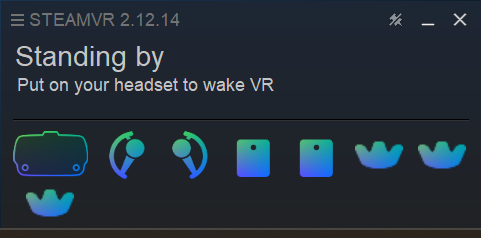
https://www.vive.com/us/support/tracker3/category_howto/pairing-vive-tracker.html
Assign Tracker Role
Note.
To avoid confusion between multiple trackers, assign each one to a specific body part
Make sure all your tracking devices, like controllers and trackers are on.
- Open the SteamVR App.
- Click on hamburger menu and go to Devices.
- Select Controller Settings.
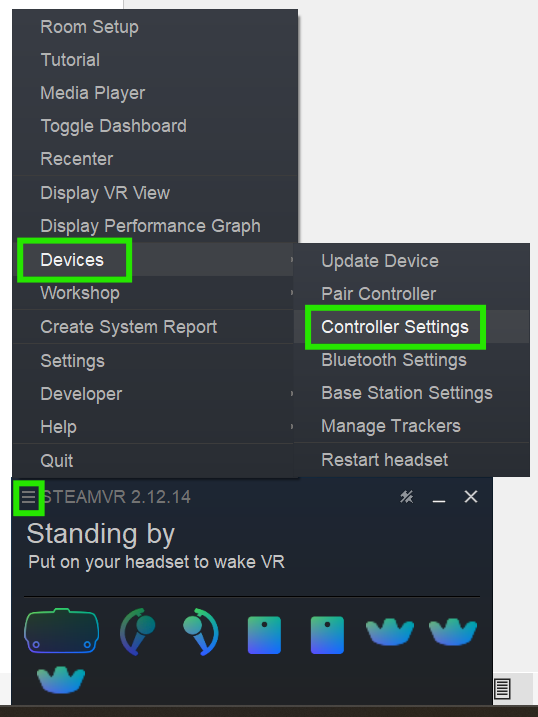
From the SteamVR Settings, Select Controller then Click on Manage Trackers
You’ll see a list of connected trackers.
Use the dropdown next to each tracker to assign it to
•   Left Footo
•   Right Foot
•   Waist
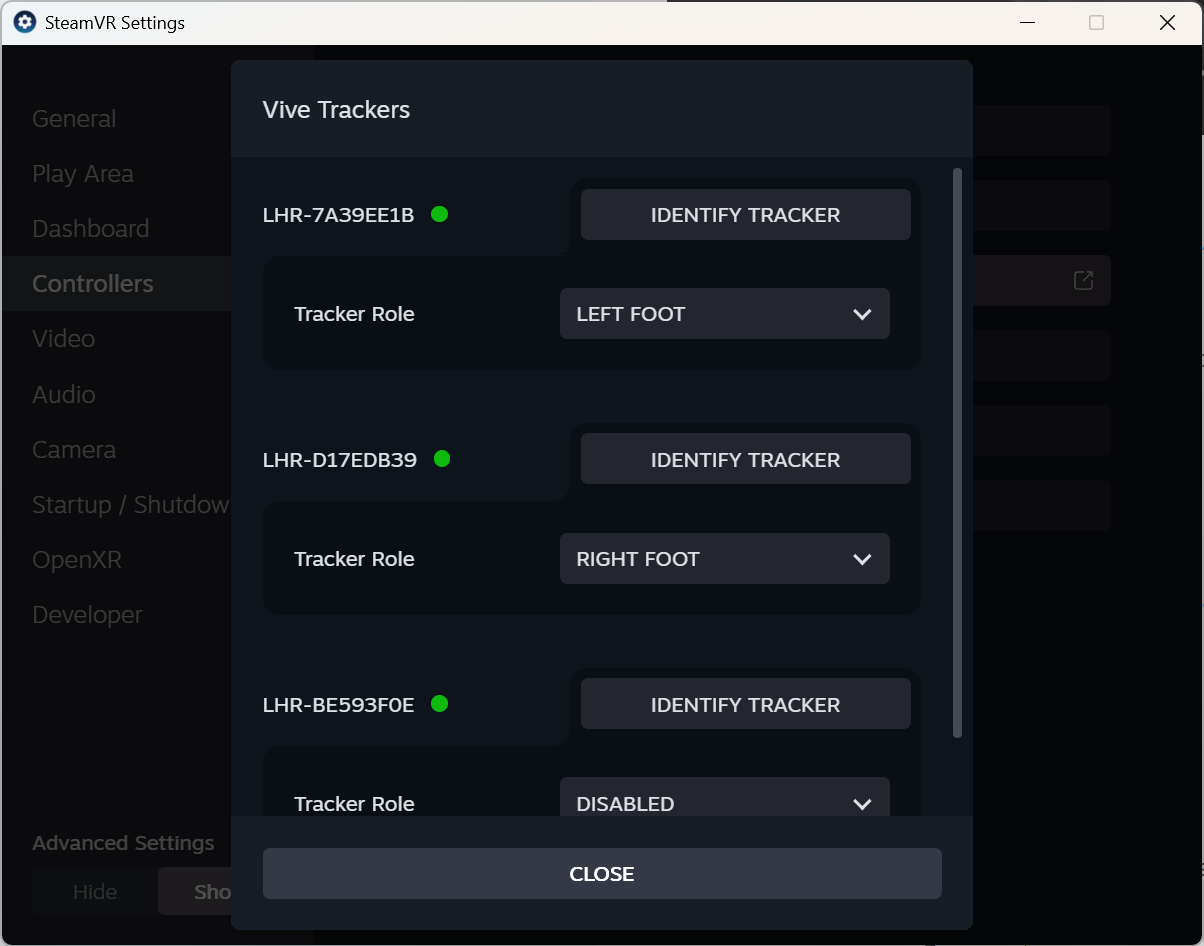
How to identify each tracker
- Pick one tracker to identify first.
- Turn off the other two trackers by holding their power buttons.
- SteamVR will show:
Green icon for active tracker.
Red icons for powered-off trackers. - Use this to determine which tracker is which and assign them accordingly.
Tip.
Label your trackers (e.g., “Left Foot”, “Waist”) to keep track of which one goes where each time you use them.
Pre-Calibration Checklist
Check Your Height Setting
• Go to the Settings menu and ensure your height is set correctly.
• If it's too low or too high, your avatar’s feet may sink into or float above the floor.Room-Scale Calibration
• Make sure your play area is correctly calibrated and not affected by apps that shift or modify your playerspace (like Playspace Mover).
Tracker Placement
• Confirm your tracker is placed appropriately on your body.
Performing Calibration
Launch the App
- Open the System Tray in VR.
- Go to Apps, then select FBC (Full Body Calibration) from the list.
Inside the Calibration App
- You’ll see a mirror to help align your avatar with the tracker markers.
- The app will display the connection status of each tracker.
- Once all required trackers are connected, a "Calibrate" button will appear.
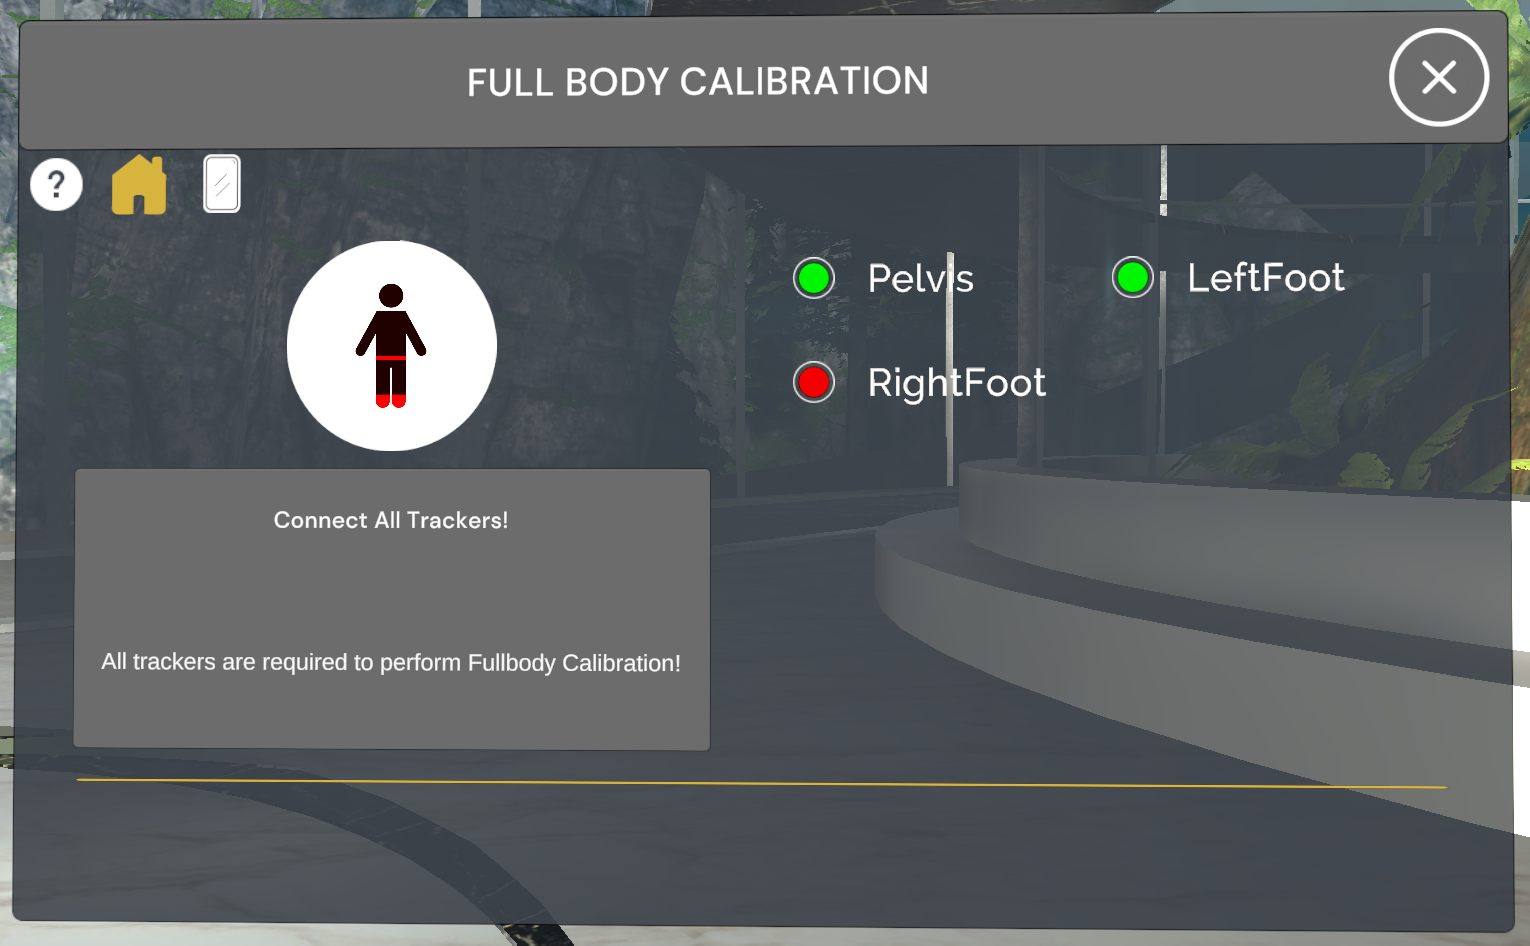
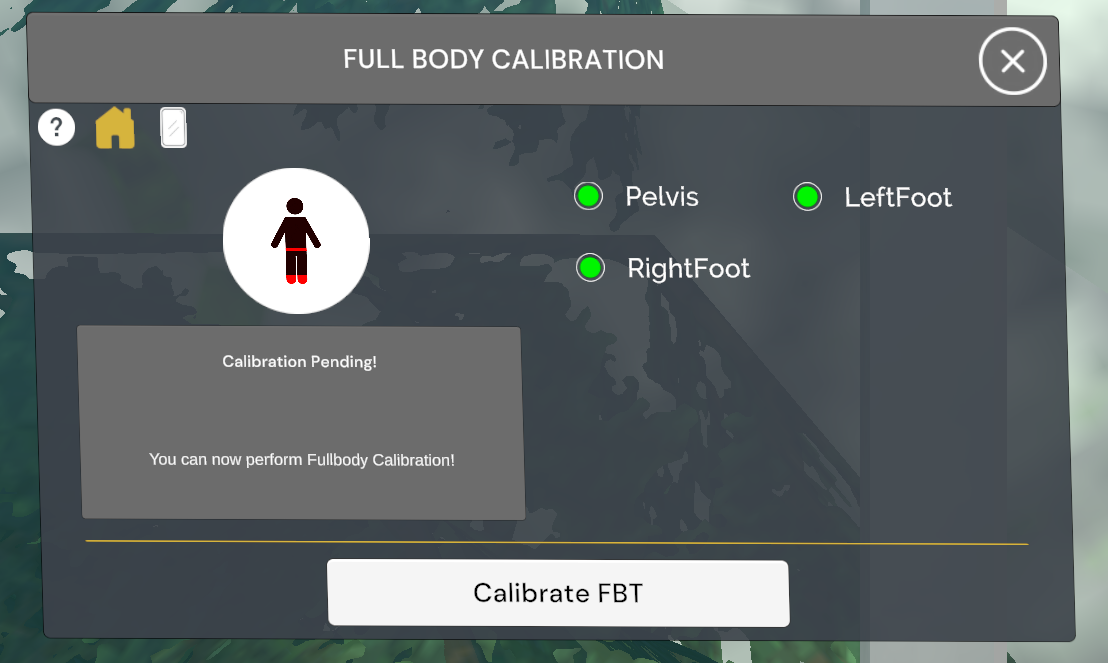
Calibrate your body position
Important
If you're not standing straight or looking forward, your avatar’s alignment (especially the viewpoint) may be incorrect.
- Stand upright and look straight ahead.
- Match the tracker spheres with the avatar’s pose.
- When everything looks correct, press both controller triggers at the same time to perform calibration.
